
QR menu and payment – a tool for viewing the menu and secure payment via QR code.
Activation
To activate and configure the app, you need to:
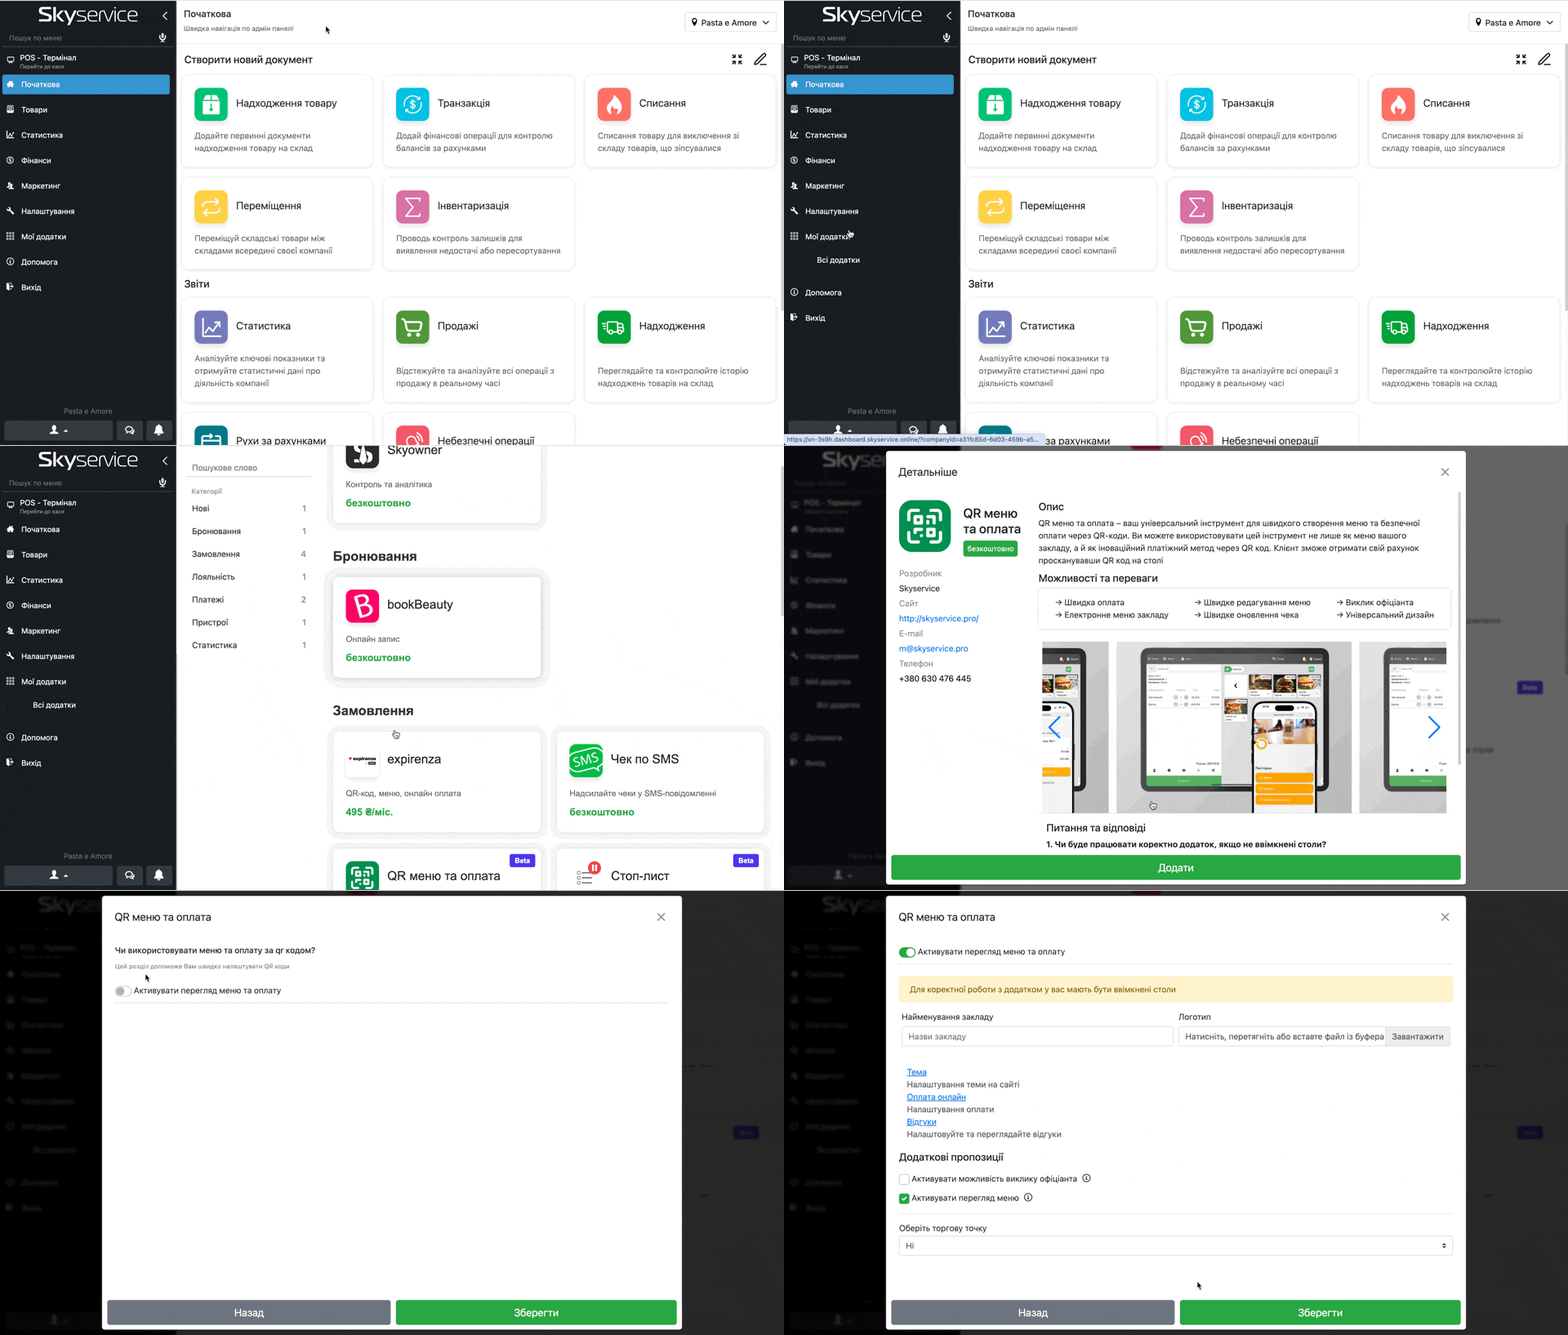
- In the admin panel go to the section My apps → All apps and select from the list QR menu and payment
- In the pop-up window you can see images of the app’s operation and read the description
- Click Add
- Activate the parameter Activation of menu viewing and payment
Basic settings
Fill in the following data for your venue:
- The name of your venue
- The venue logo
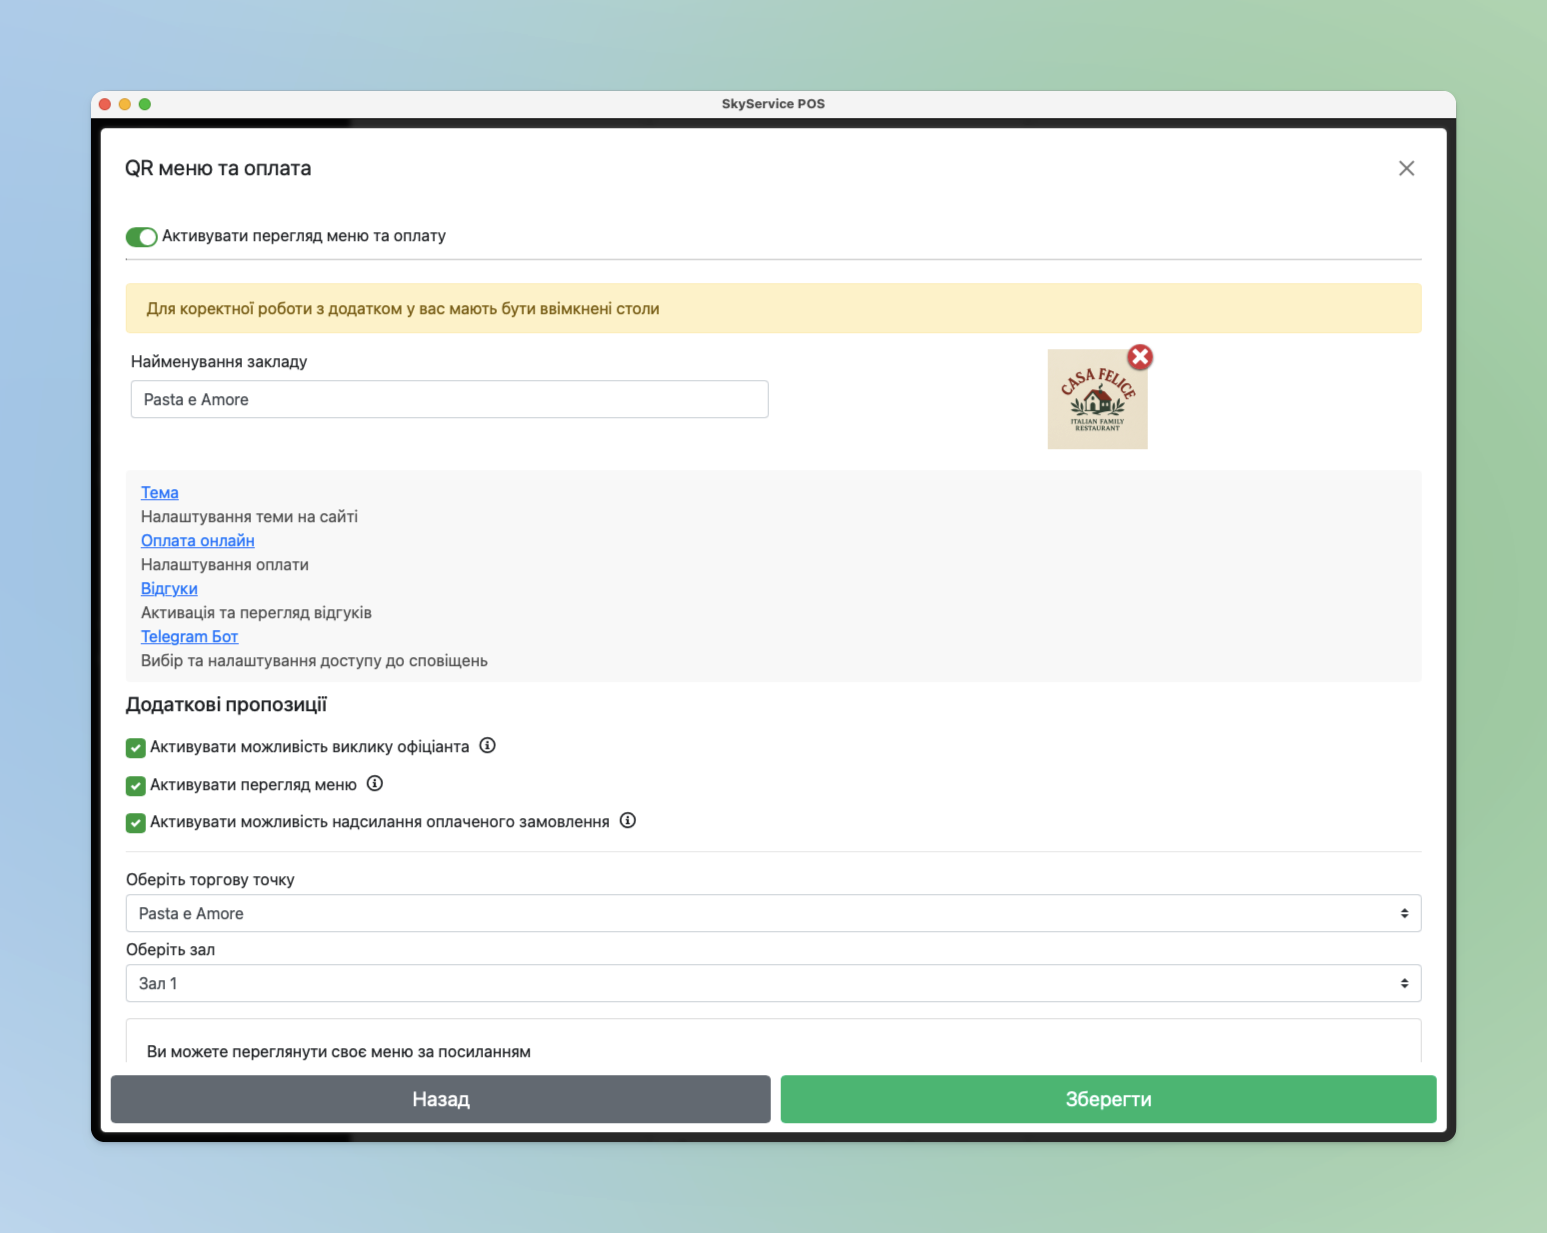
☝️ The specified data will be displayed on the site for your guests.
❗Important! Note that for this app to work in the program, table settings must be activated.
🔗 For more detailed information we recommend viewing the lesson in our knowledge base How to arrange tables on the hall map.
Theme setup
To configure the theme click Theme.
In this section it is possible to configure the way of switching between orders (in case there are several created orders for a table), i.e.:
– Scroll – orders are scrolled vertically, i.e., from top to bottom;
– Swipe – orders are scrolled horizontally, i.e., from right to left.
👉 Additionally in Settings you can choose the design of this menu specifically for the client.
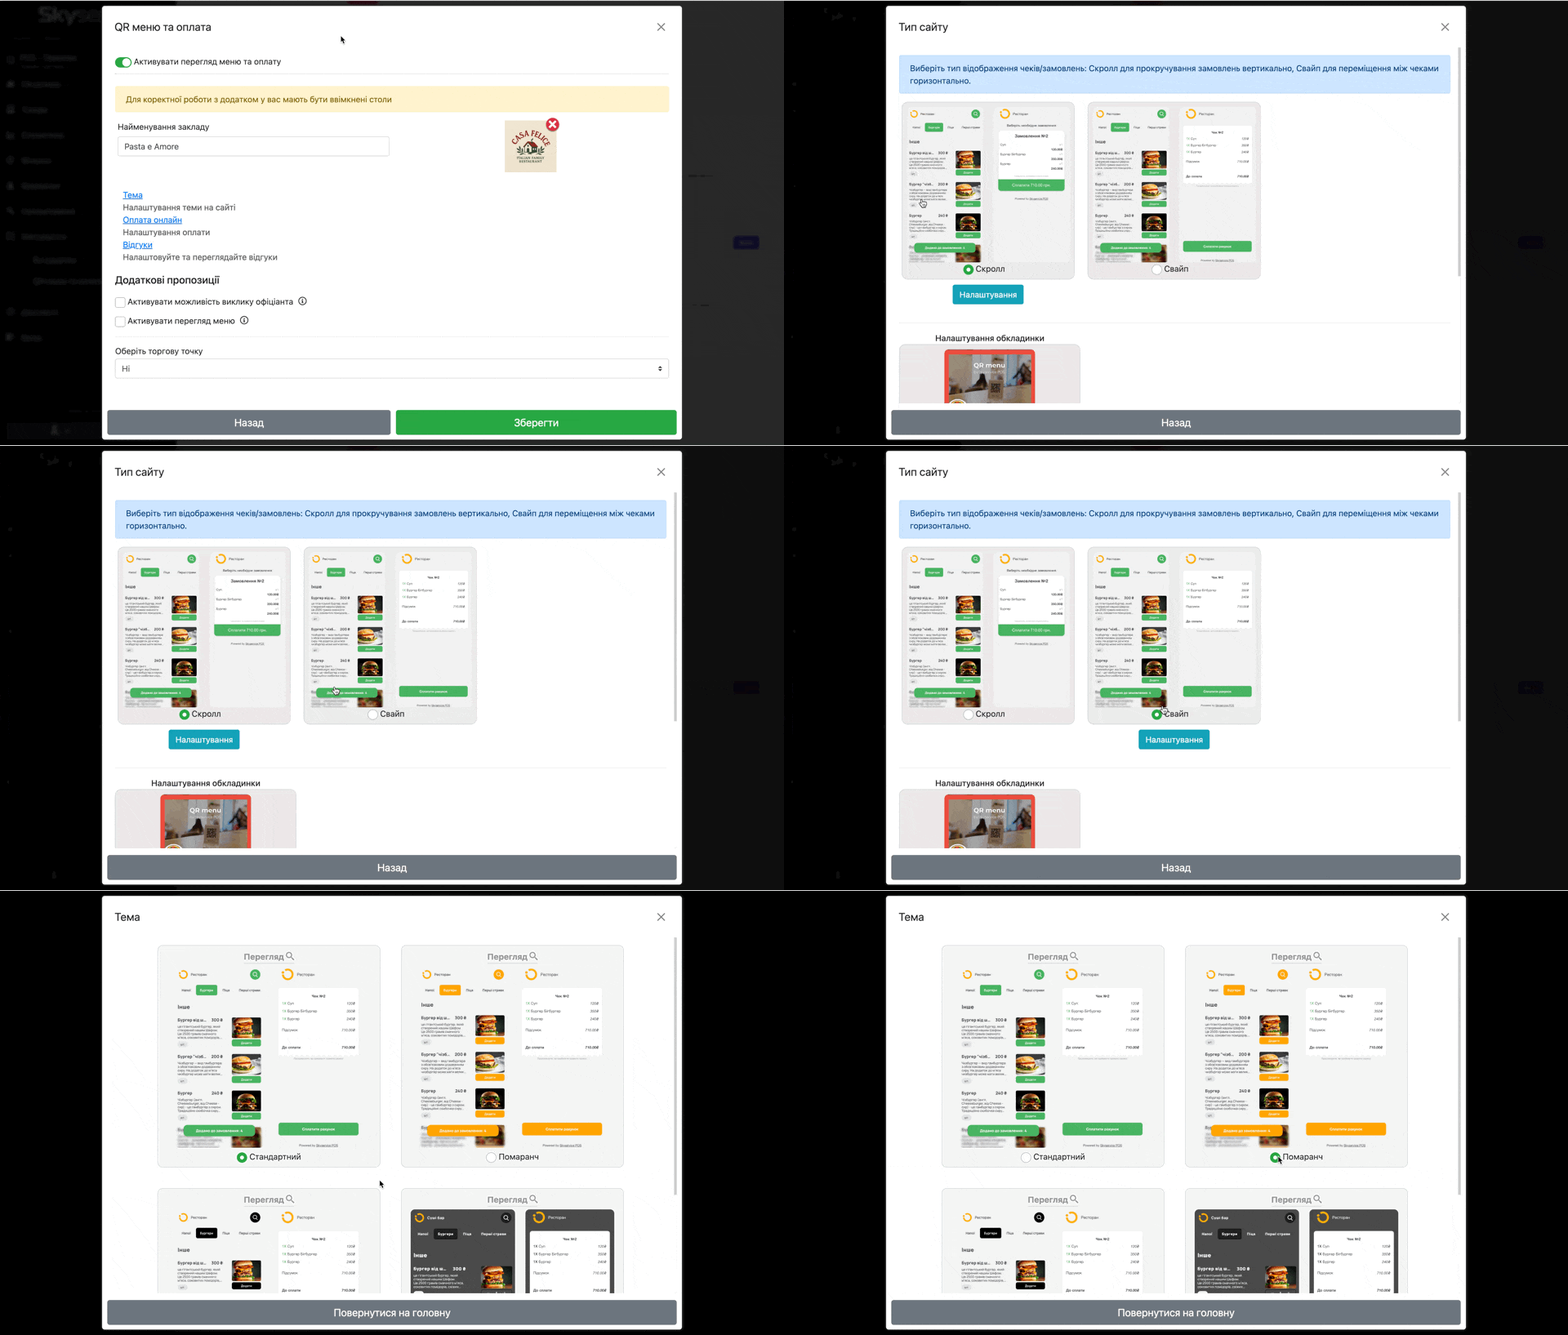
ℹ️ Also, you can configure the cover of your menu. That is, this image will be displayed on the main page of your QR menu. To do this:
- Click Theme
- Scroll down to the Cover settings
- block
- Select an image
- recommended image size 600×300Click
Back❗️ Important! To save everything you chose in the tab Themes by clicking Back be sure to click Save
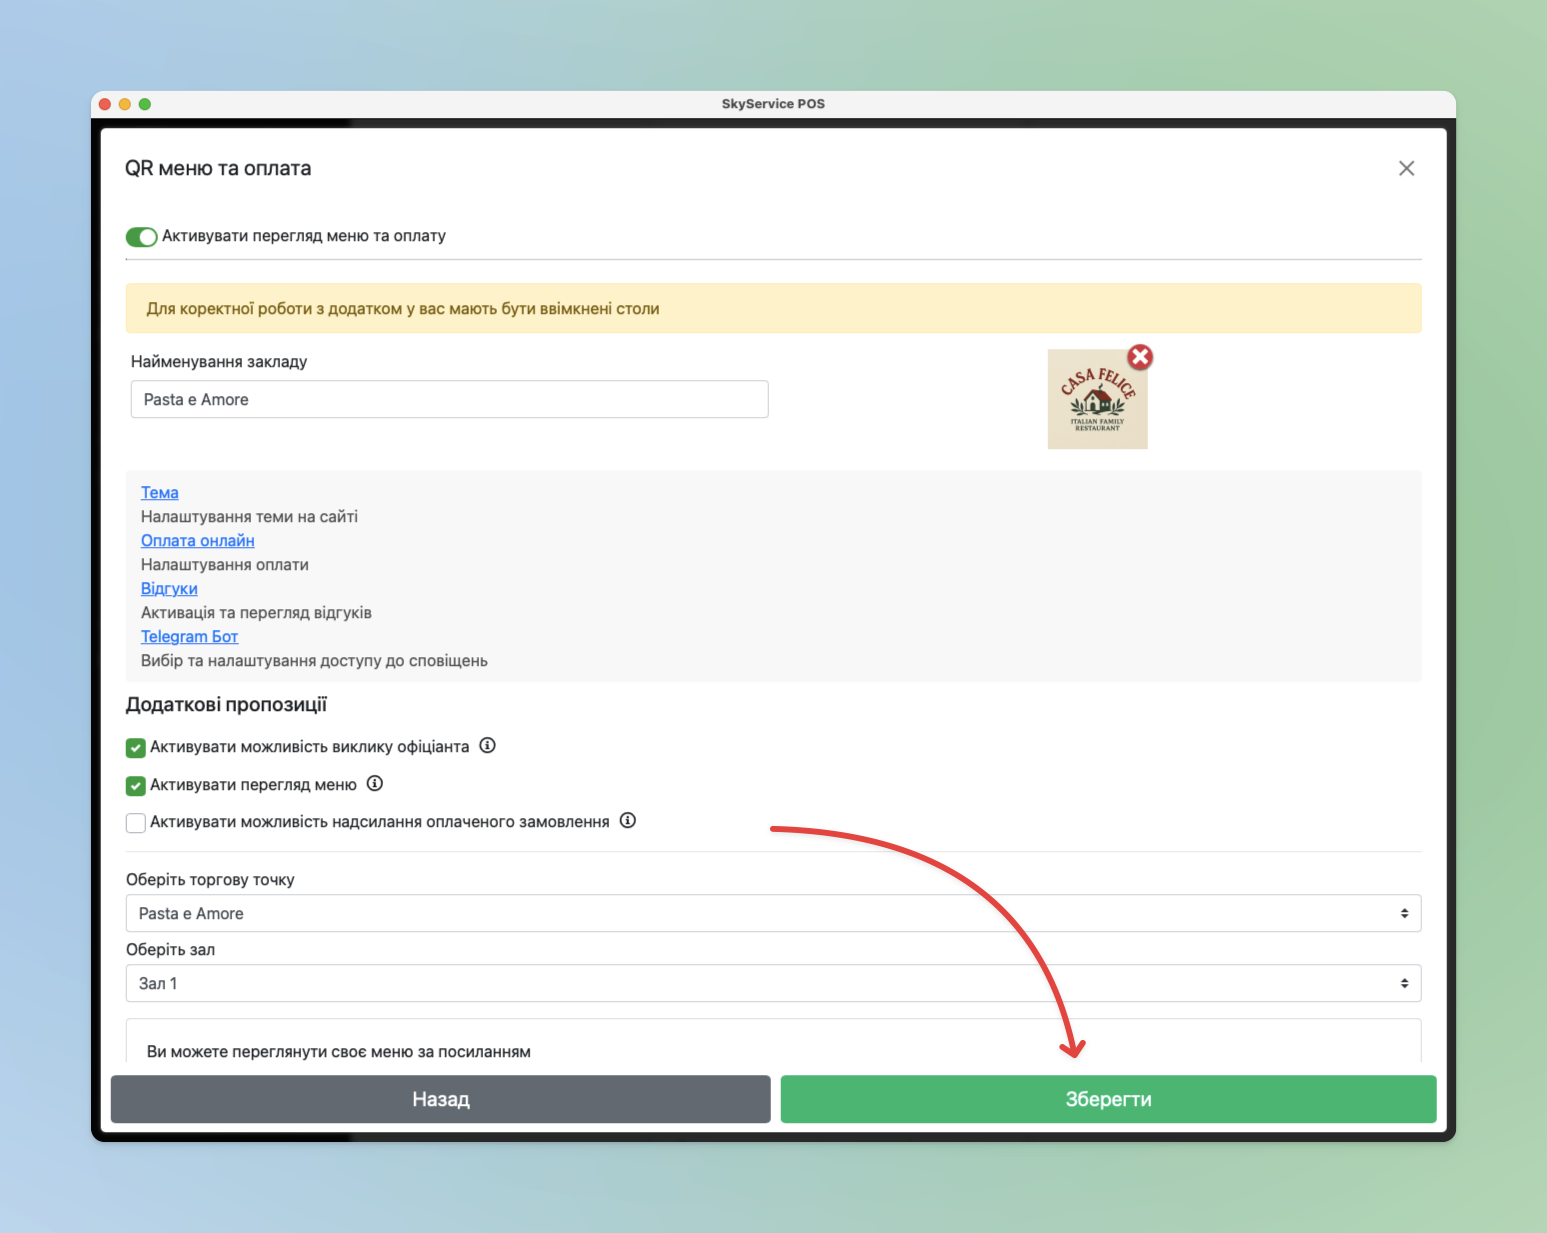
in the main settings window:
Online payment
🔥 Accept order payment online together with Skyservice.To configure payment click Online payment
- .
- Choose the payment method to accept payment online.No payment
- – your guest will not see the order payment buttons.
- if there is no need to accept payment via QR code, i.e., so that guests only have the opportunity to view the menu via QR code, and payment takes place in the standard way – Portmone or LiqPay
- Choose the payment method to accept payment online.No payment
– choose the gateway you work with, whose cabinet you have.Specify the necessary details of the chosen payment system in which you have a “wallet
” created. If necessary, you can clarify these details with the corresponding payment system.
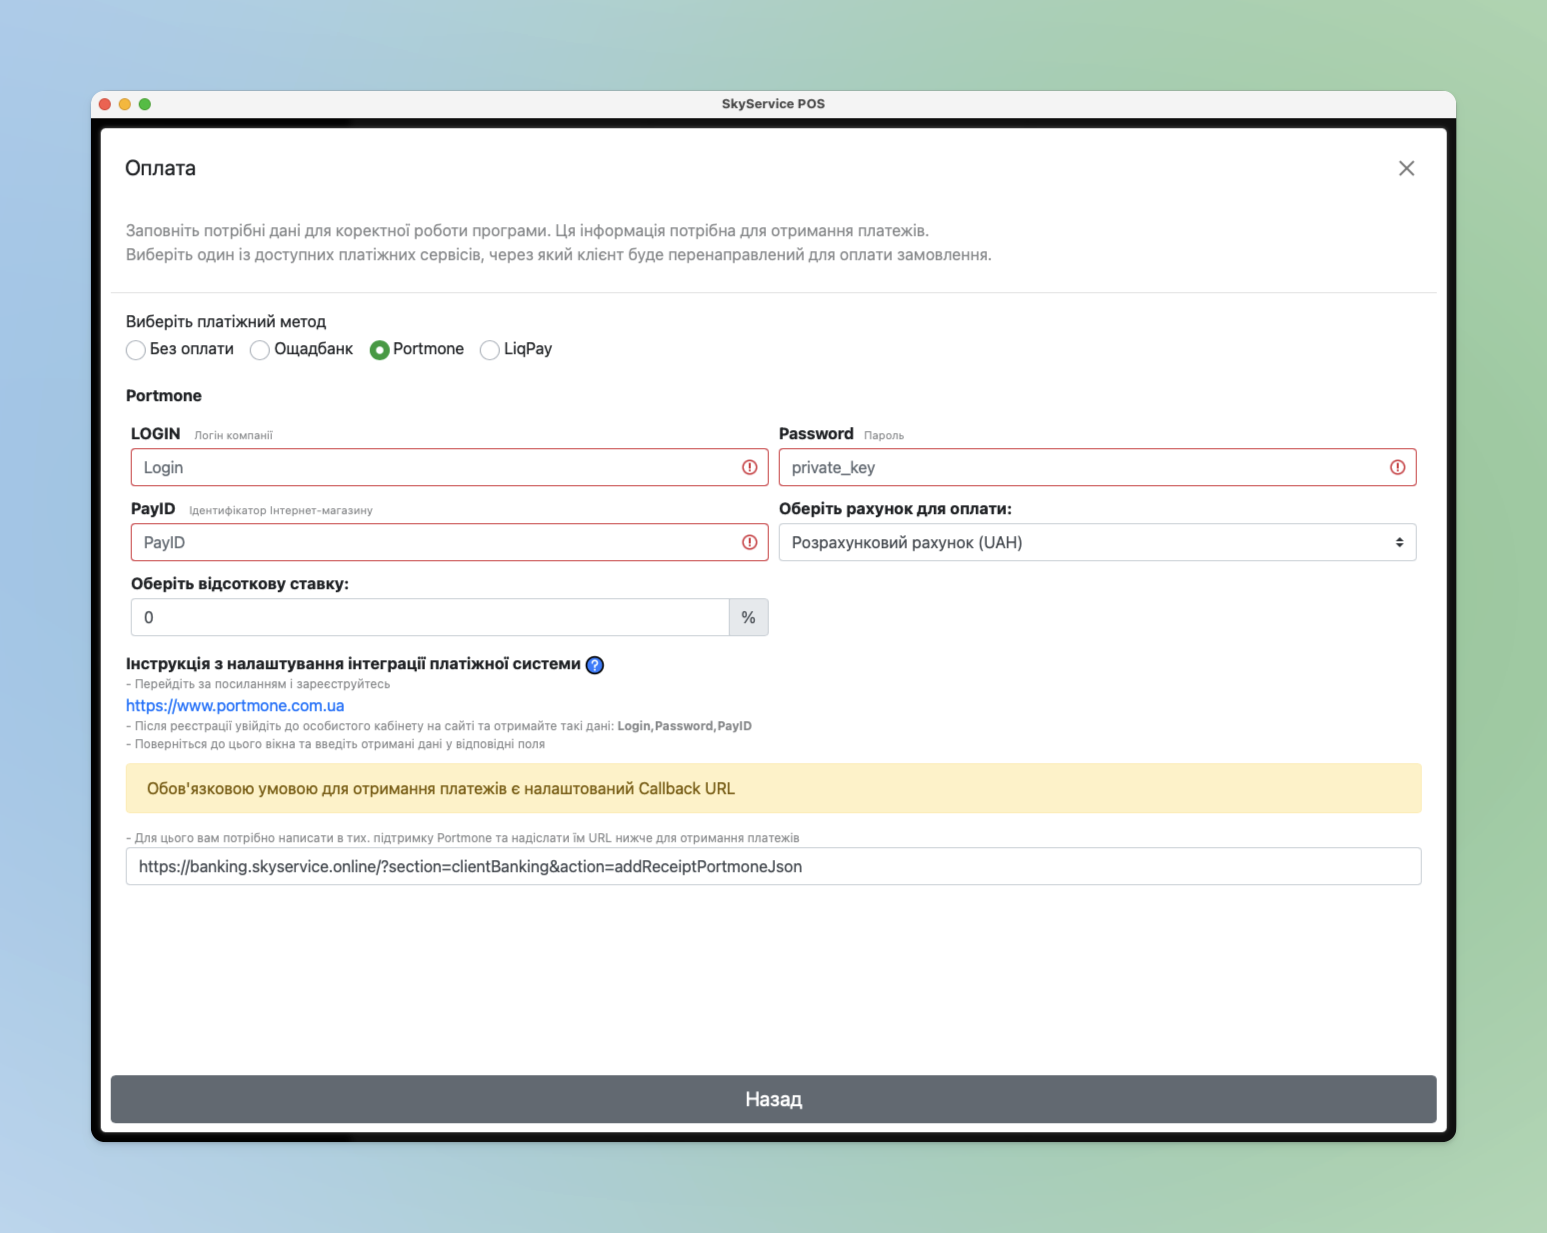
ℹ️ Also, when choosing a payment system in the program, below you can follow the link directly to the site of the corresponding one chosen.
❗In addition, specifically in the case of Portmone, a Callback URL must also be configured, which is additionally described below when choosing this payment system. To do this you need to copy the link and provide it to Portmone technical support.
Reviews
👉 Accept guest reviews using the QR menu and payment app.To configure click Reviews
- .In the Reviews
- window activate the settings.
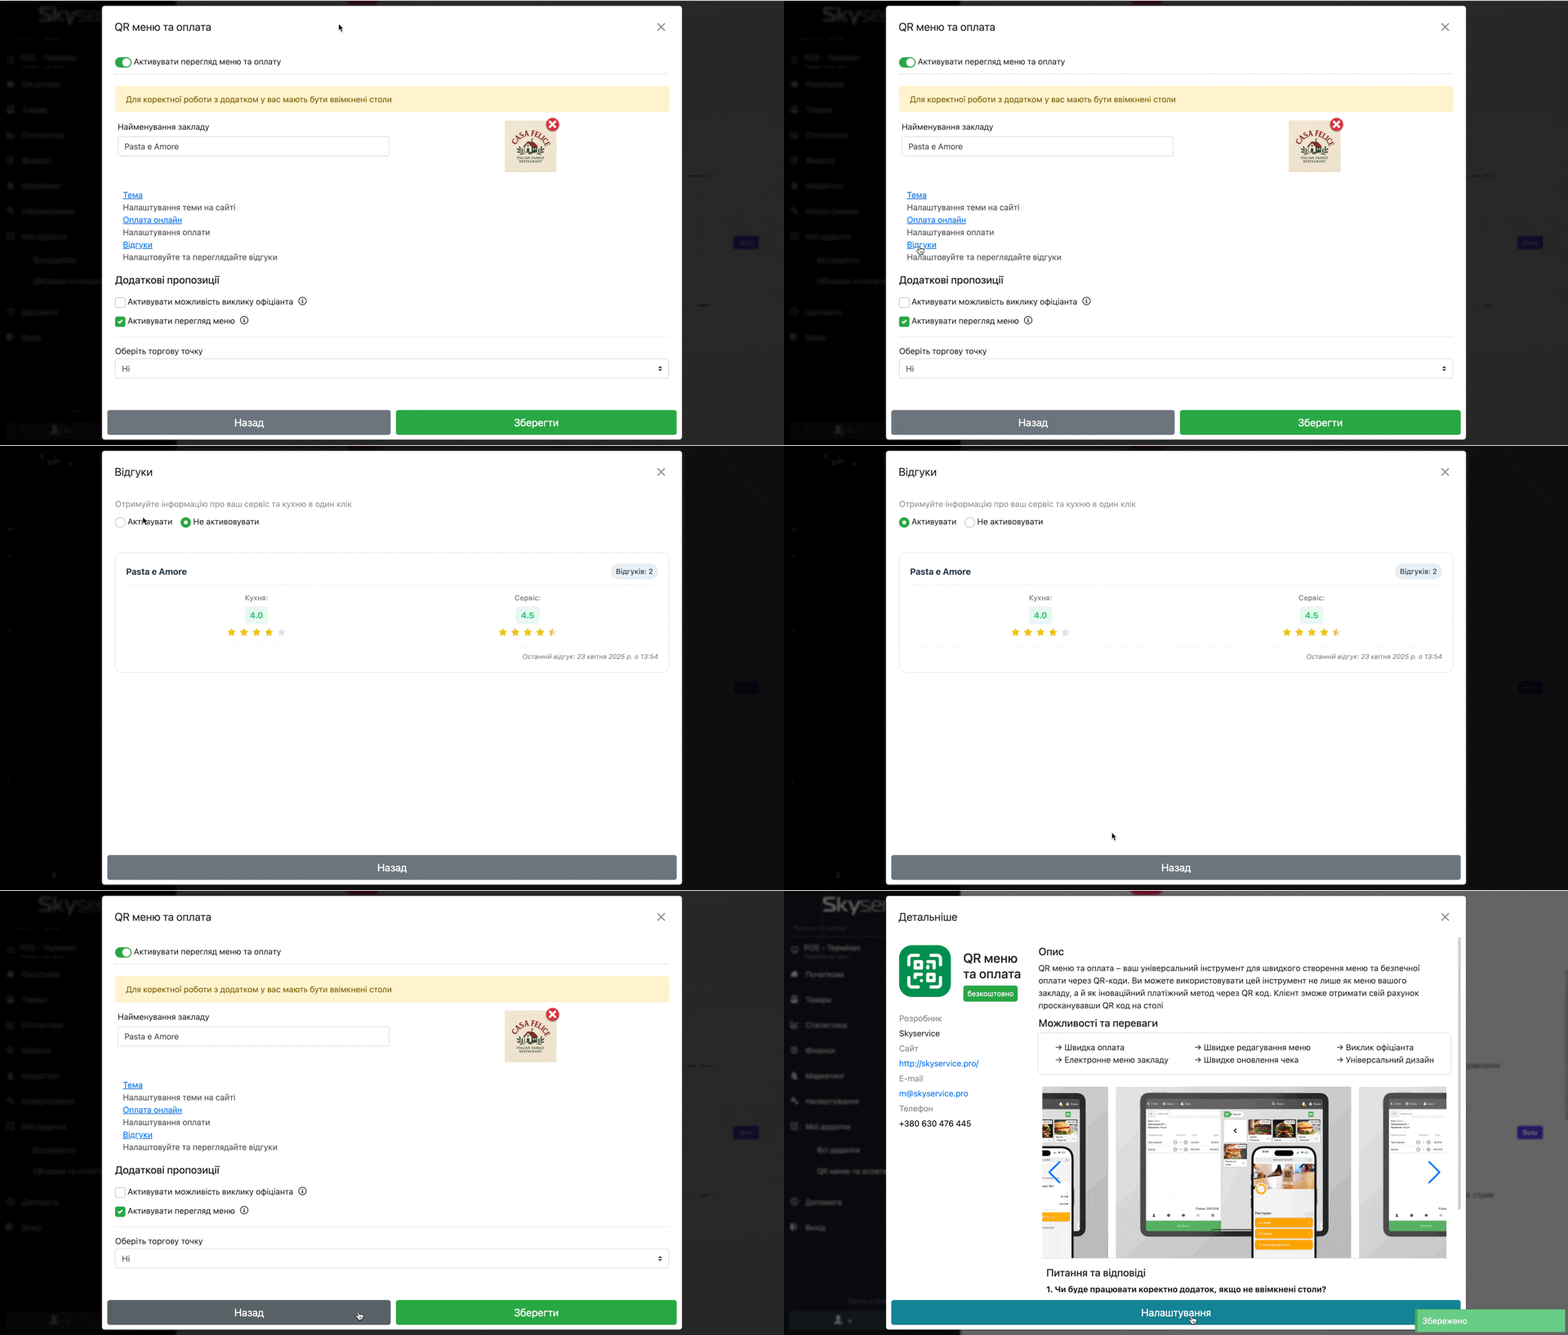
In this section you will be able to view all reviews that your guests leave.
Notifications in Telegram
- 🔥 Receive instant notifications in Telegram about the most important things! You will be promptly informed about:
- Waiter call
- New client reviews
Payments and transactionsTo configure click Telegram Bot
- .In the Telegram bot settings
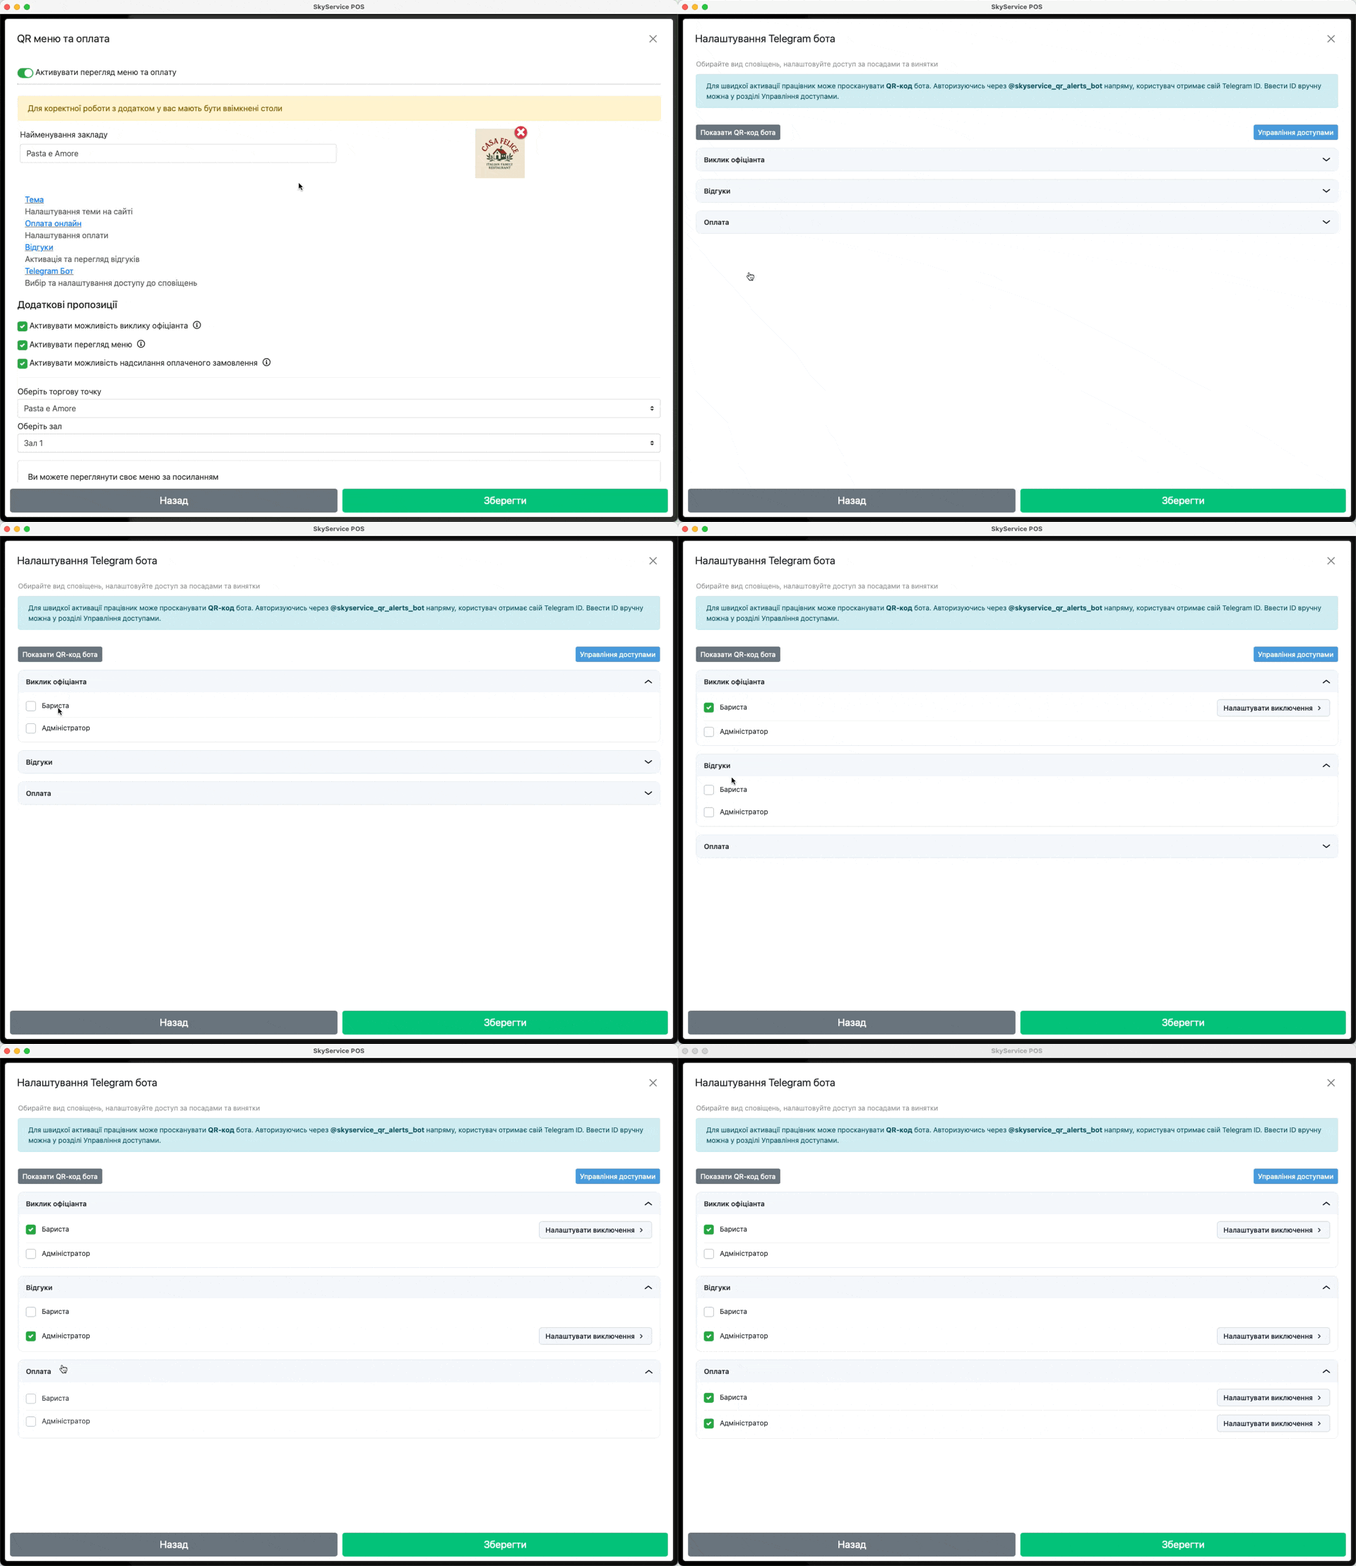
window, under each notification type, activate the positions that should receive notifications.
- Connecting employeesClick
- Show bot QR code
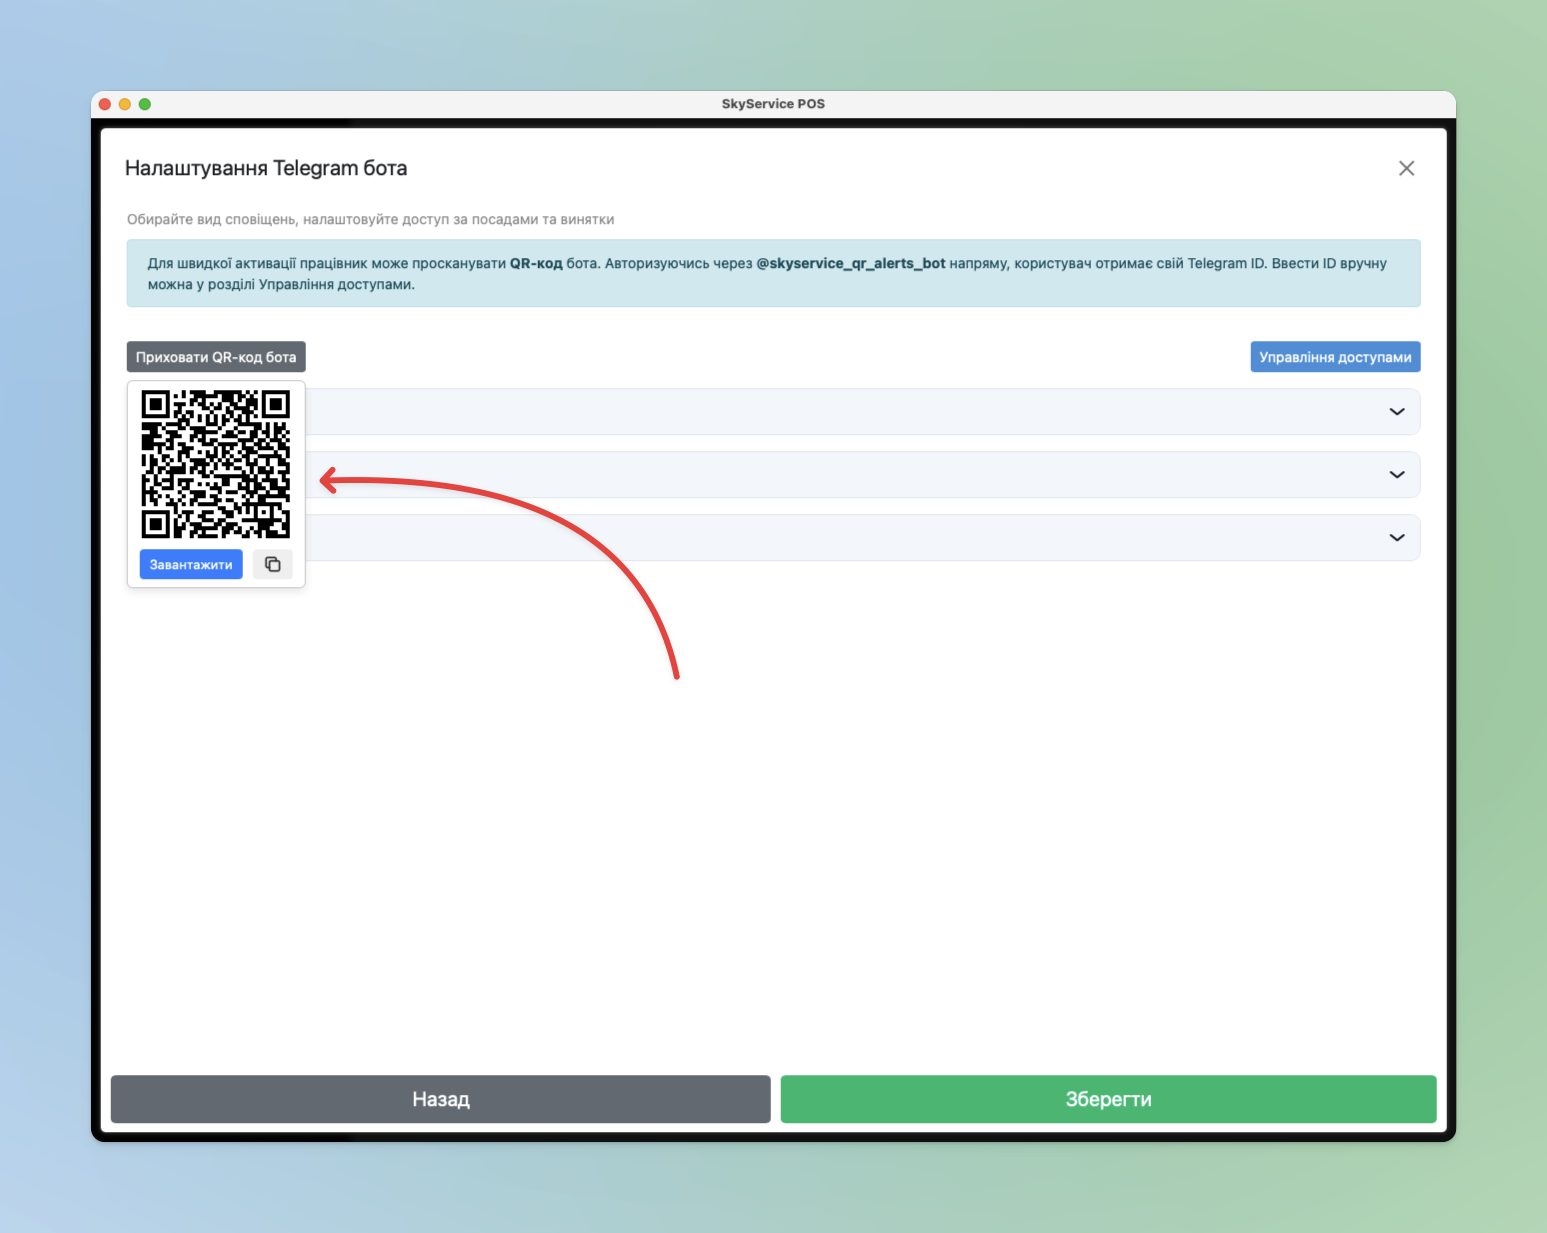
- Scan the QR code from the employee’s device or copy the link and send it to your employee
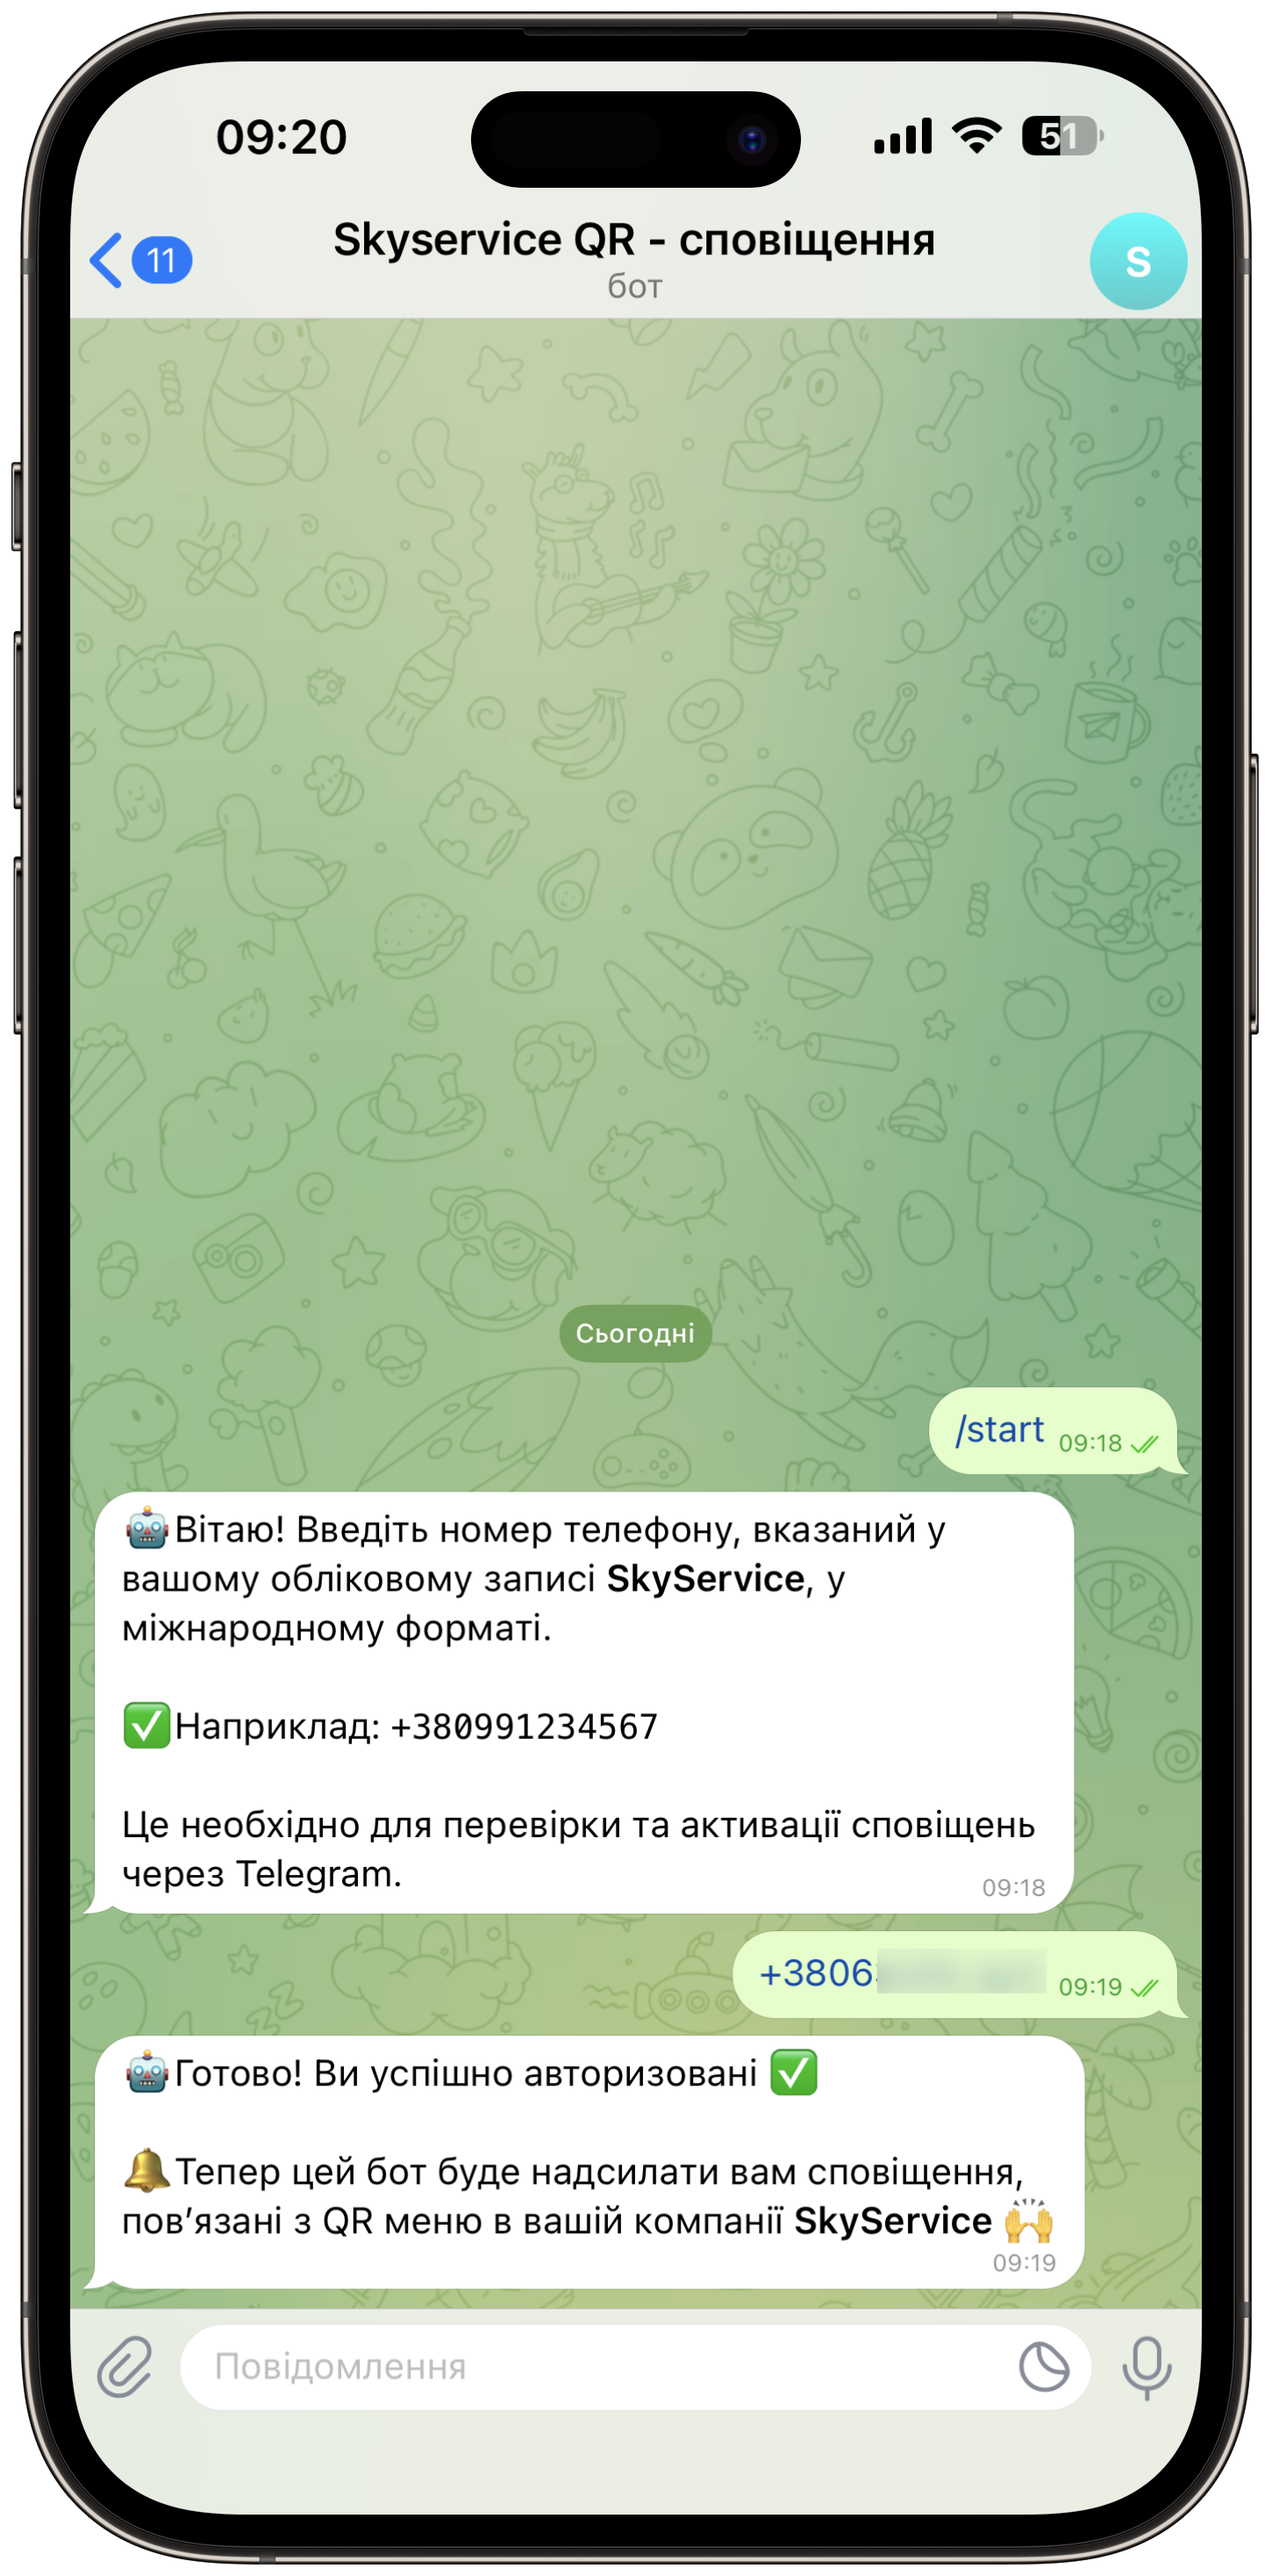
In the Telegram bot you need to specify the phone number under which the account is registered in Skyservice
Additional offers
- The QR menu and payment app provides additional features that will help improve your service.Activate waiter call capability
- – provides the guest the possibility to call a waiter, about which a notification will arrive in the POS terminal.Activate menu viewing
- – if you only need to accept payment via QR code, without the additional possibility of viewing the venue menu, in this case remove the “check” next to this option.Activate the possibility of sending a paid order
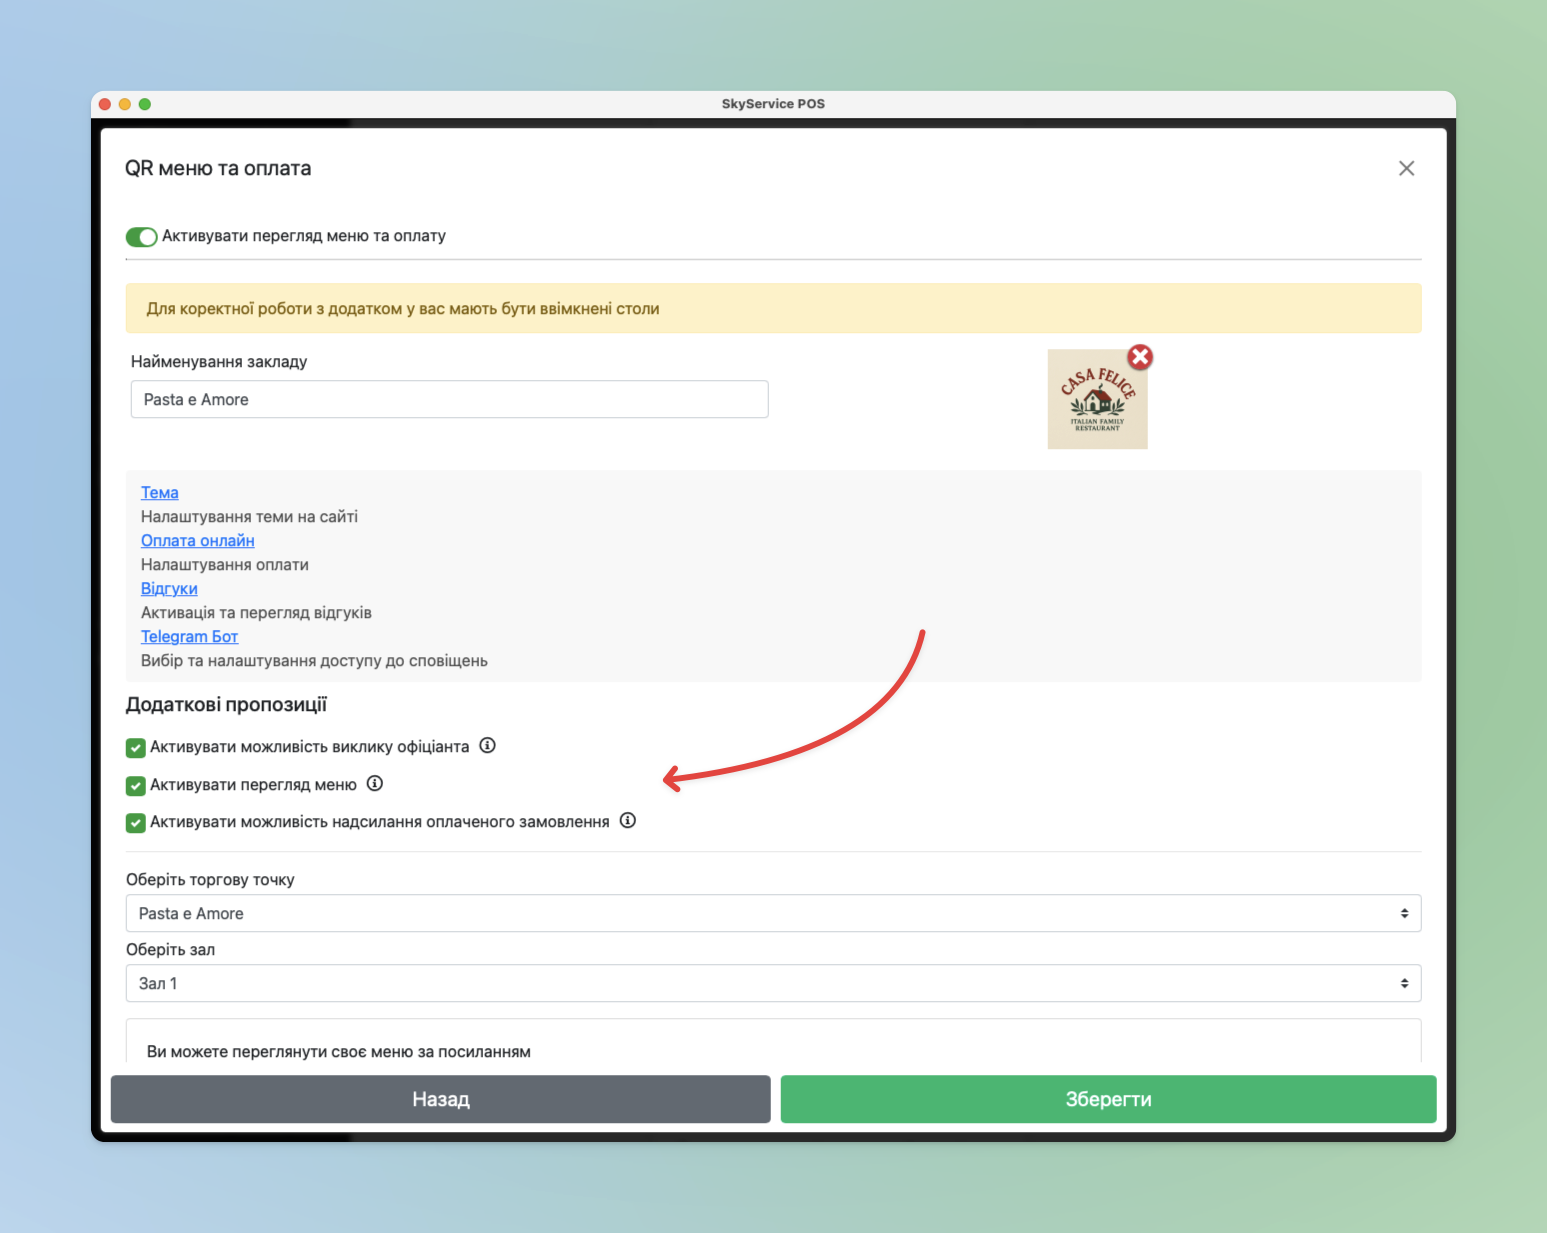
– allows clients to independently form an order that will be transferred for preparation for pickup after successful payment via the payment system.
- Sales point setup
- Select the sales point
- Set the required hall
For the required tables generate a QR code and upload them to provide to clients in printed or electronic form.☝🏻We emphasize attention to the options Download all and Generate all
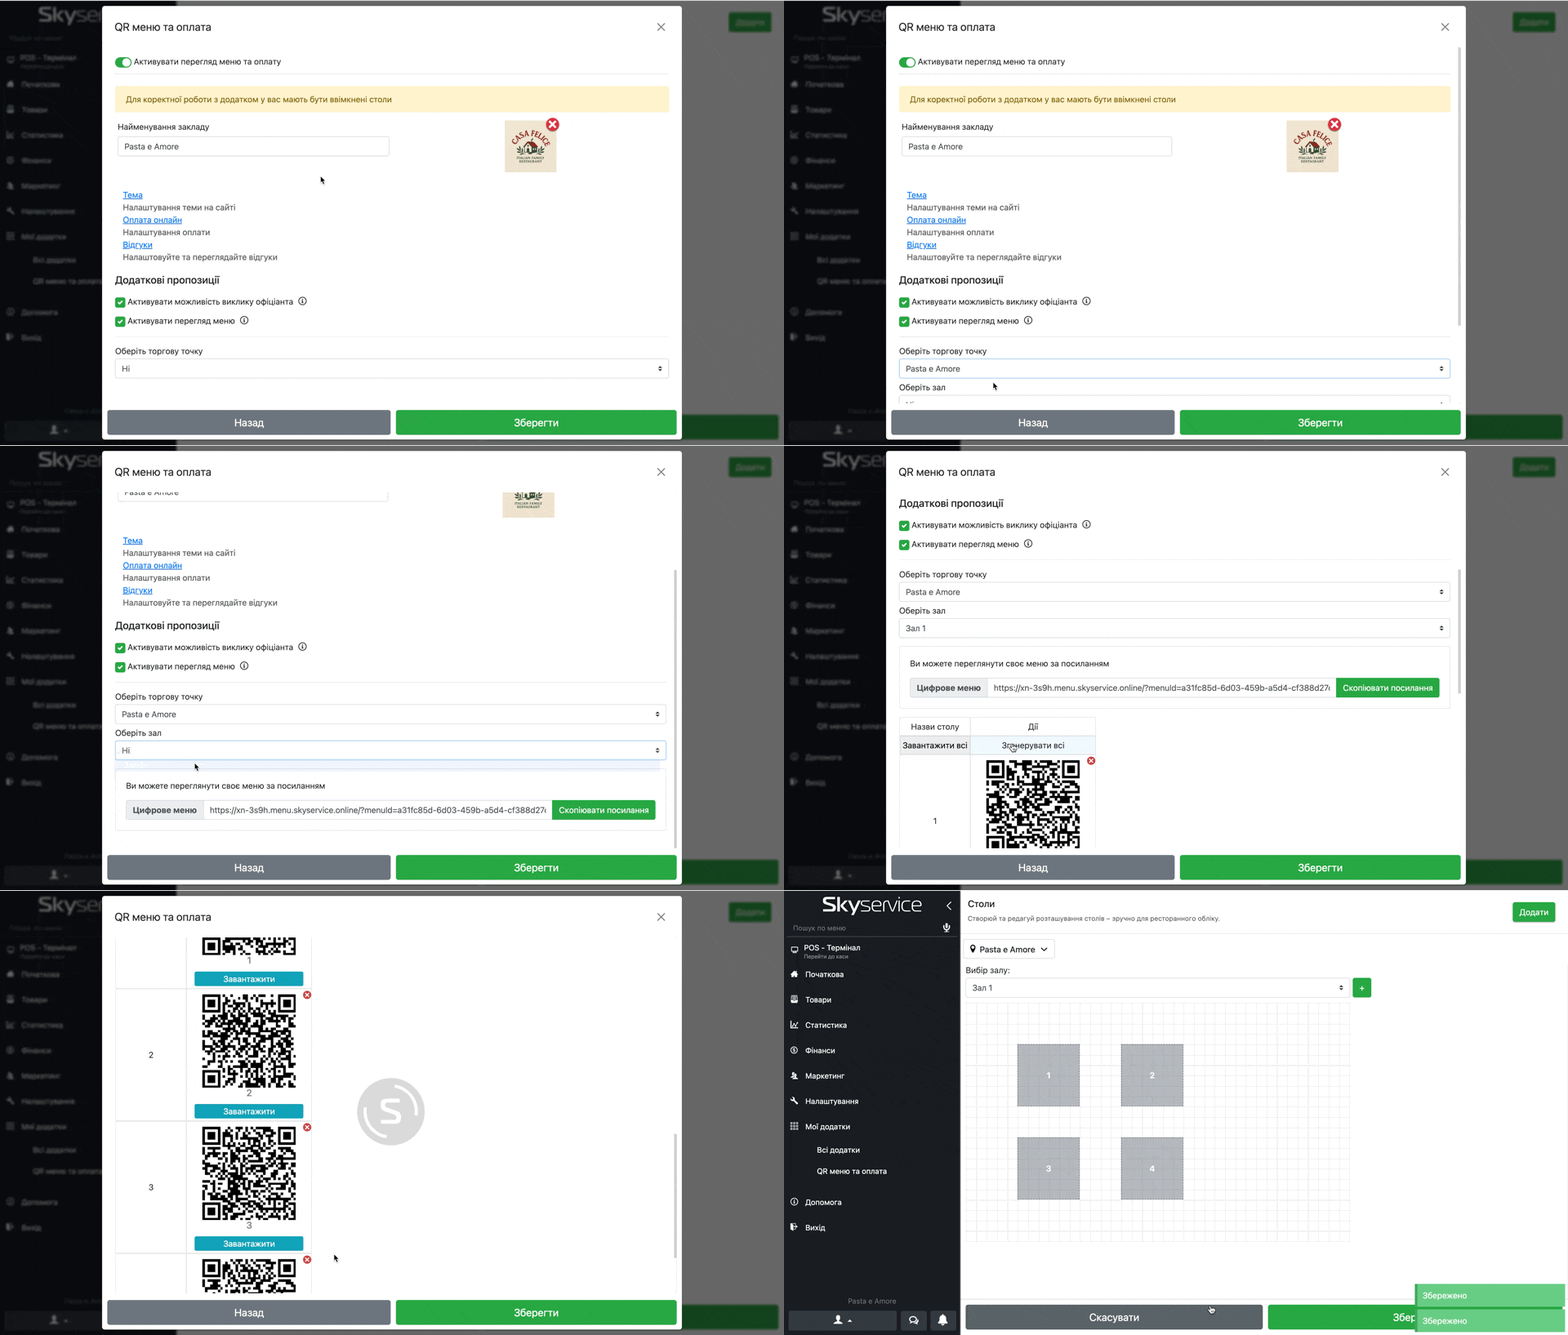
. They allow generating QR codes for all tables of the chosen hall with one click and, accordingly, uploading all codes also in one click, and not individually.❗ If it is necessary to create this setting for several halls or sales points, switch between them in the card QR menu and payment
and you will be able to generate QR codes for each hall separately. ❗️
After creating a QR code, it will not be removed from the table until you generate a new code or delete it entirely from the settings.
QR menu and payment
After you have set everything up, we can move on to working with the QR menu and payment.
- In the QR menu the guest can:
- View the menu
- Pay for the order
- Call a waiter
- Leave a review
Read the venue’s working hours
Venue menuTo go to the menu on the main page click Menu
.
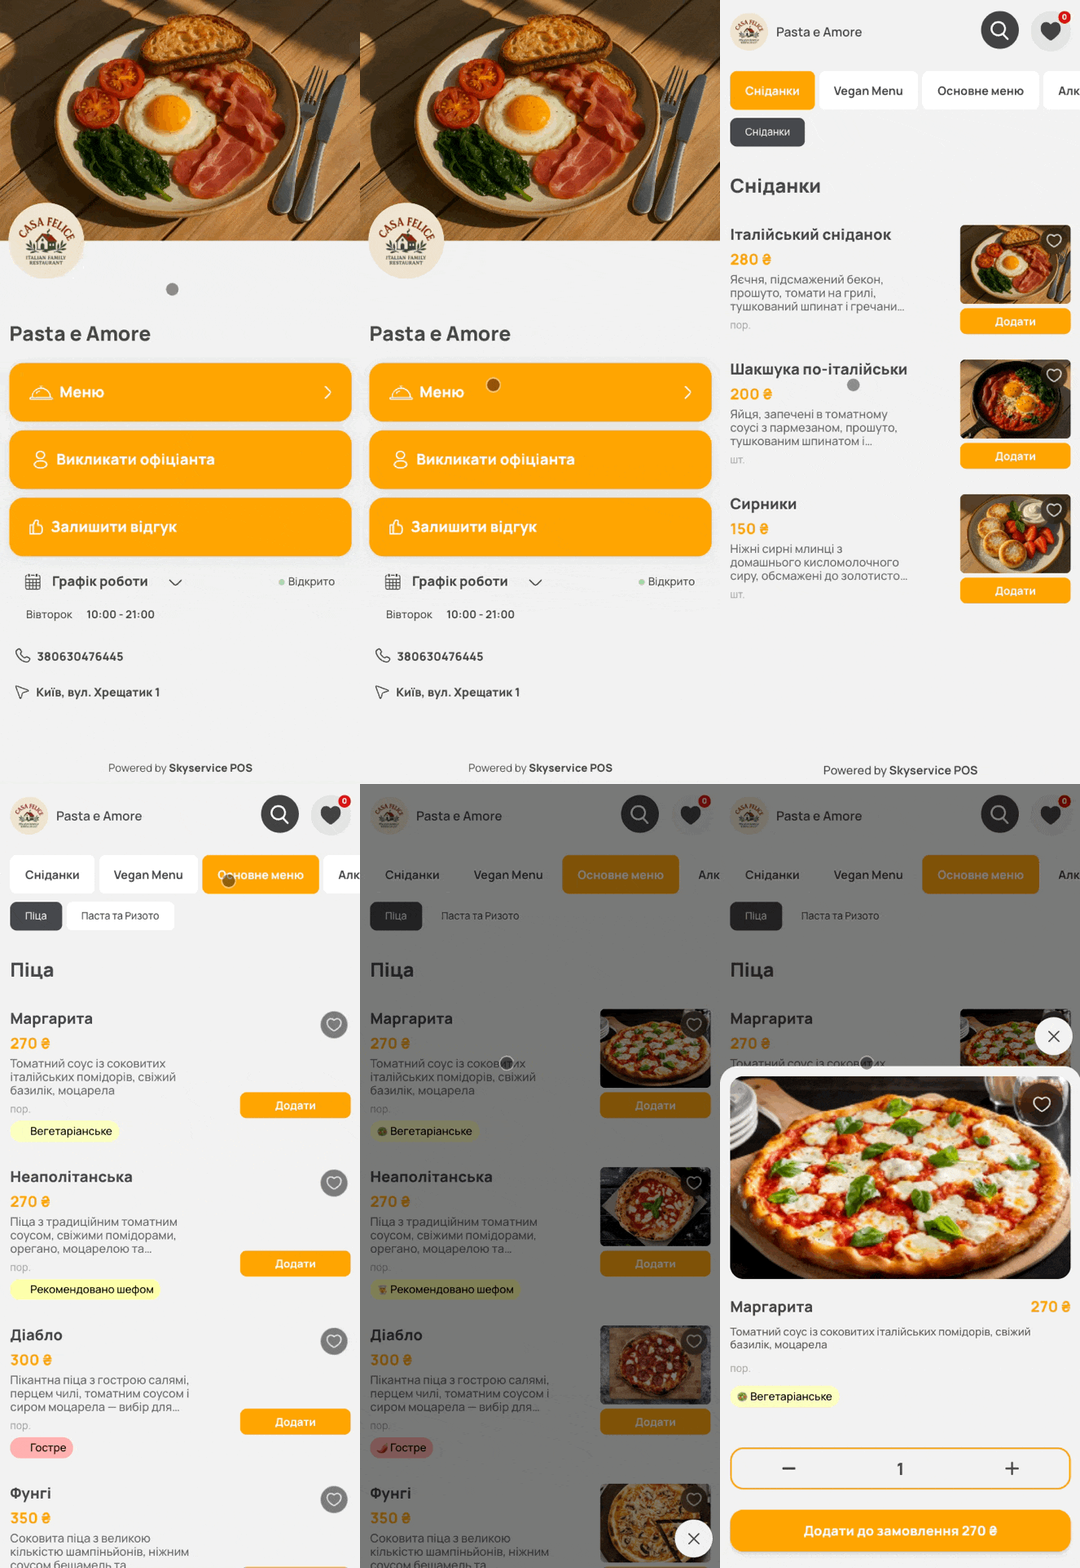
Order paymentTo pay for the order the guest on the main page must click Payment
.❗️ Important!
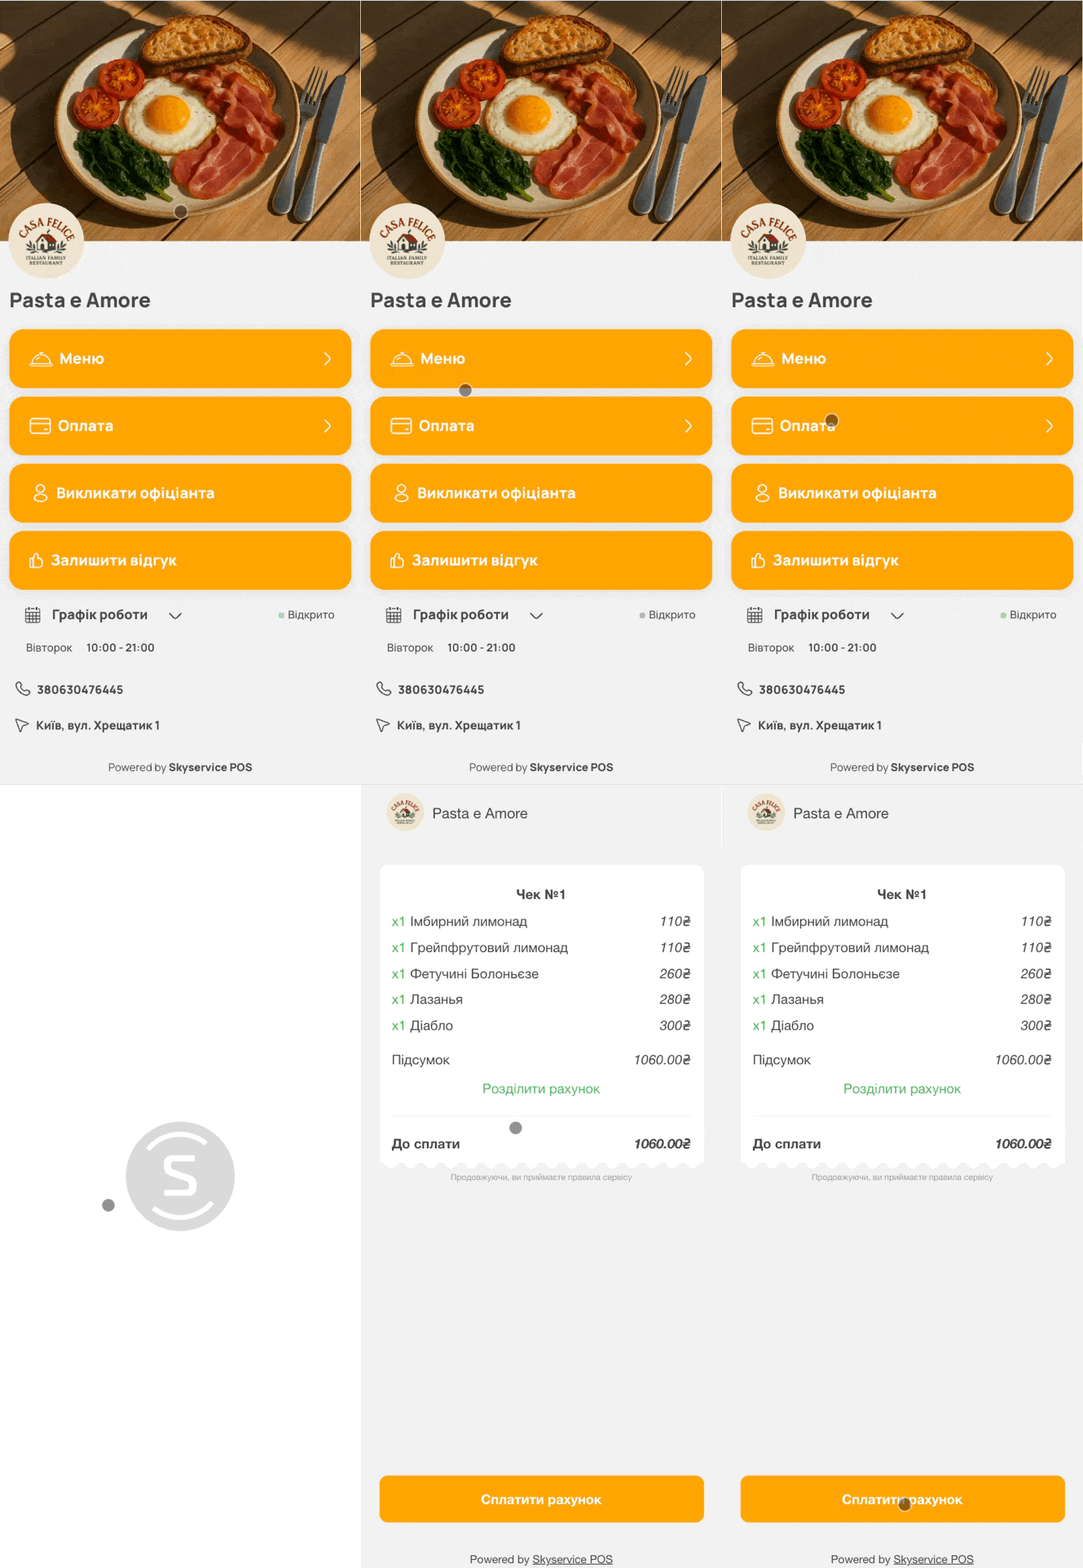
The order will be displayed on the payment page if the waiter has entered the order for the client’s table for which they are scanning the QR code.
Waiter callTo call a waiter through the QR menu, the guest on the main page must click
Call waiter.
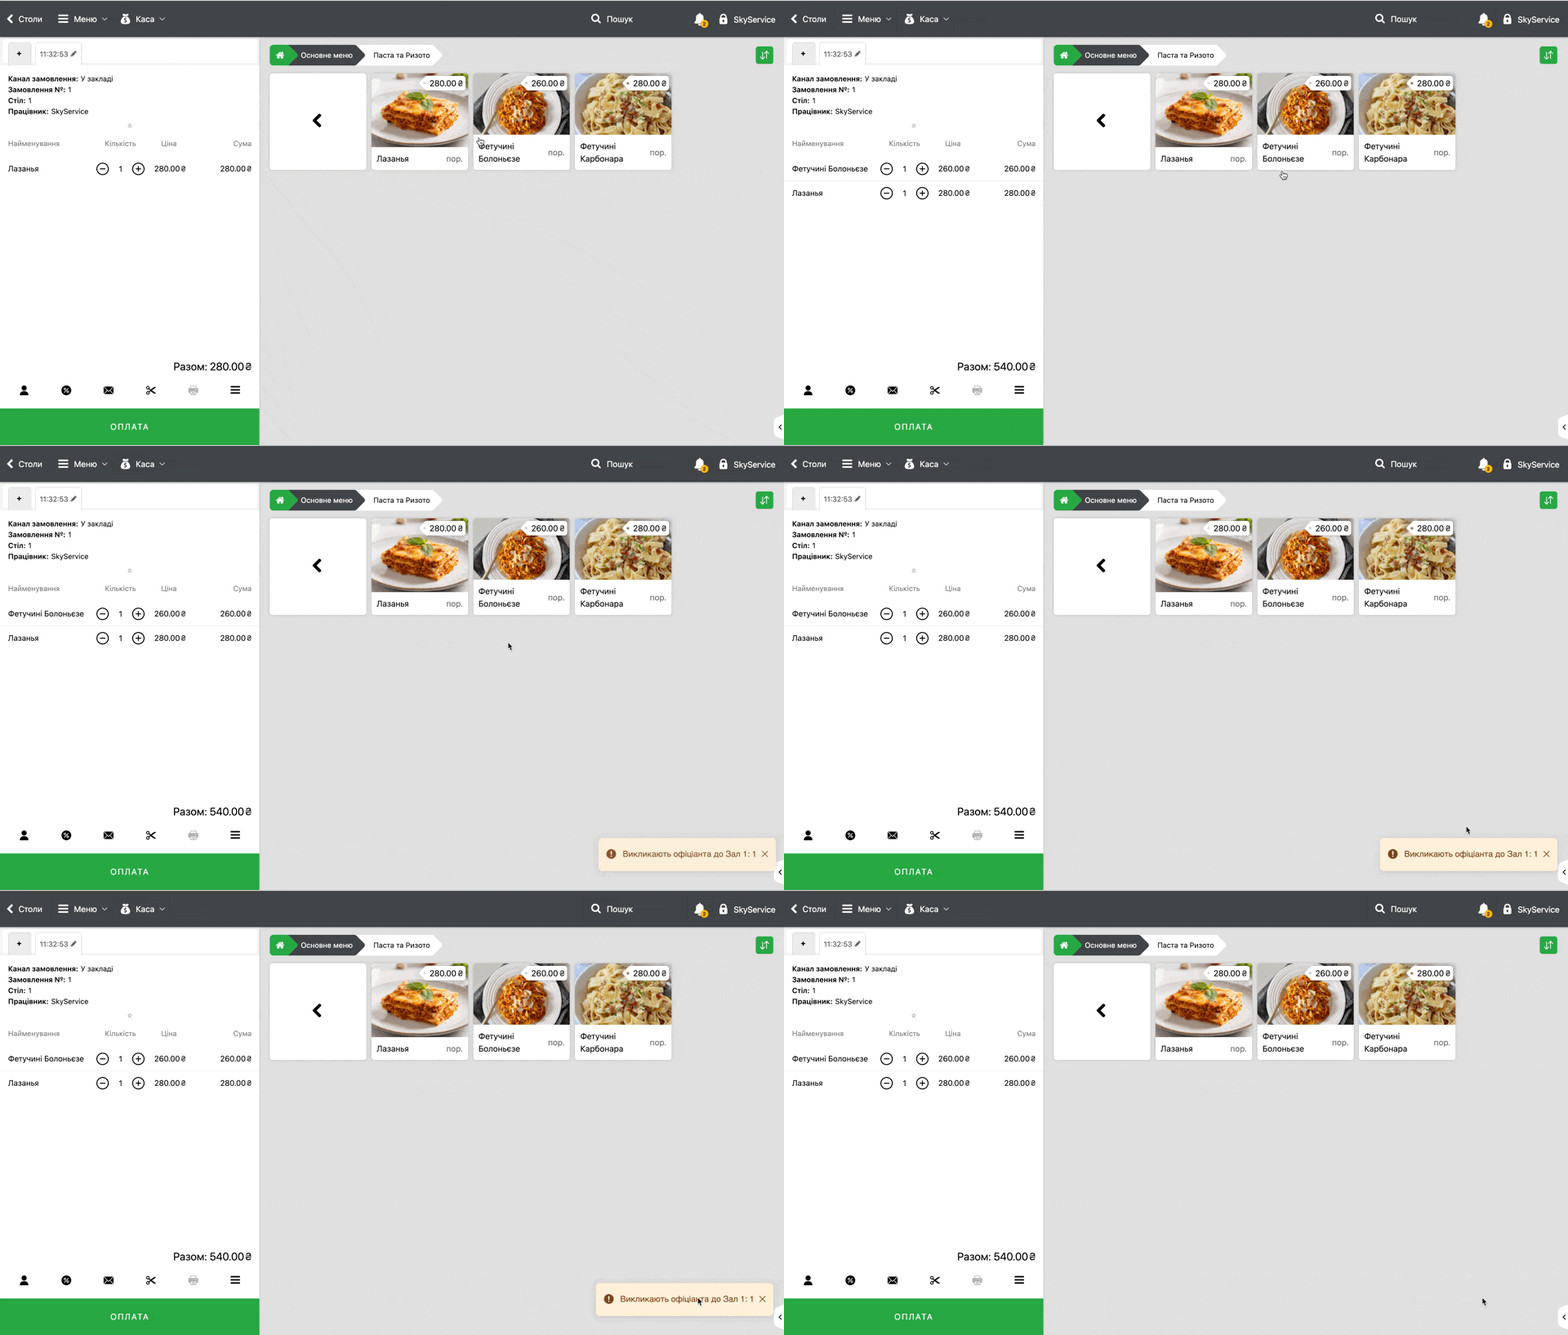
👉 The notification will arrive in the waiter’s terminal with a sound alert.
Review
- Your guest can leave a review as follows:On the main page they need to click
- Leave review
- Set the rating for the cuisine and service
- Leave a comment
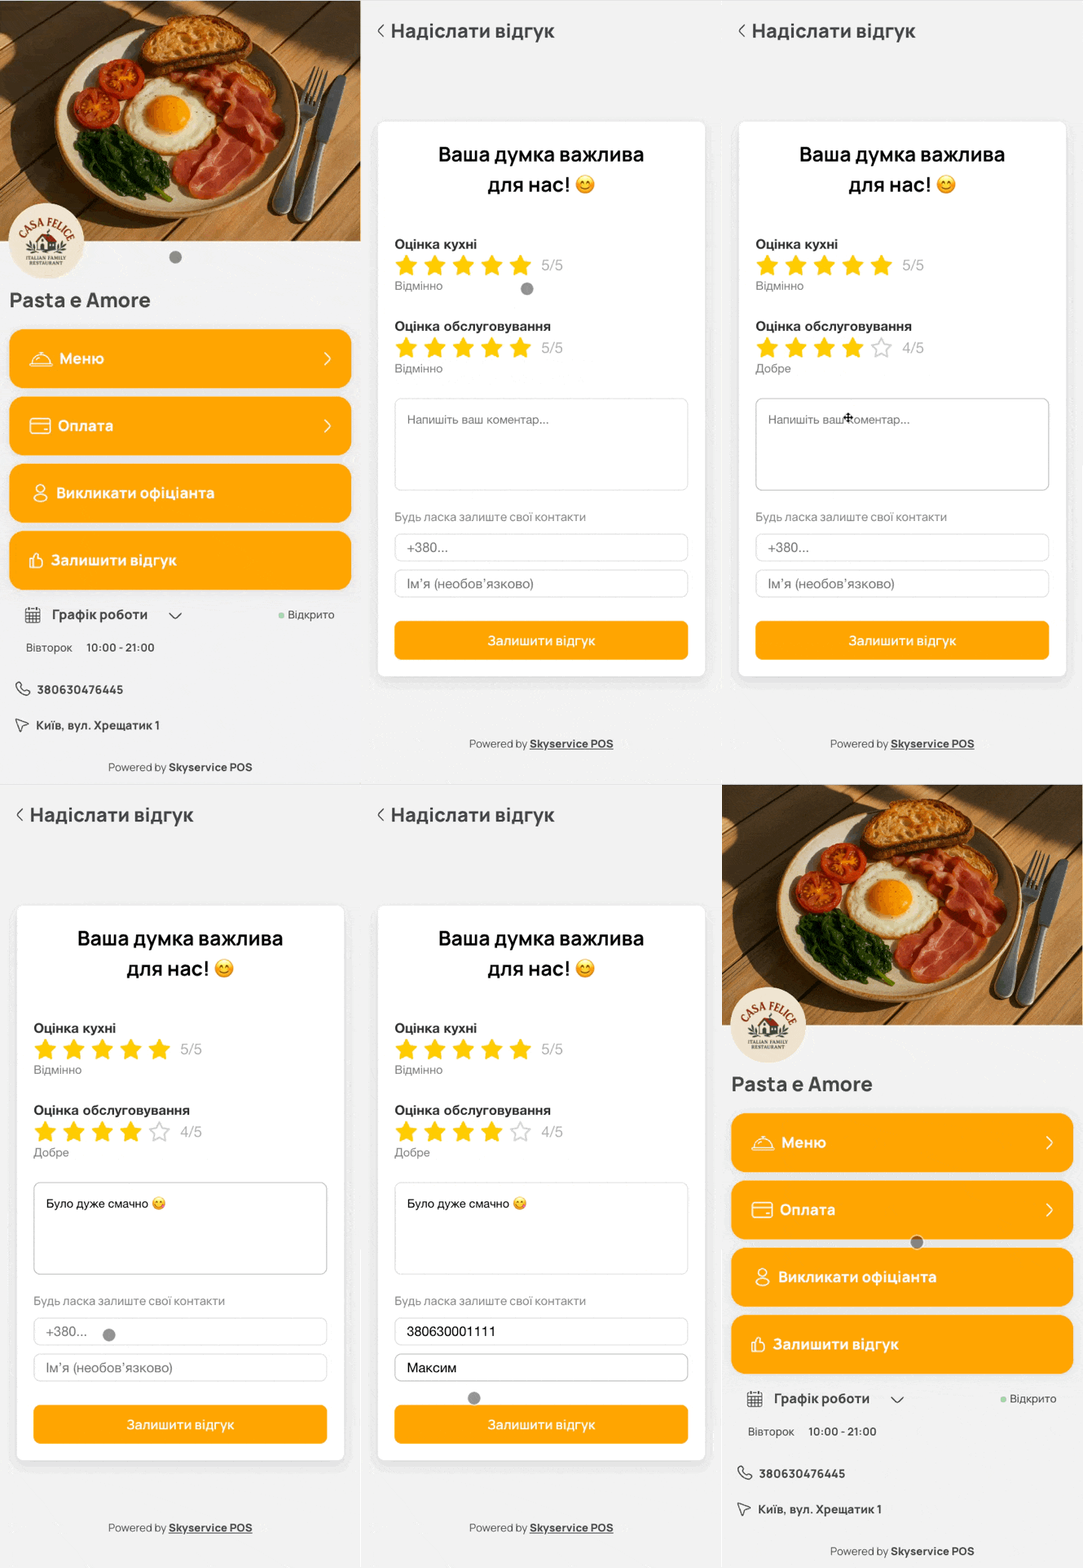
Specify data for feedback
ℹ️ To view order statistics🔗 To view statistics we recommend reading the lesson in our knowledge base How to view statistics by payment method