BookBeauty – is a Skyservice app that allows clients to sign up for services independently via a link, QR code or a button on your own site. And you don’t lose reservations – all are collected on one platform in one place.
Activation
To go to the BookBeauty module and its subsequent configuration
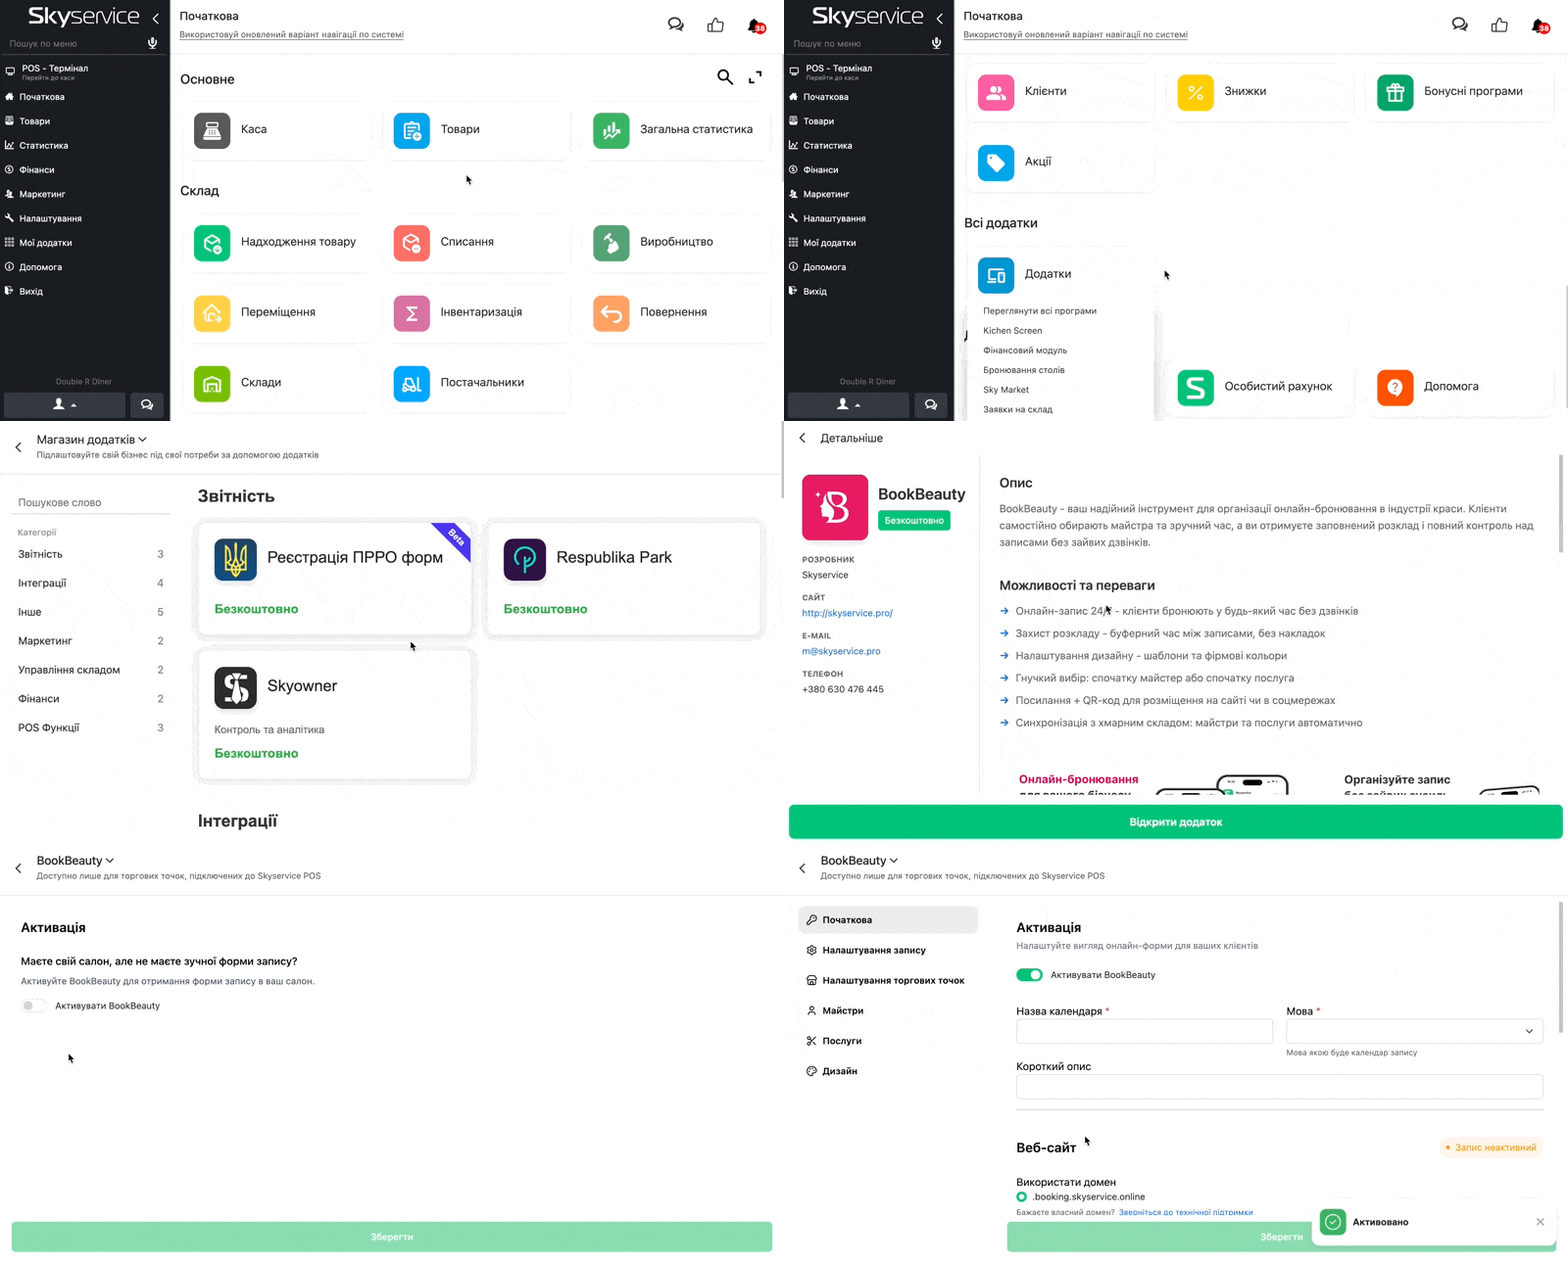
- On Home click Apps → View all programs
- Select BookBeauty, additionally read the description of the app and click Open app
- Click Activate
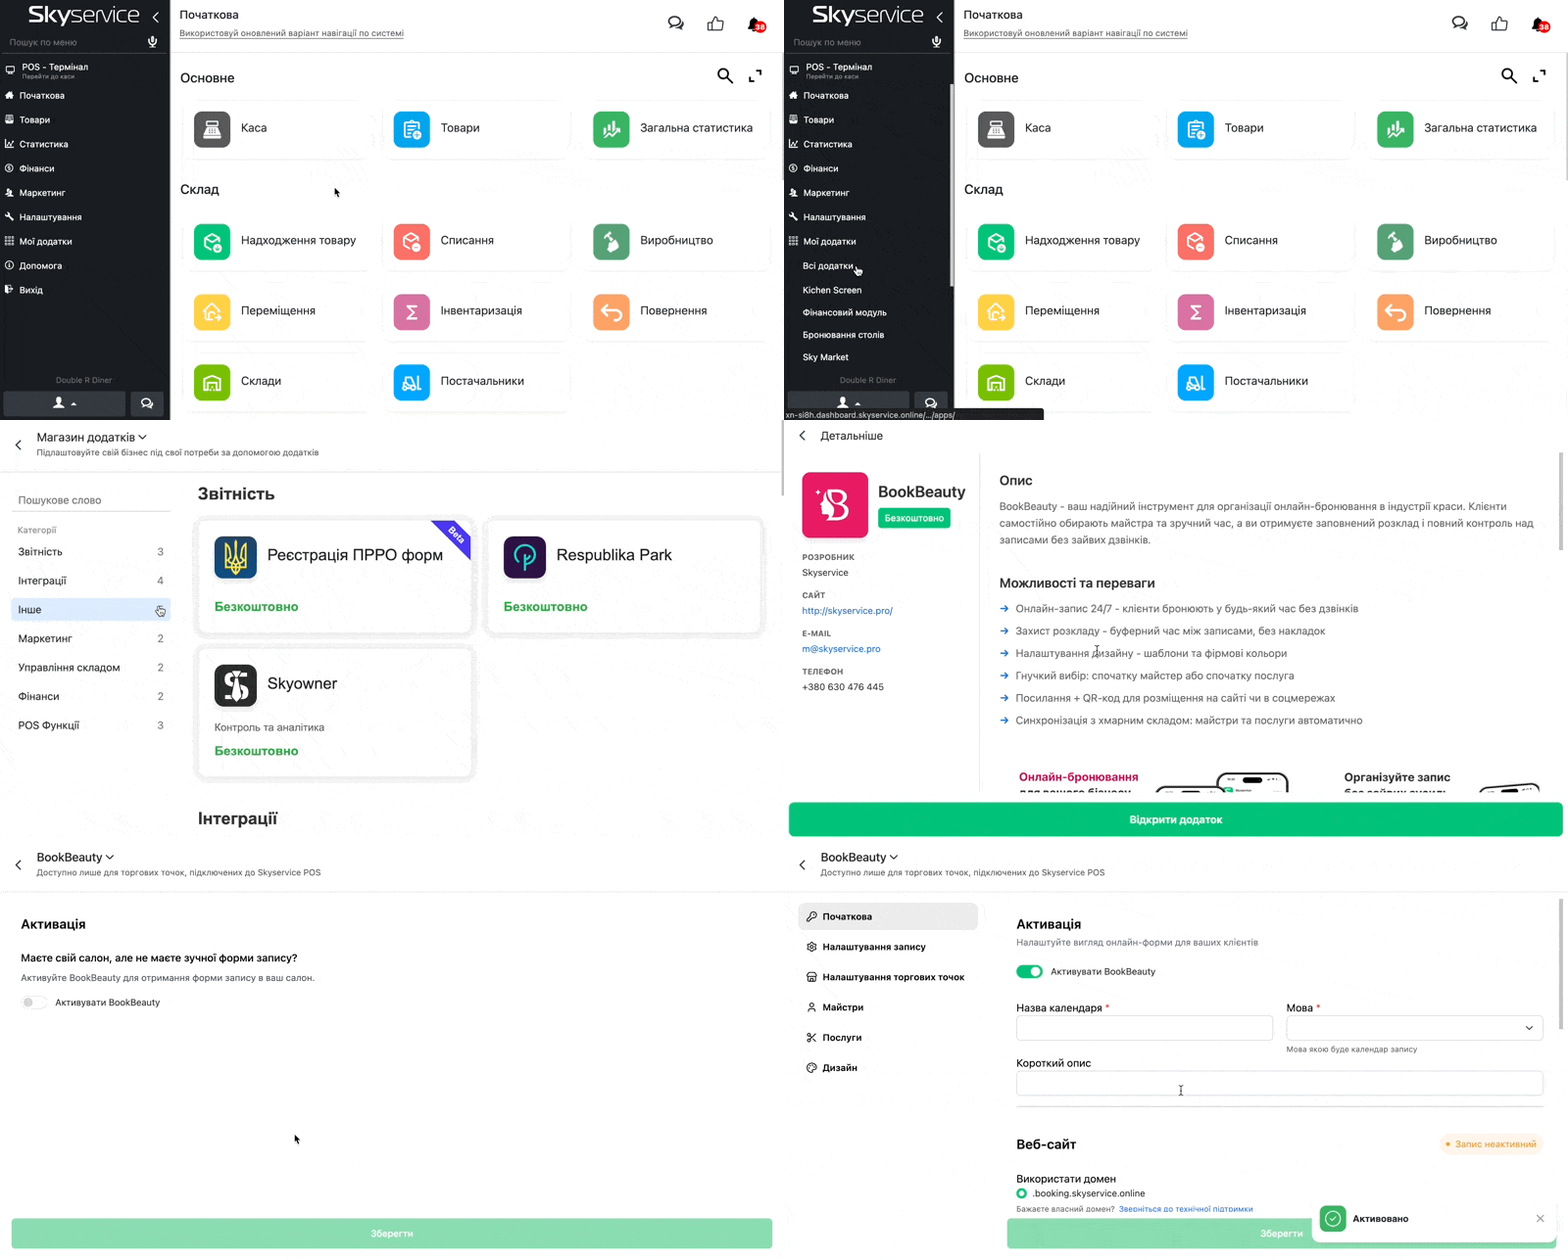
- Or in the side panel click My apps → All apps
- Select BookBeauty and click Open app
- Click Activate
Setup
Next let’s look step by step at how to configure the app for further work with it
Initial
Next you set the initial settings:
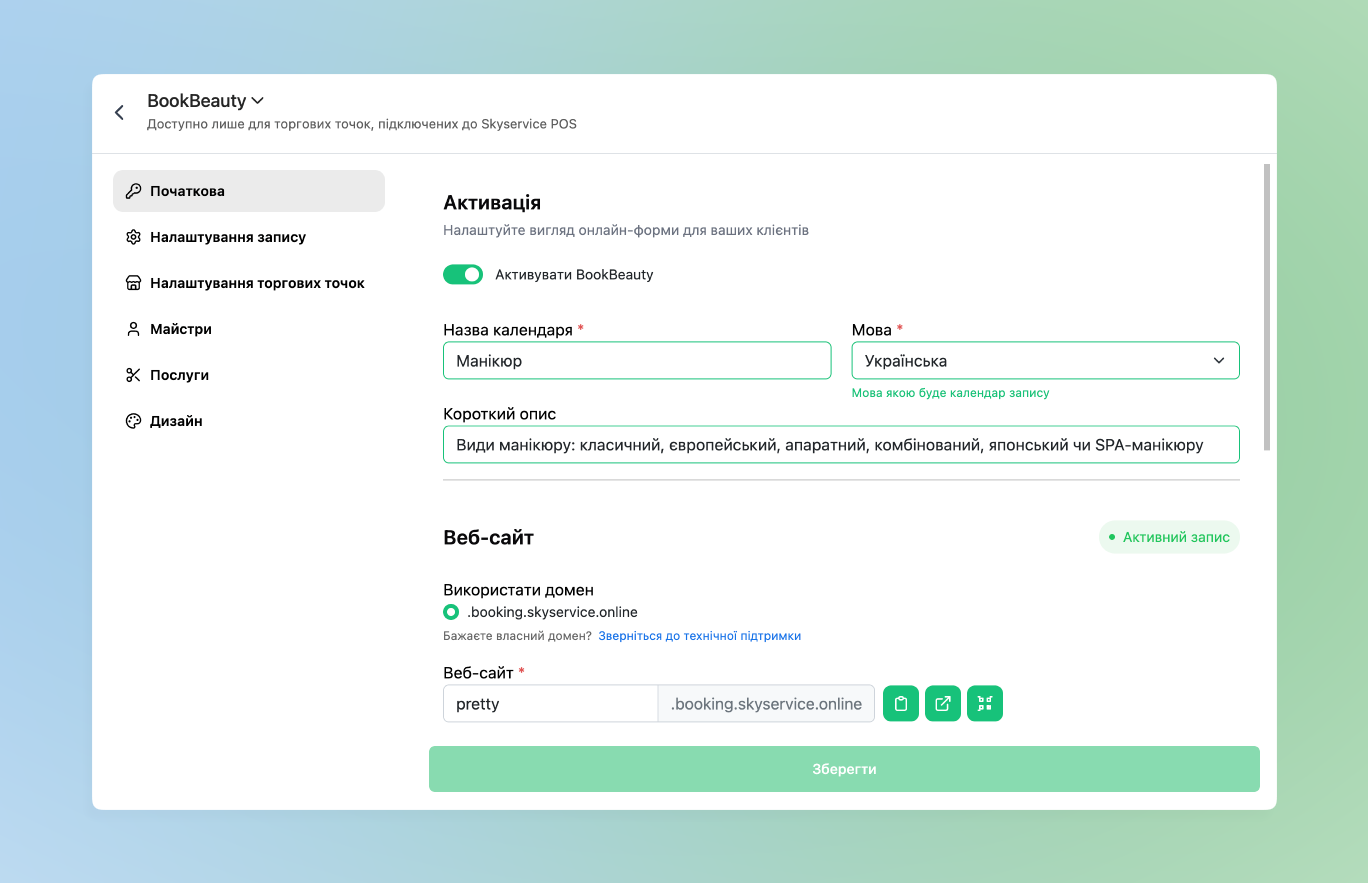
- Calendar name – satisfactory
- Language – set the language in which the site with entries should be displayed
- In the section Website you set additional settings
- Domain – if you have your own registered domain and want to use it – specify it
- Website – specify a satisfactory name that will be displayed in the link. The name can be anything
- This link can already be given to clients for further forming an entry
- Also for convenience You can:
- – Copy the link;
- – Go directly to the store site;
- – Generate a QR code.
- The corresponding buttons will help you in these actions

- The corresponding buttons will help you in these actions
Script for embedding on your own site
If you have your own website, then it is possible to add a button to go directly to the calendar on it
- You set which Button text should be, Button color and Text color that will be displayed on your site
- Below is displayed HTML code – you give it to your site developer to add the corresponding button for going to BookBeauty on your own website
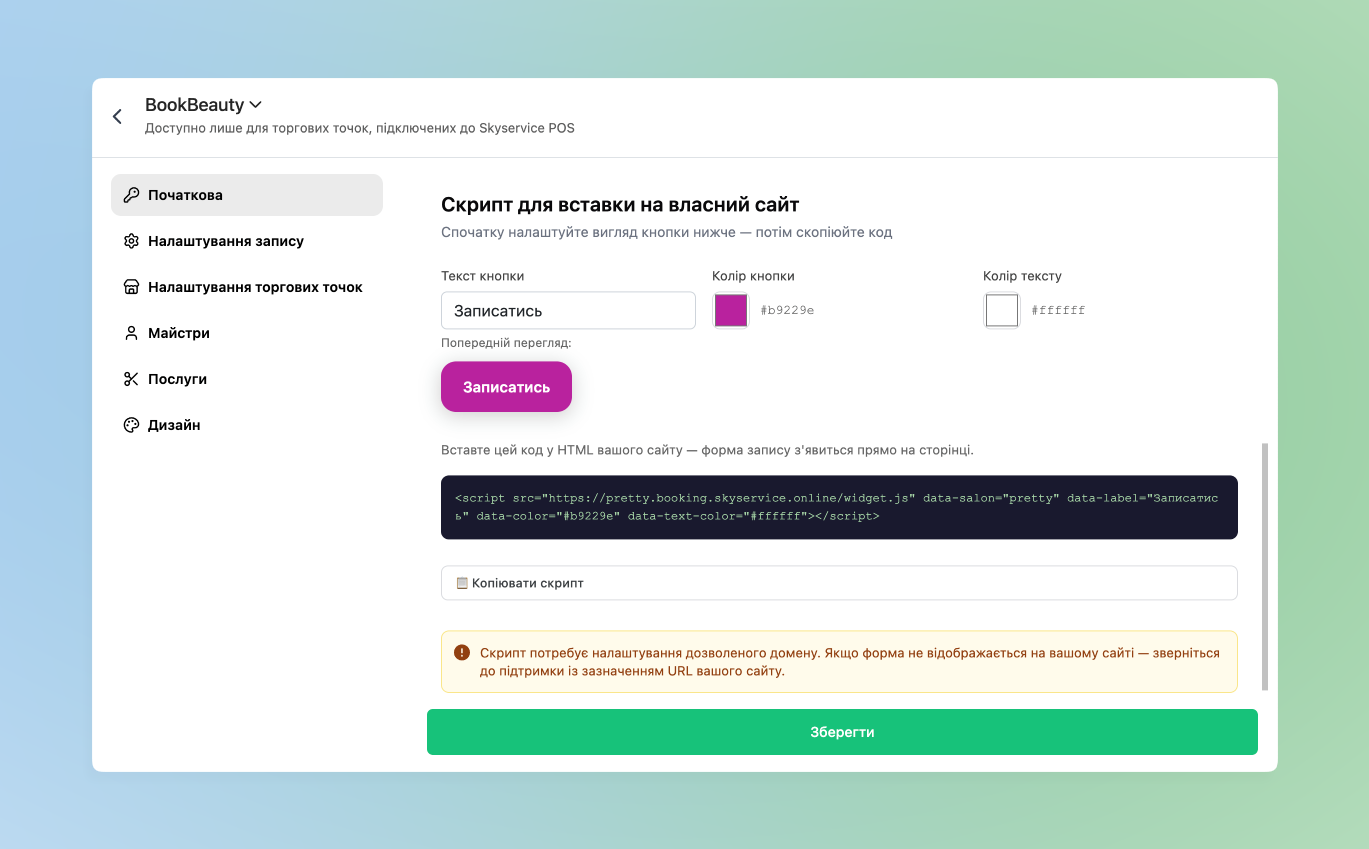
❗️After changing settings, before going to the next section, be sure to click Save.
Booking settings
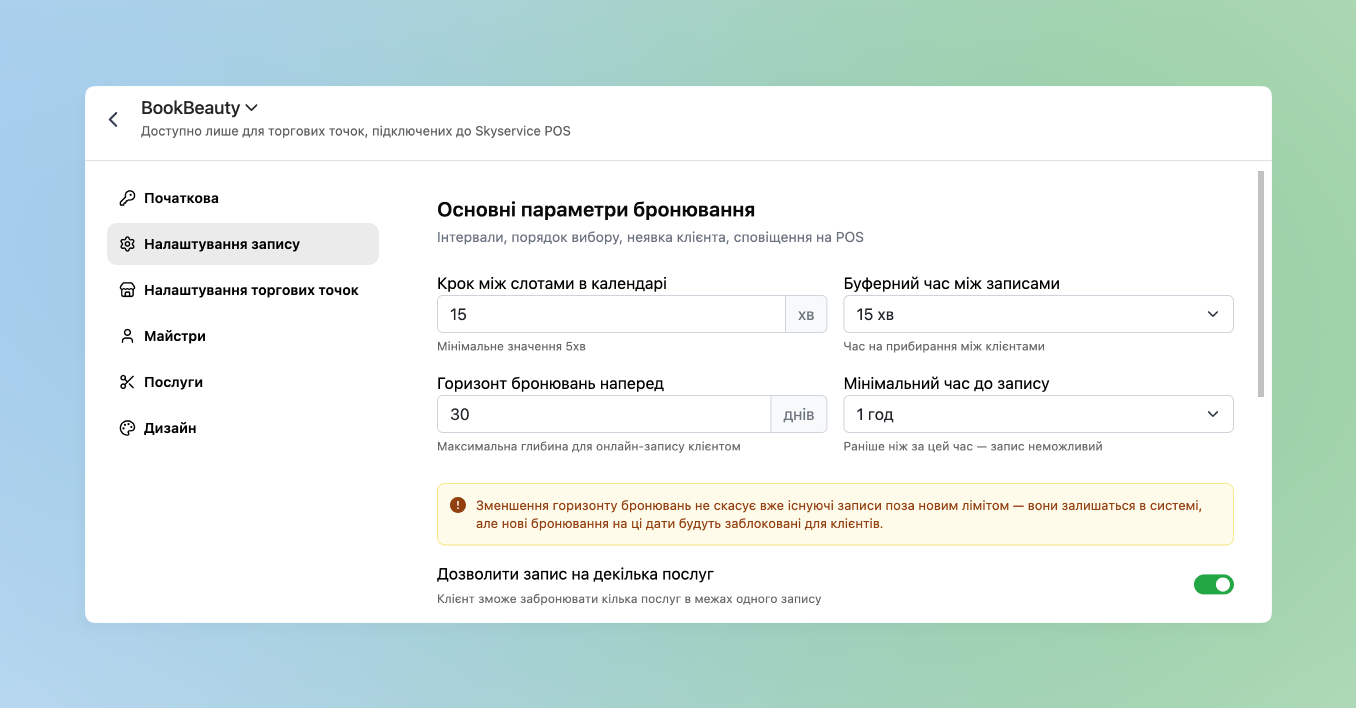
Main booking parameters
- Step between slots in the calendar – interval between which the client can select the time for booking (for example: 30 min – the client will see possible hours 9:00, 9:30, 10:00 and so on)
- Buffer time – pause between bookings (for example for cleaning or breaks)
- Booking horizon in advance – how many days ahead dates are available for booking. For example 30: in the client’s calendar only the next 30 days will be available for booking
- Minimum time until booking – how many hours in advance can be booked for a free hour. For example, if set 2 hours – the client viewing the calendar at 10:00 will not be able to book at 11:00
- Switch Allow booking for several services – the possibility of booking several services within one entry
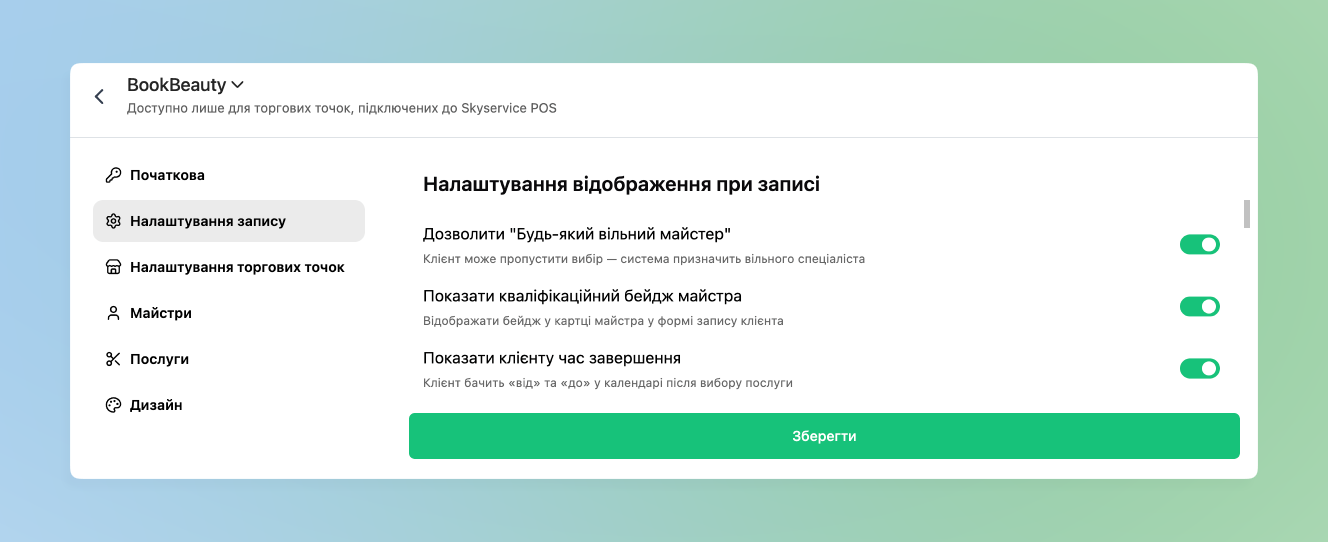
Display settings when booking
- It is set exactly what information the client can observe when creating an entry:
- Allow “Any available master” – the client does not have to choose a master and can skip this choice – the system will assign a free one
- Show the master’s qualification badge – allows the client to view the master’s badge when selecting them. This badge is configured in the following sections
- Show the client the end time – the client will see the hours from the start of the entry to the end of its completion
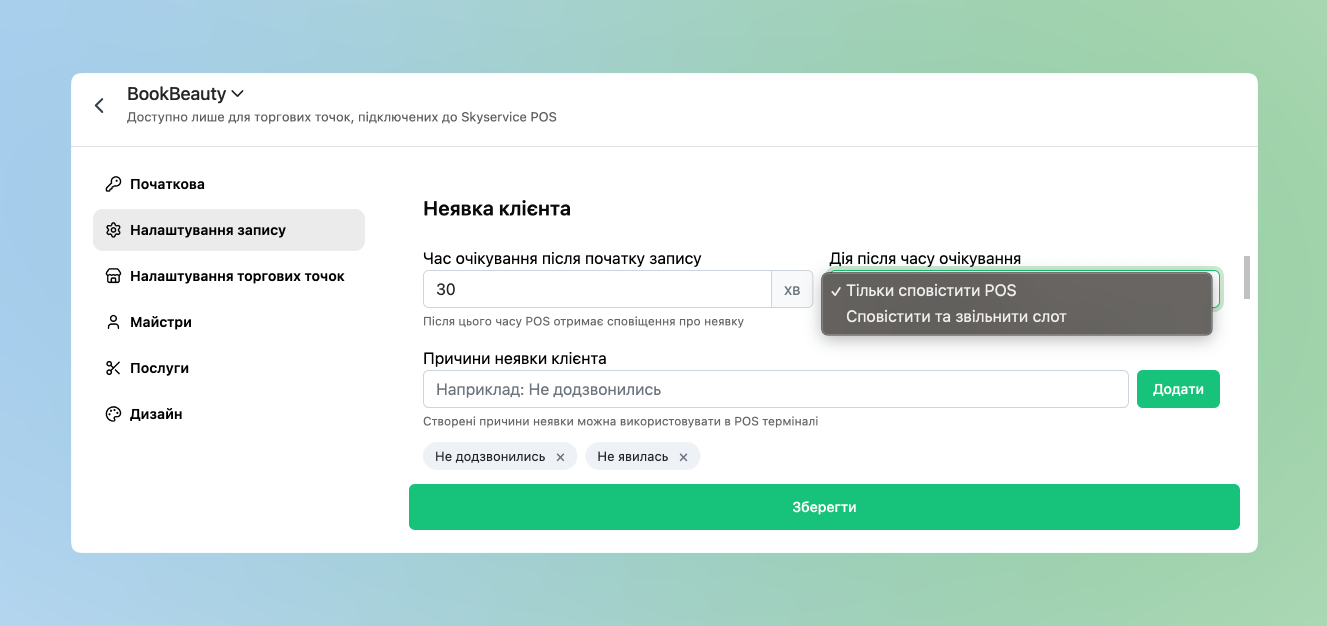
Client no-show
- If the client does not appear for the entry – it is possible to set the following options:
- Waiting time after the start of the entry – after what time a no-show notification should arrive (for example: 0 min – the notification will arrive immediately, and if 30 min – accordingly half an hour after the start of the entry)
- Action after waiting time:
- Only notify POS – just a notification will arrive on the POS terminal and the master does not have to close it
- Notify and free the slot – similarly a notification will arrive on the POS terminal, but the entry will be automatically closed
- Reasons for client no-show – additionally you can set standard reasons why the client did not appear for the entry. The cashier will be able to choose one of them when confirming the no-show for further statistics.
POS terminal notifications
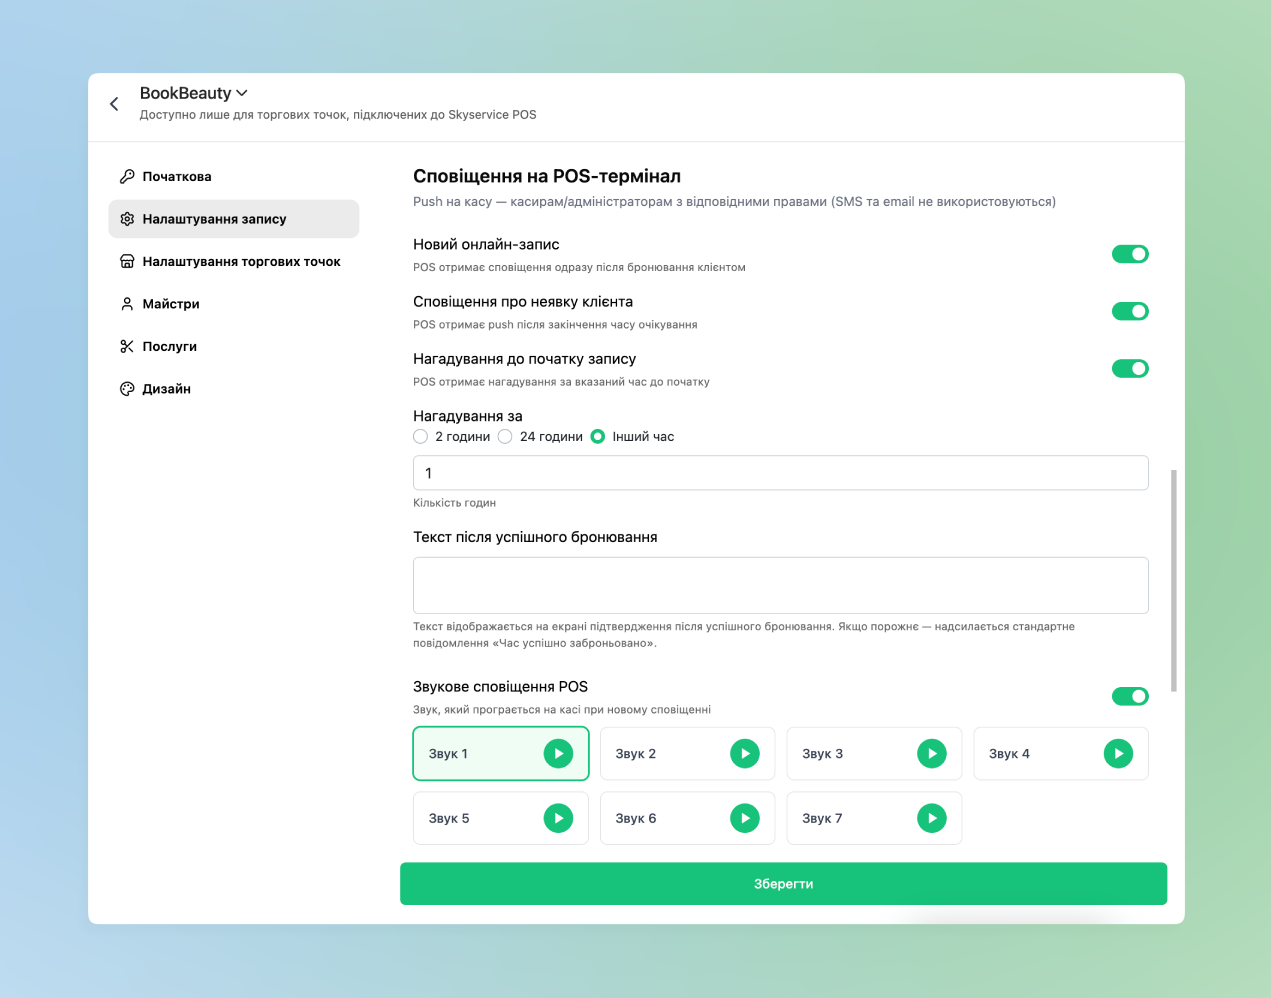
- In this section the appearance of notifications is configured and additionally about what exactly they arrive specifically for the POS terminal
- New online booking – when activated, a notification will arrive immediately on the POS terminal after the booking is created by the client
- Client no-show notification – whether to receive notifications on the POS terminal after waiting for the client on their no-show for the entry
- Reminder for:
- You can set standardly for 1 or 24 hours – if necessary to set a different reminder time select Other time and below set the necessary indicator
- Text after successful booking – what exactly is displayed on the POS terminal in the notification about a successful booking is specified. With an empty field the following will be displayed by default “Time successfully booked”
- POS sound notifications – the sound for notifications about booking is set, which is played on the POS terminal. By switching between them, listen and set the more suitable one for yourself
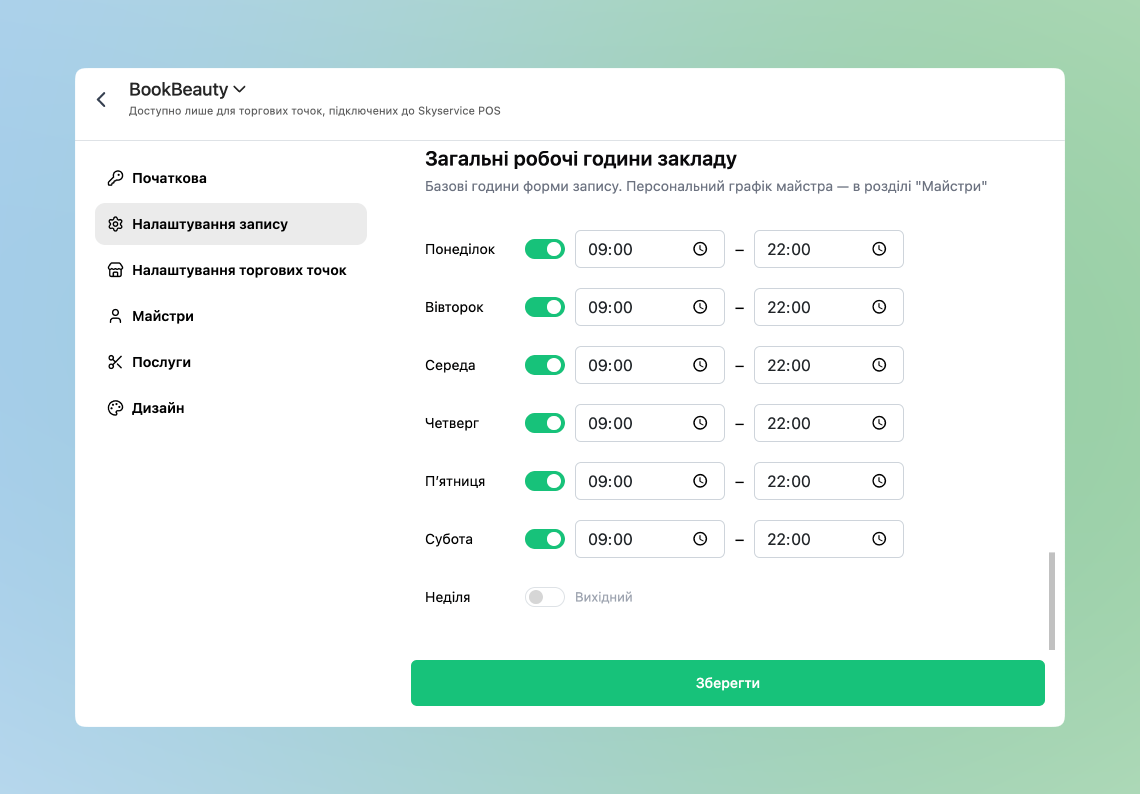
General working hours of the venue
- The general time for accepting entries is set
- If a Master has their own individual time and it differs from the venue’s operation – it is possible to set an individual time for them separately
❗️After changing settings, before going to the next section, be sure to click Save.
Sales points settings
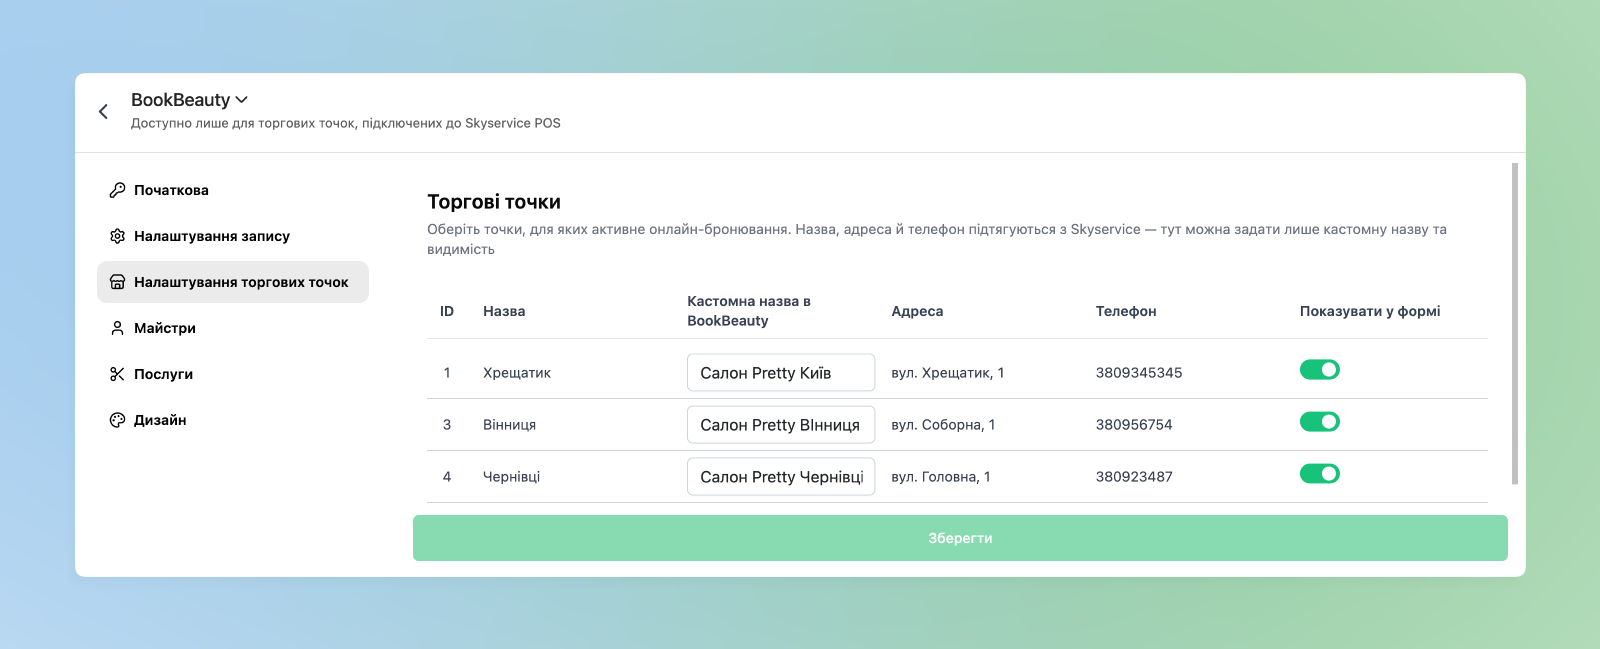
- You set for which specific sales points the ability to sign up via the app BookBeauty
☝🏻Note that for the point to work with BookBeauty it is mandatory in the section Settings → Sales points → set the Address and Phone. The client will see this information when creating a booking
❗️After changing settings, before going to the next section, be sure to click Save.
Masters
Next you set which masters can perform the services
- Next to the required employee activate the switch → next a bit lower it is possible to set them an individual booking schedule for different points if they work between them
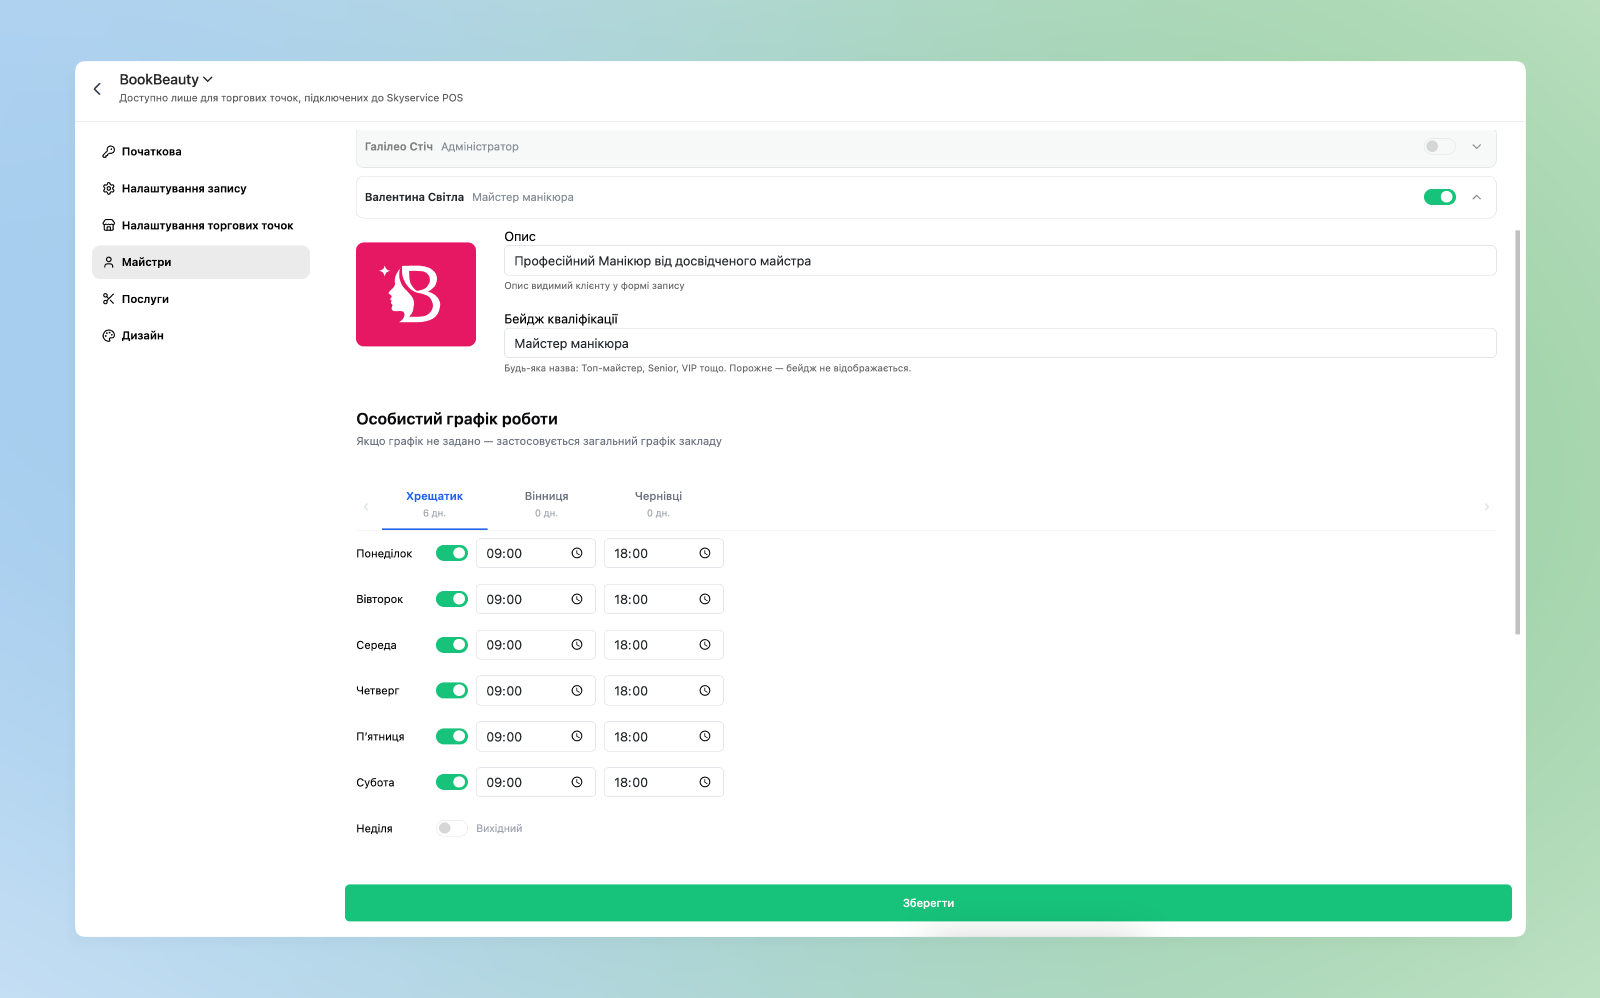
- A bit lower it is possible to set separately which Services the master can perform and additionally set the time for their performance for a separate master by clicking Add
- ☝🏻Note that without added services the master will not be available for selection
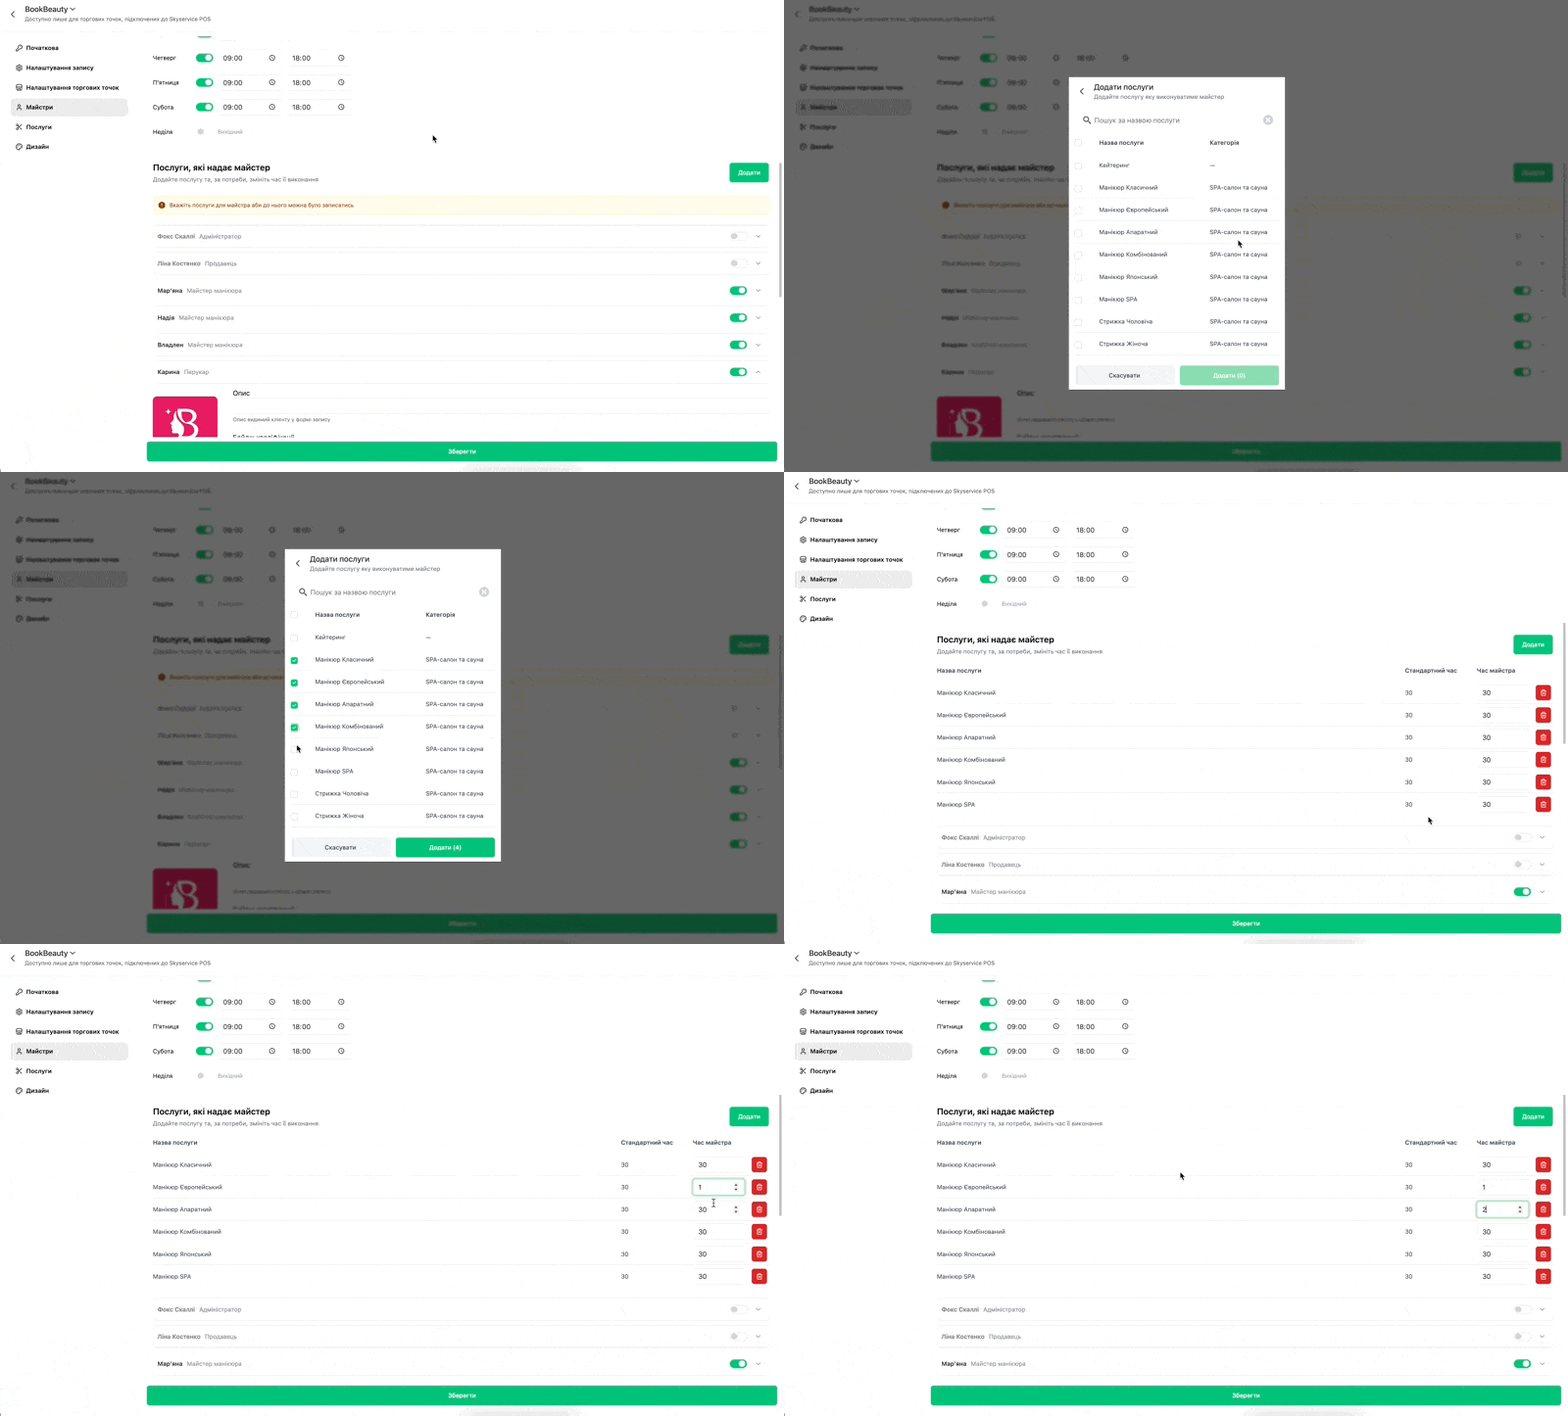
❗️After changing settings, before going to the next section, be sure to click Save.
Services
☝🏻We note that for further booking there must be created items with the Product type “Service”. More details on how to create a new Service can be read at the link.
- Additional settings for services are set for display to clients and which specific services will be available for booking
- Show service price to the client – for example if the price with each service may vary from complexity – the client will not see the price and the master will independently set it when conducting the sale
- Additionally, in this case, it is recommended in the card of the Service itself to set the option Ask for price during sale
- Show service price to the client – for example if the price with each service may vary from complexity – the client will not see the price and the master will independently set it when conducting the sale
- Below activate the Services that should be available to clients for booking and additionally set the time how long the service takes (by default it is set – 60 min)
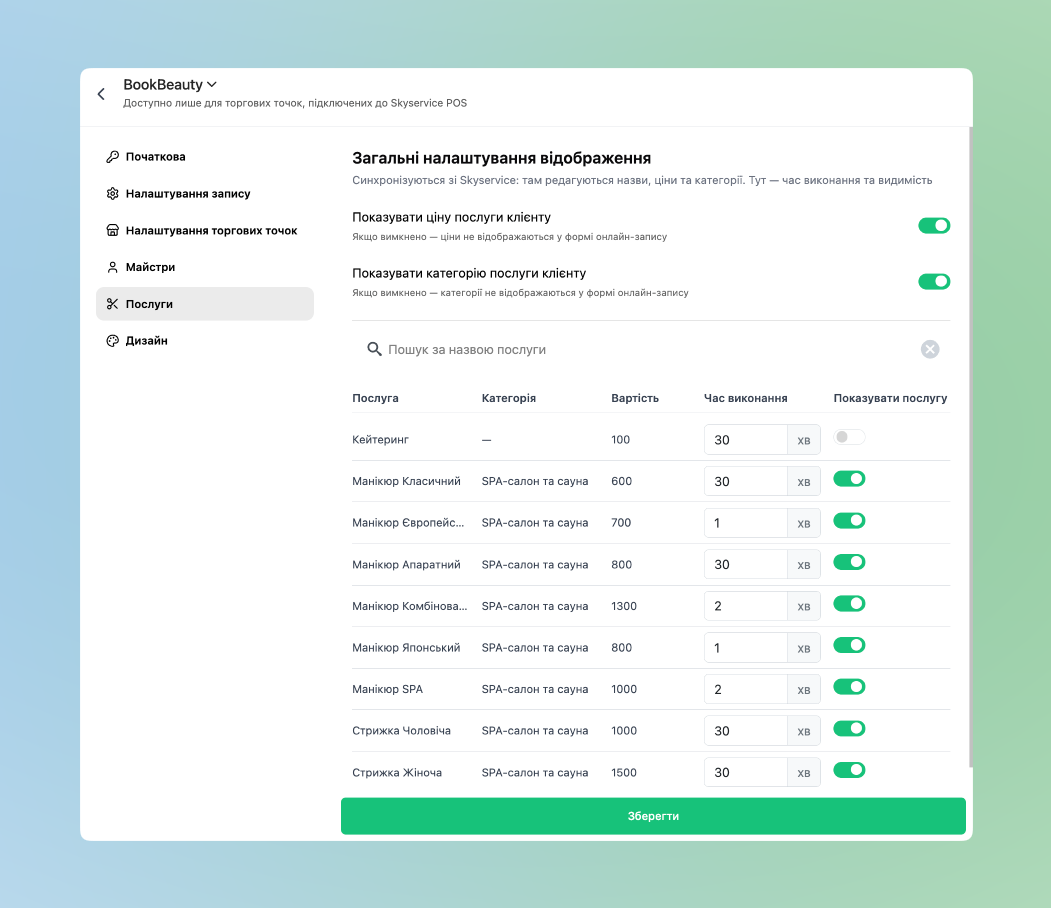
❗️After changing settings, before going to the next section, be sure to click Save.
Design
- In this section it is possible to set:
- Theme by Templates and its color display, if necessary it is possible to set your own color
- Logo, if its photo is available in JPEG, PNG or WEBP format and weight up to 10MB
The font also changes according to the theme – in Light, Dark and Neutral different fonts are applied.
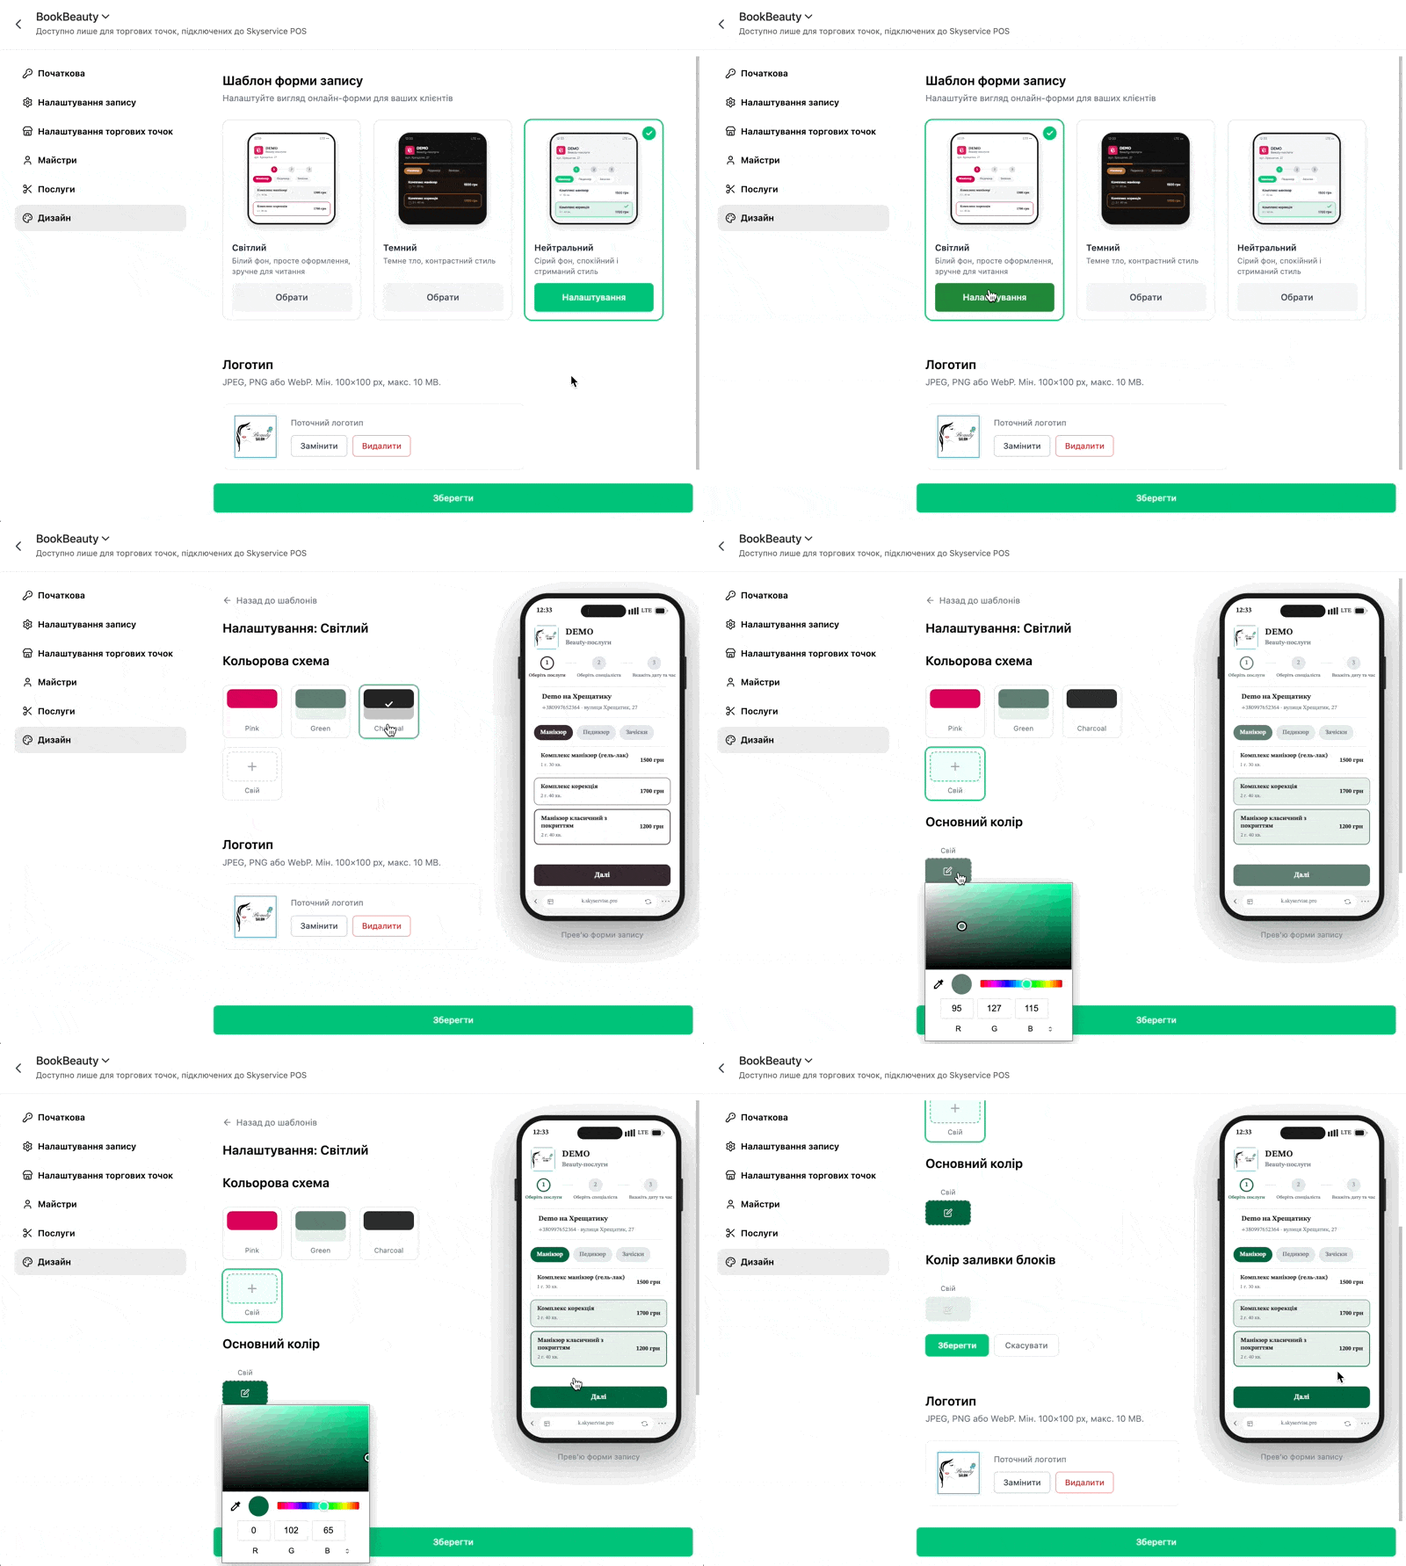
❗️After changing settings, before going to the next section, be sure to click Save.
Access rights
- To configure Access rights go to the section Settings → Employees → select the required employee
- Below activate Extended mode and next all access rights are observed which can be configured in detail
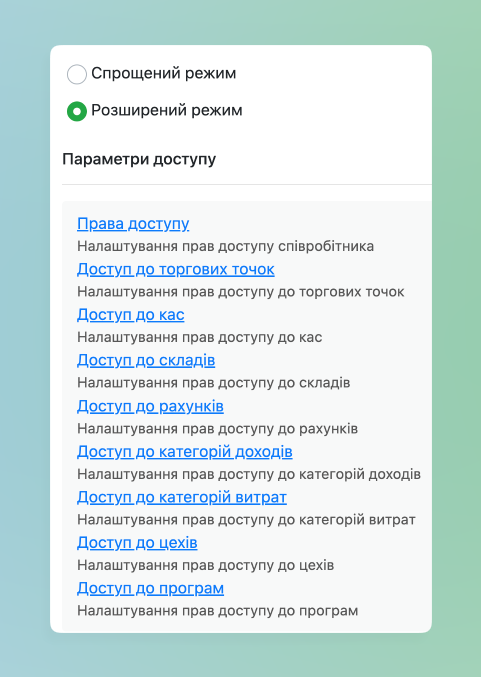
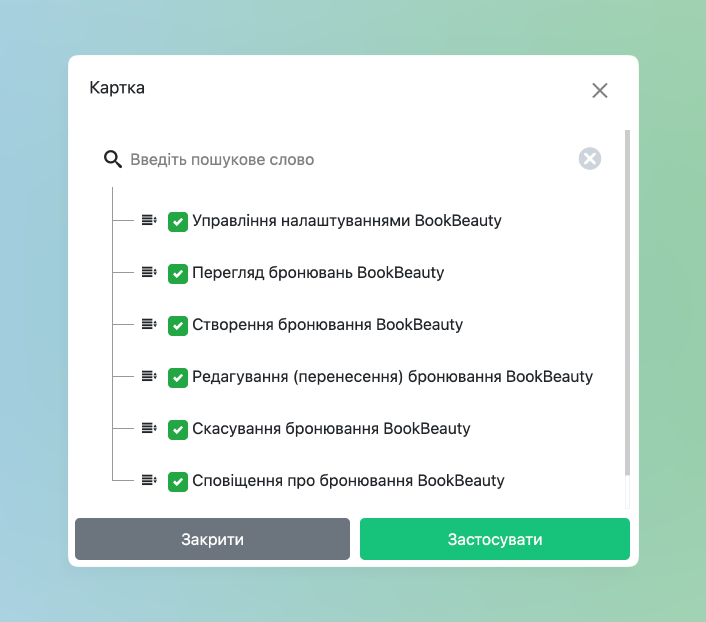
- Next you choose Access to programs → Access to BookBeauty → next it is possible to configure:
- Management of BookBeauty settings – have access to changes in the settings of this module
- View BookBeauty bookings – you set whether the selected employee can view the list of scheduled entries
- Create BookBeauty booking – it is set whether the employee will be able to create a booking themselves or only accept an entry previously created by the client
- Edit (reschedule) BookBeauty booking – setting for granting rights to edit an entry
- Cancel BookBeauty booking – access to booking cancellation accordingly
- BookBeauty booking notifications – it is set whether the current employee should receive booking notifications
Working with BookBeauty
From the client’s perspective
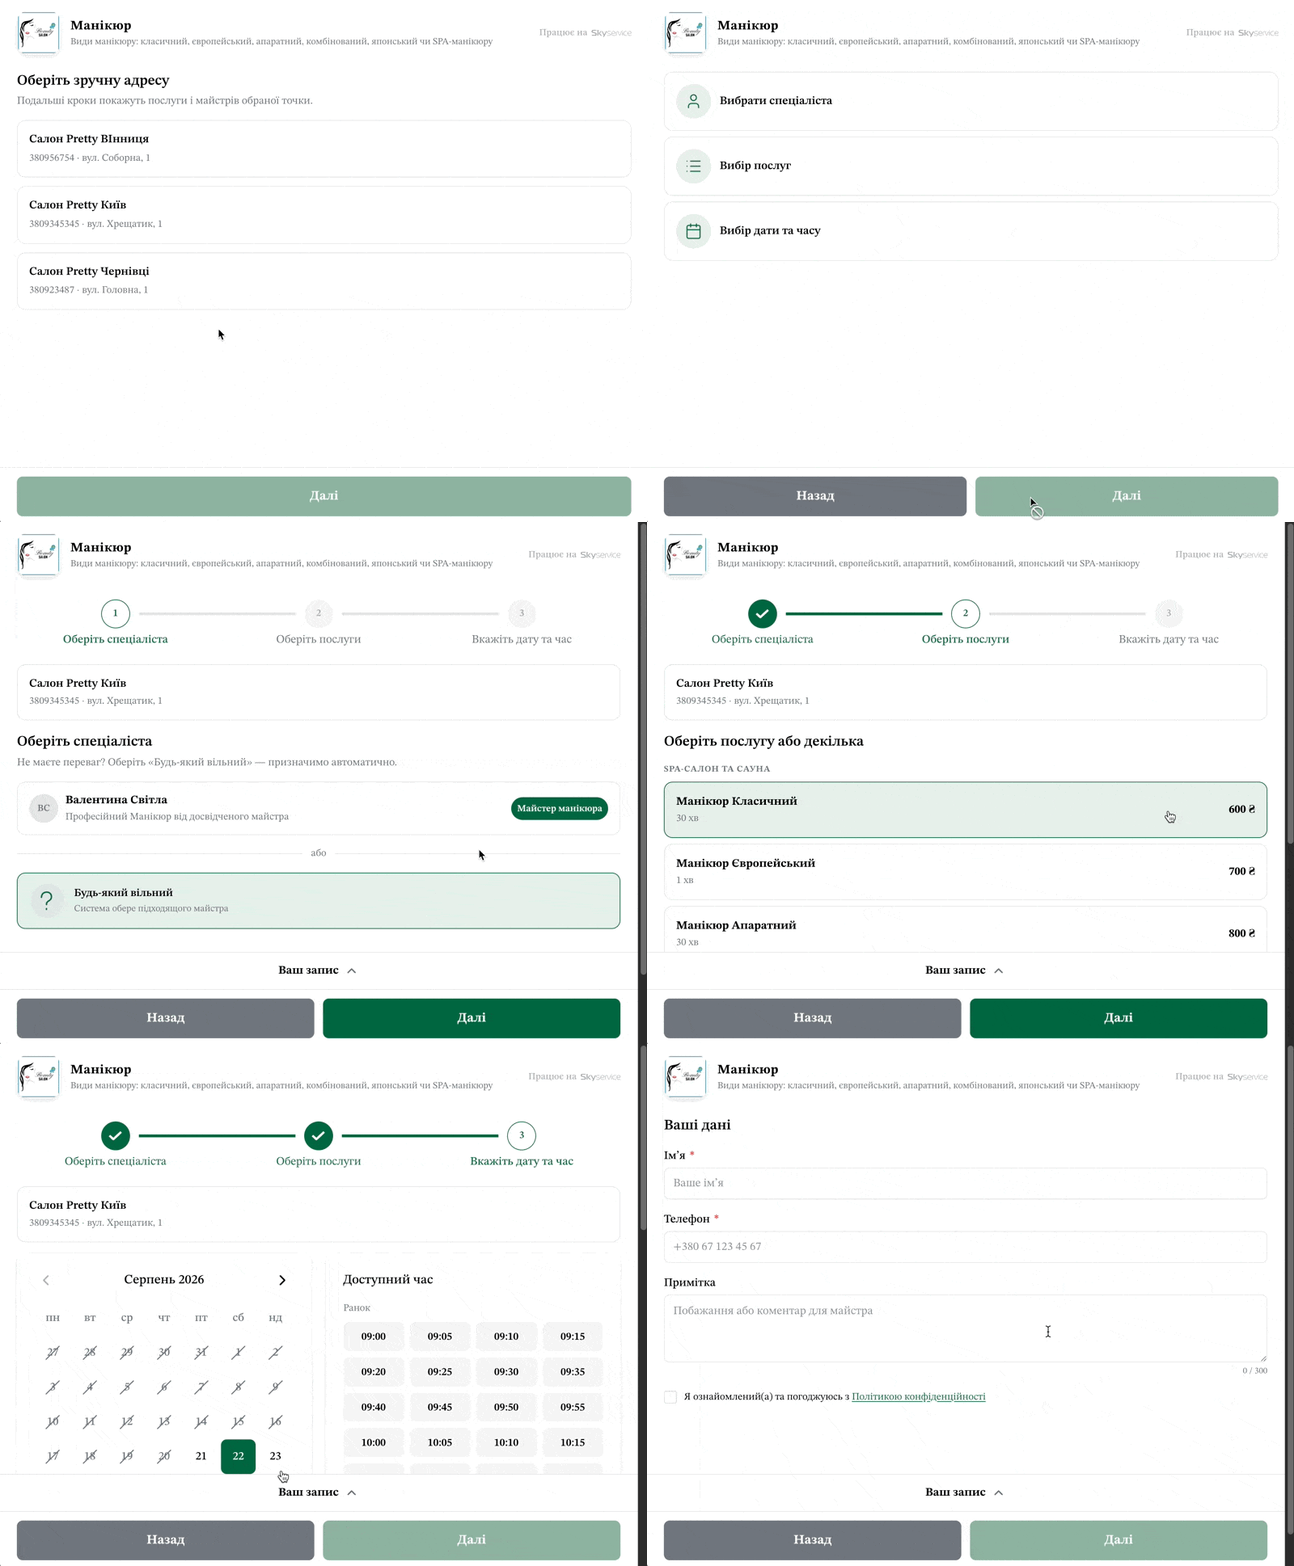
- Next the client follows the link or from your website to the calendar, first selects a convenient point for them and there will be an information block with the address and phone
- Selects the required specialist or indicates that any will do (if this setting was previously created)
- Selects one or several services
- Selects a convenient date and time
- Then fills in their data for further contact with them
- If necessary the client will have the ability to add a Note to the booking
- By clicking on Your entry details of the current booking will be observed
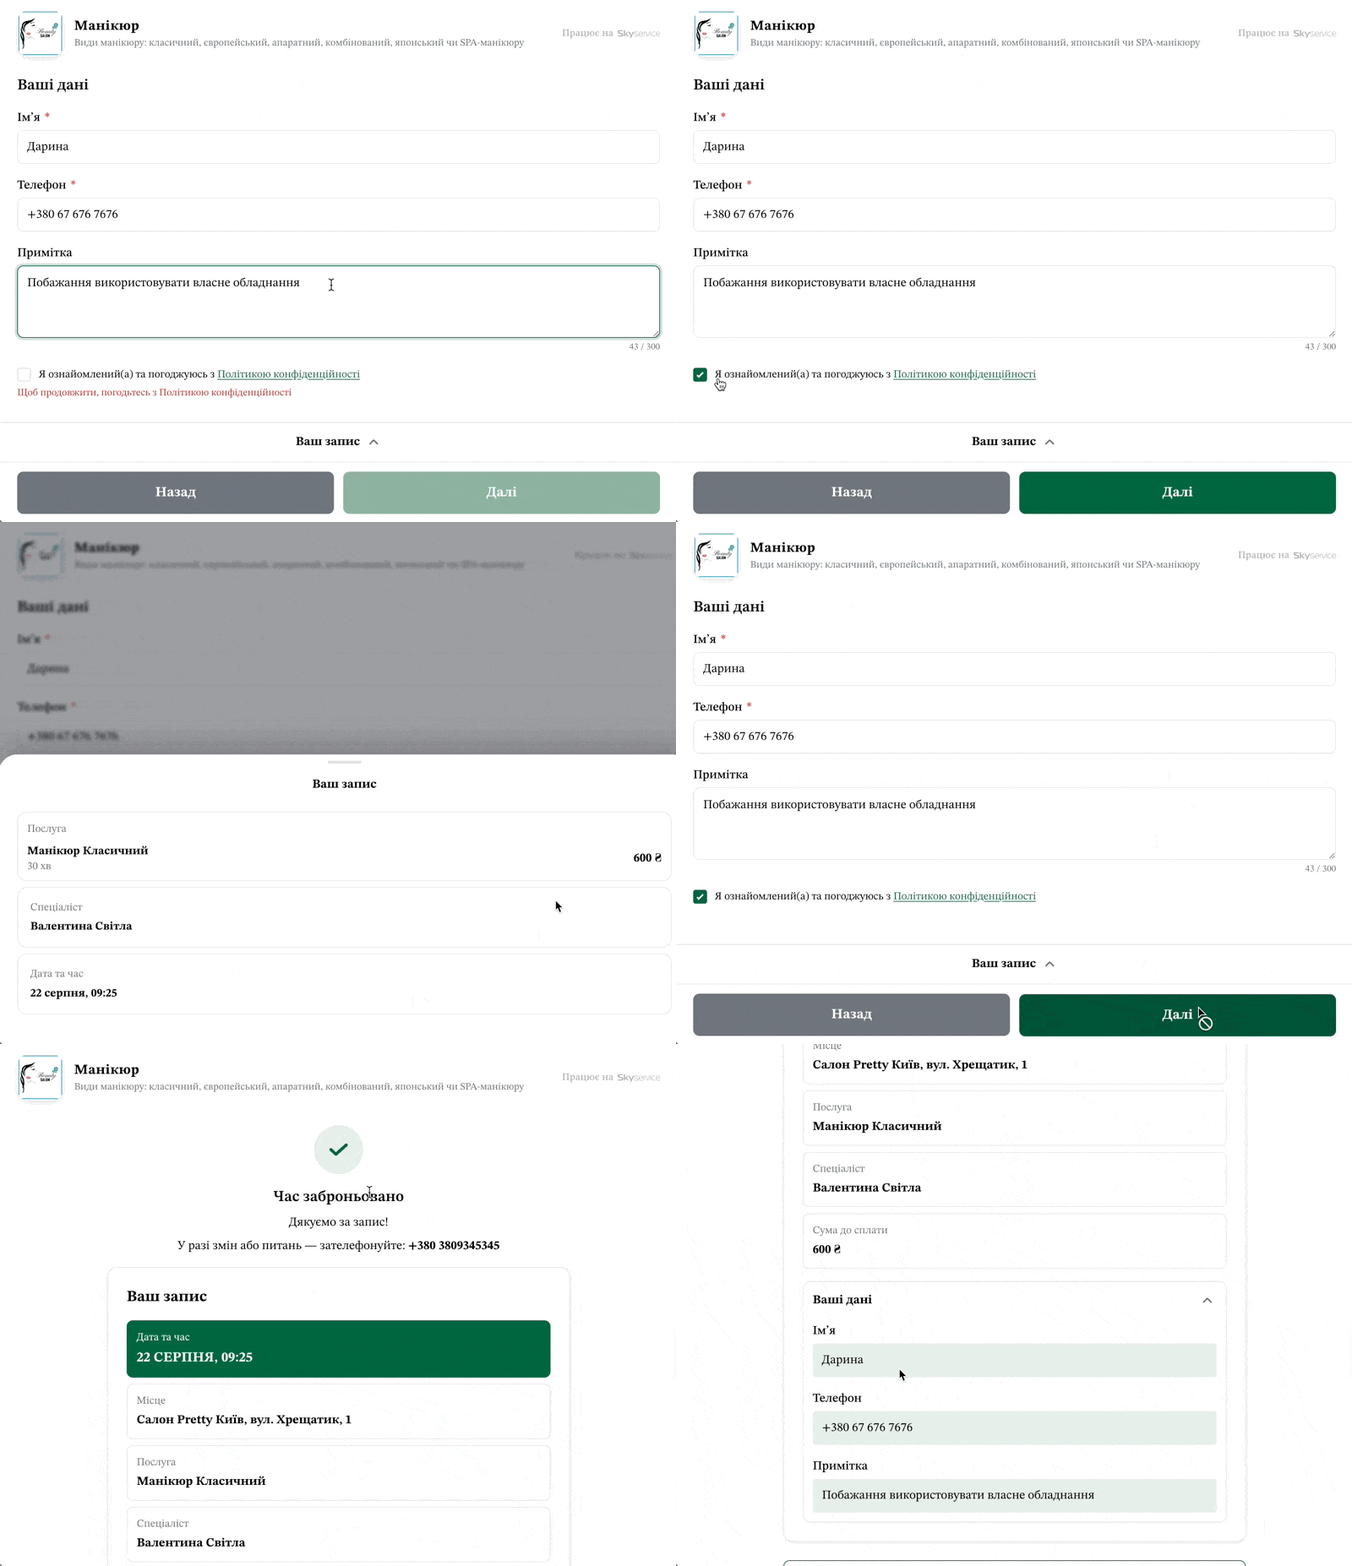
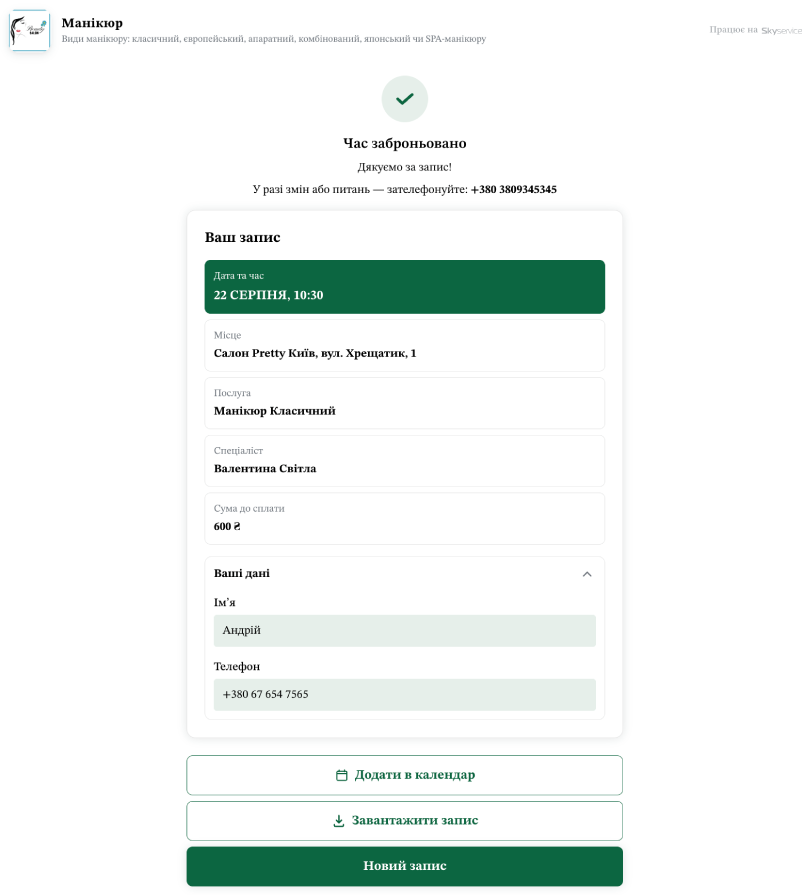
- Next the client confirms the entry and will have three additional options:
- Add to calendar – an additional file will be downloaded, when opening which it will immediately move to the device’s calendar and offer to set a reminder about the entry
- Download entry – downloads data about the entry as an image in .png format
- New entry – go to creating a new entry
From the cashier/master side
New booking
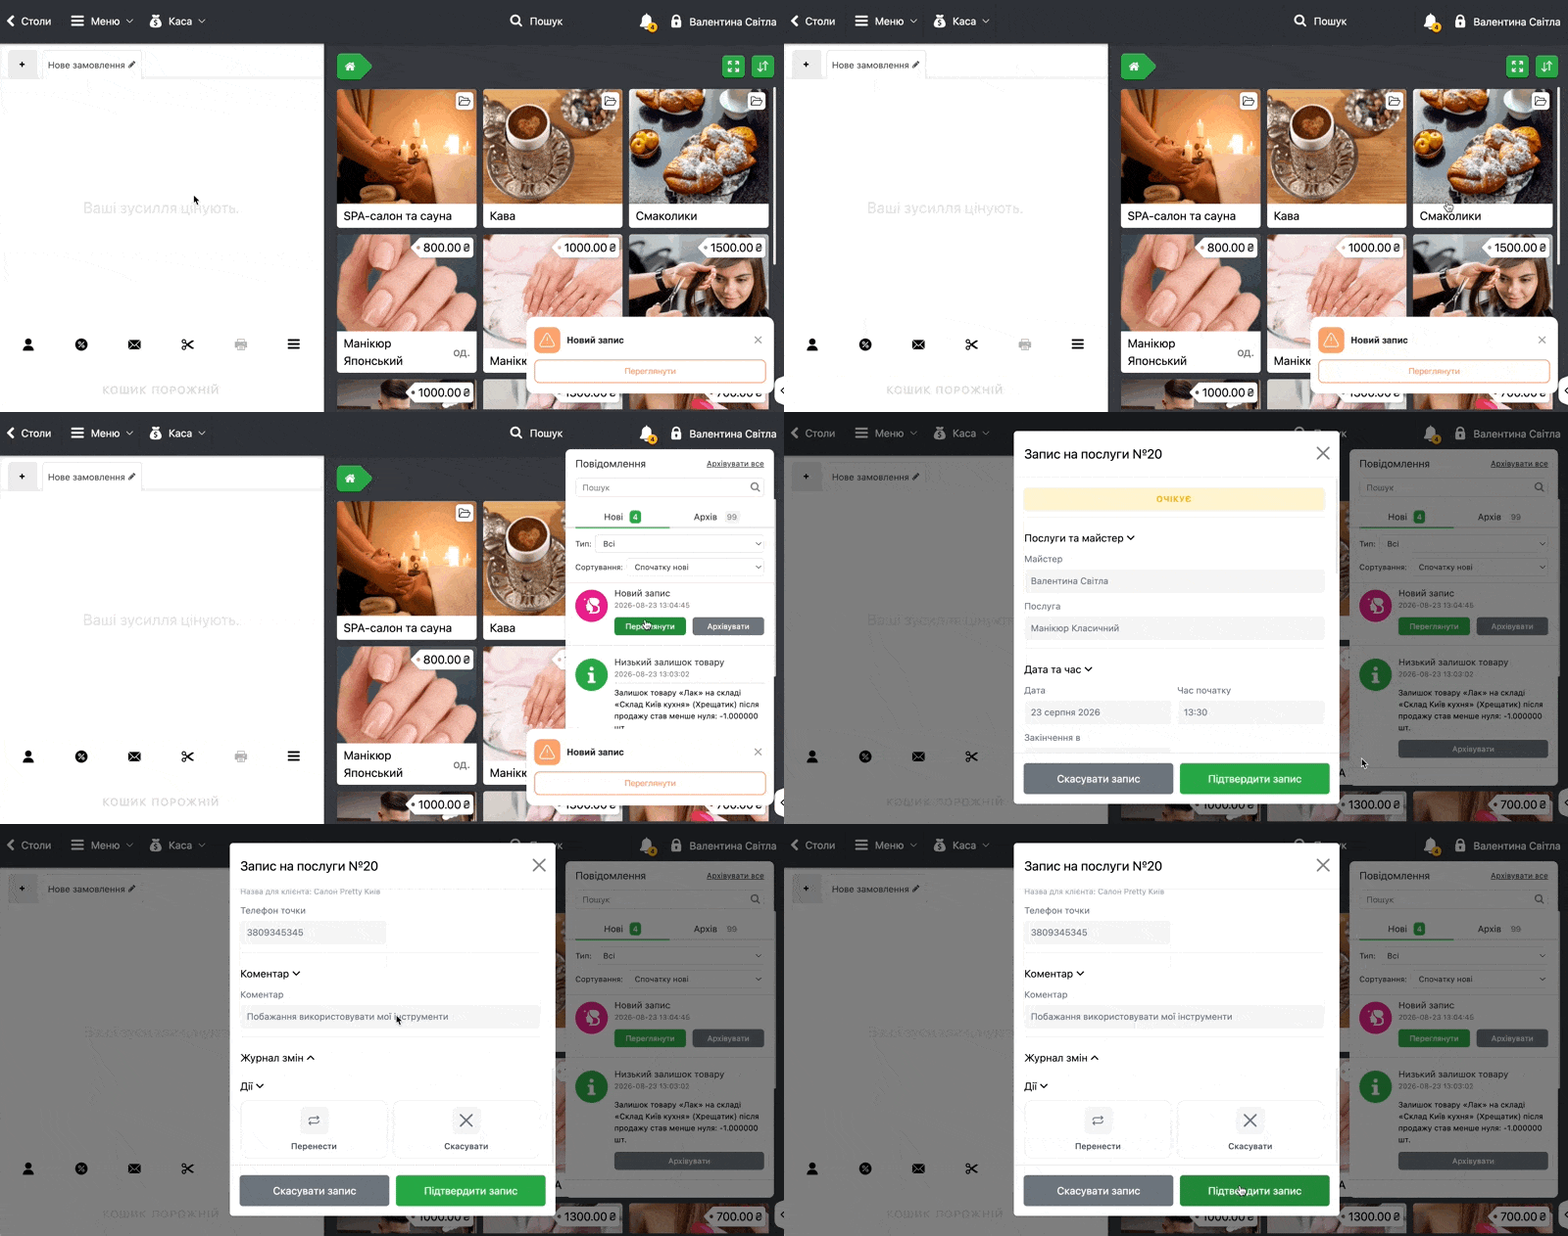
- After the client successfully creates a booking, on the POS terminal a notification about the new entry will be observed – by clicking it you can View the entry and Confirm it
- If necessary you can Archive the message – the entry, at the same time, will still be available for acceptance and editing on the app page
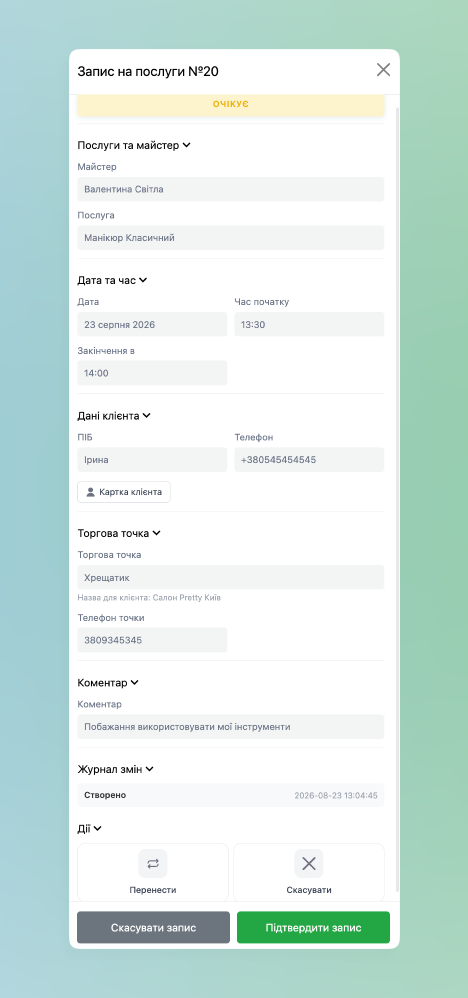
- Next the cashier will see the following data:
- At the top the Status of the entry is displayed – until its confirmation Pending
- Services and master for which the client is signed up
- Date and time of the booking
- Client data, which they specified when creating the entry
- Sales point at which the service will take place
- Comment that the client specified when creating the booking
- Change log – if there was a rescheduling of the entry – it will be additionally displayed in this list
- And at the very bottom the following Actions will be available:
- Reschedule – if you need to change the date and time of the booking
- Cancel – accordingly for cancelling the entry
- Confirm entry – the cashier or master confirms the entry
- If the entry remains without confirmation or cancellation – it will be in the status Pending
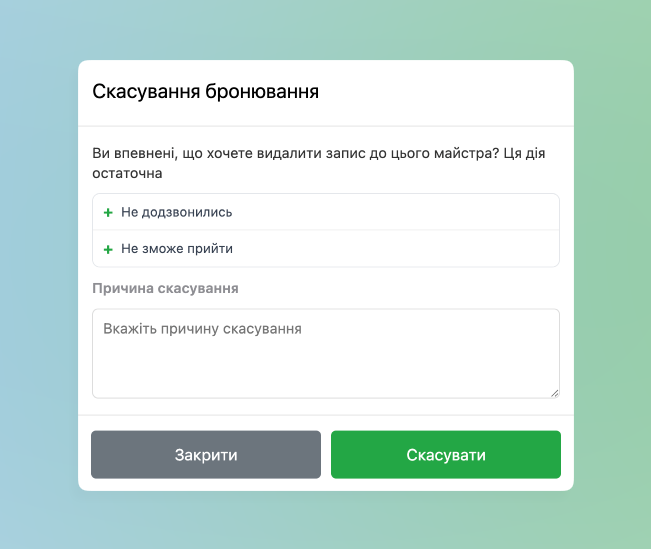
- Note that when cancelling you must specify a reason – you can choose one of the previously created ones or add a new one when cancelling
Confirming the entry
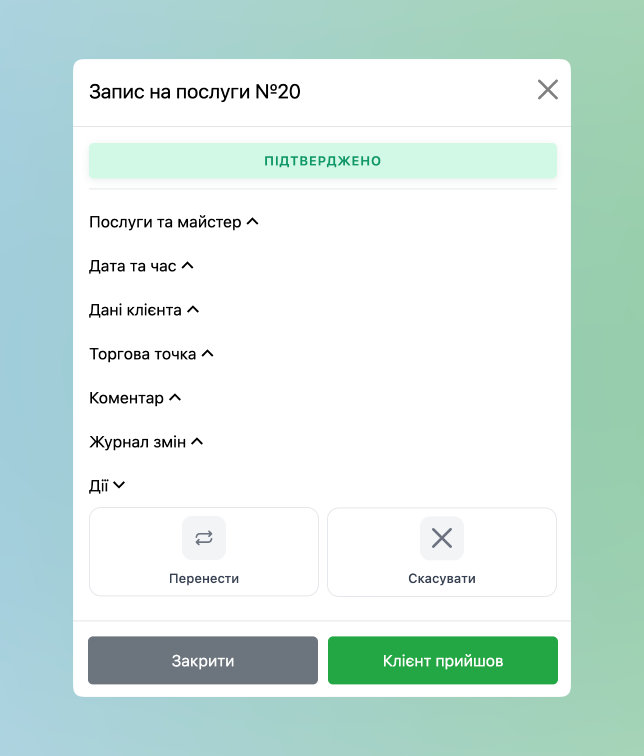
- Next after confirming the entry, its Status will accordingly change to Confirmed, below the data about the entry is also displayed and the following Actions will be available:
- Reschedule – if you need to change the date and time of the booking
- Cancel – accordingly for cancelling the entry
- Client arrived – at the client’s arrival
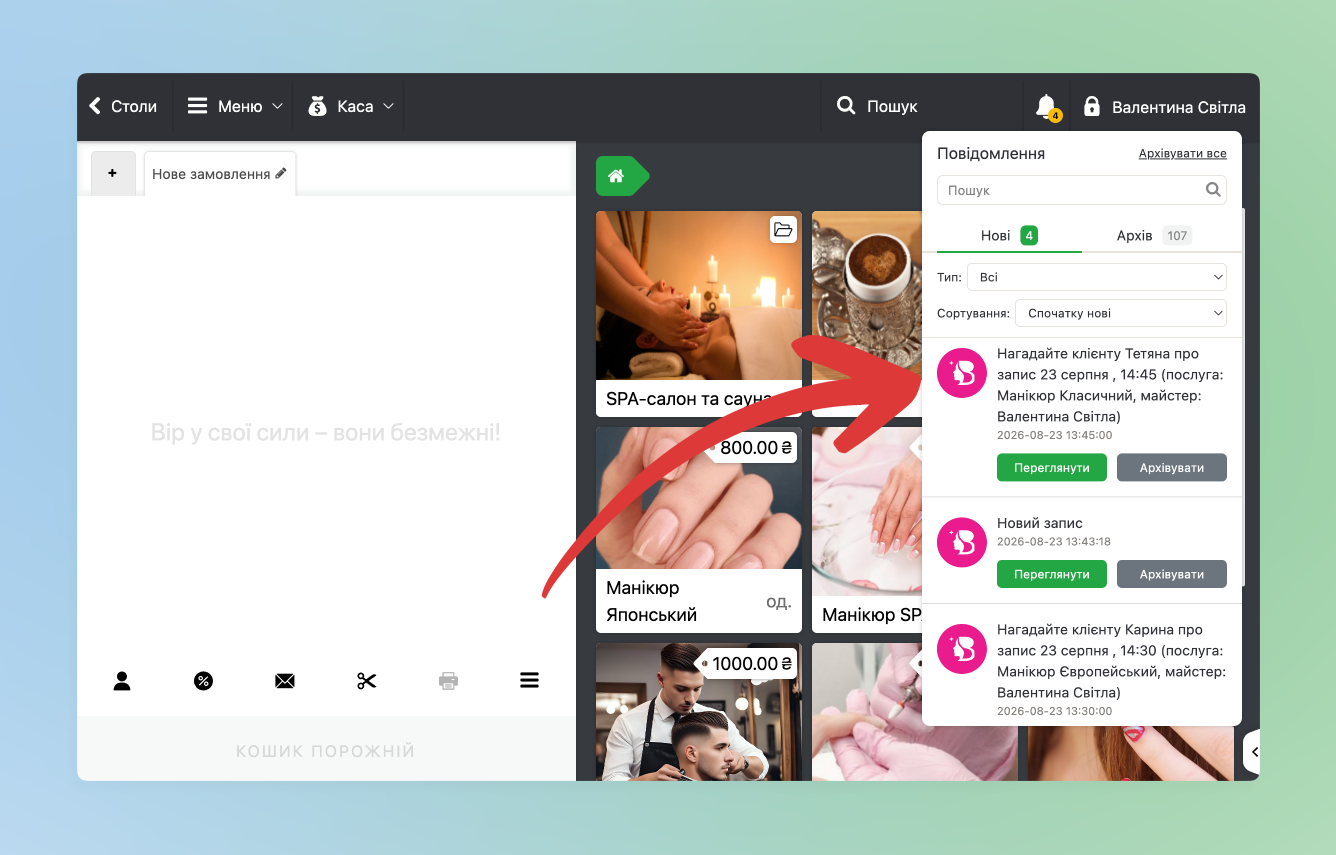
- Additionally, if the time to remind is set, a notification will arrive on the POS terminal. For example, the entry is at 15:00, the reminder is set for 1 hour before – the notification will arrive on the POS terminal at 14:00.
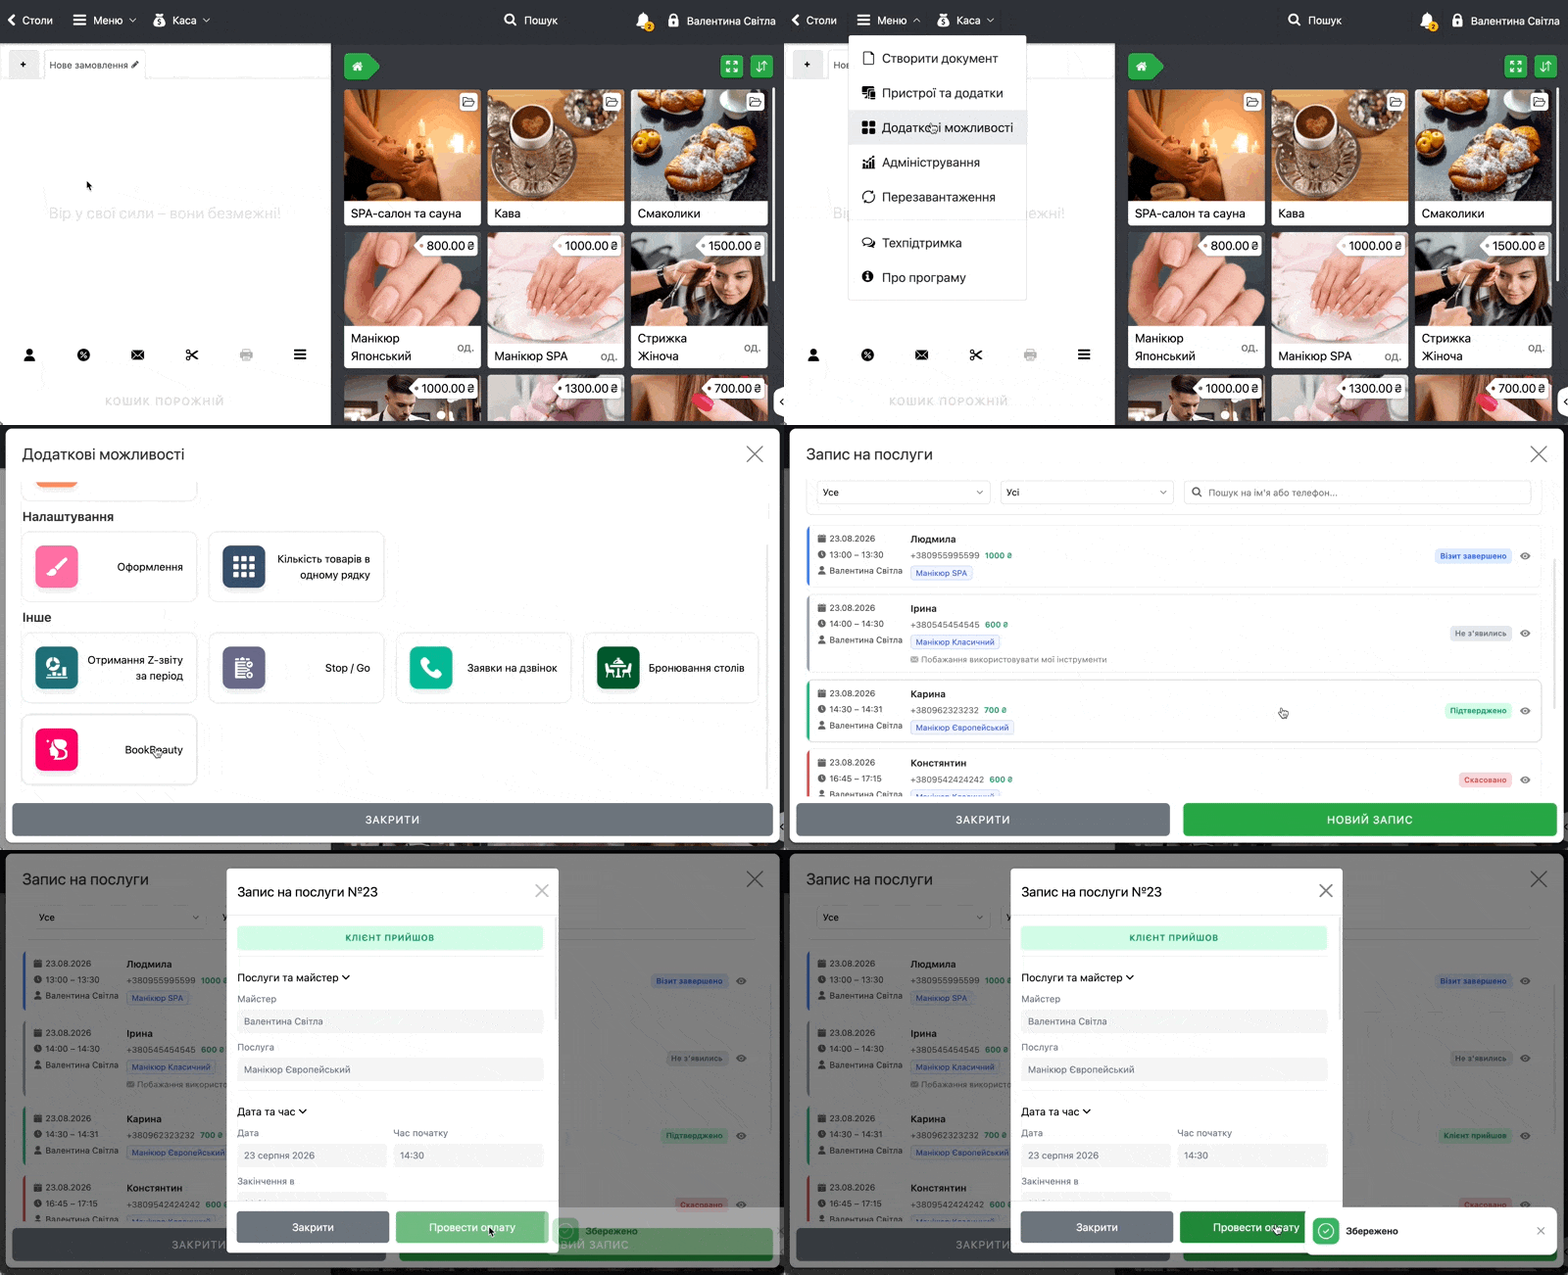
Confirming the client’s arrival
- At the client’s arrival go to the section Menu → Additional features → BookBeauty → select the required booking → click Client arrived
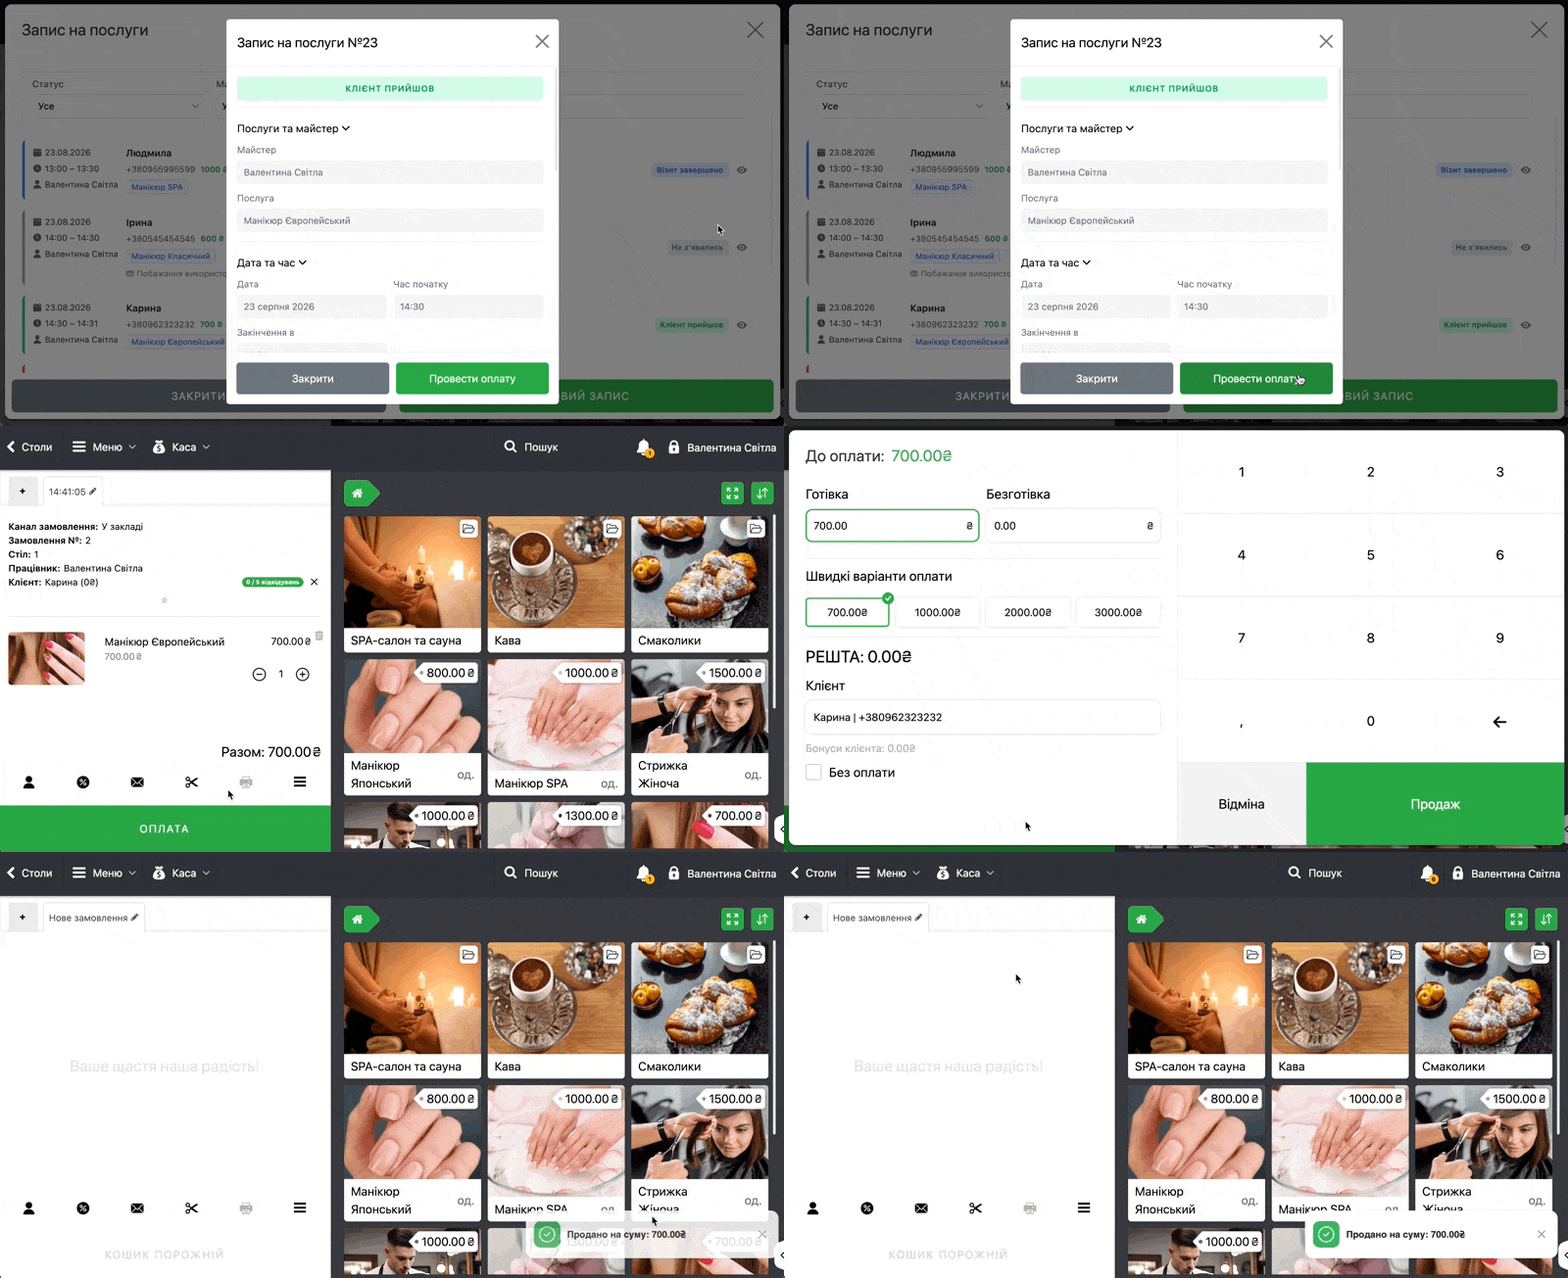
- At the end of the service for payment, in this same section, select the current entry and click Conduct payment → and next the sale is conducted as usual
Client no-show
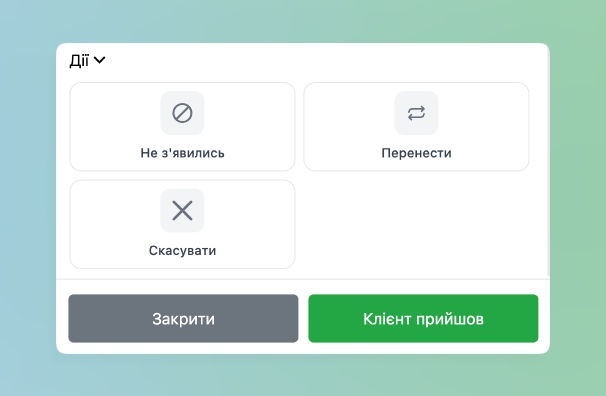
- If the client did not appear at the specified time, i.e., Client arrived was not clicked before the entry time – an additional notification will arrive at the start of the entry or after a certain time that was previously configured in the Admin panel
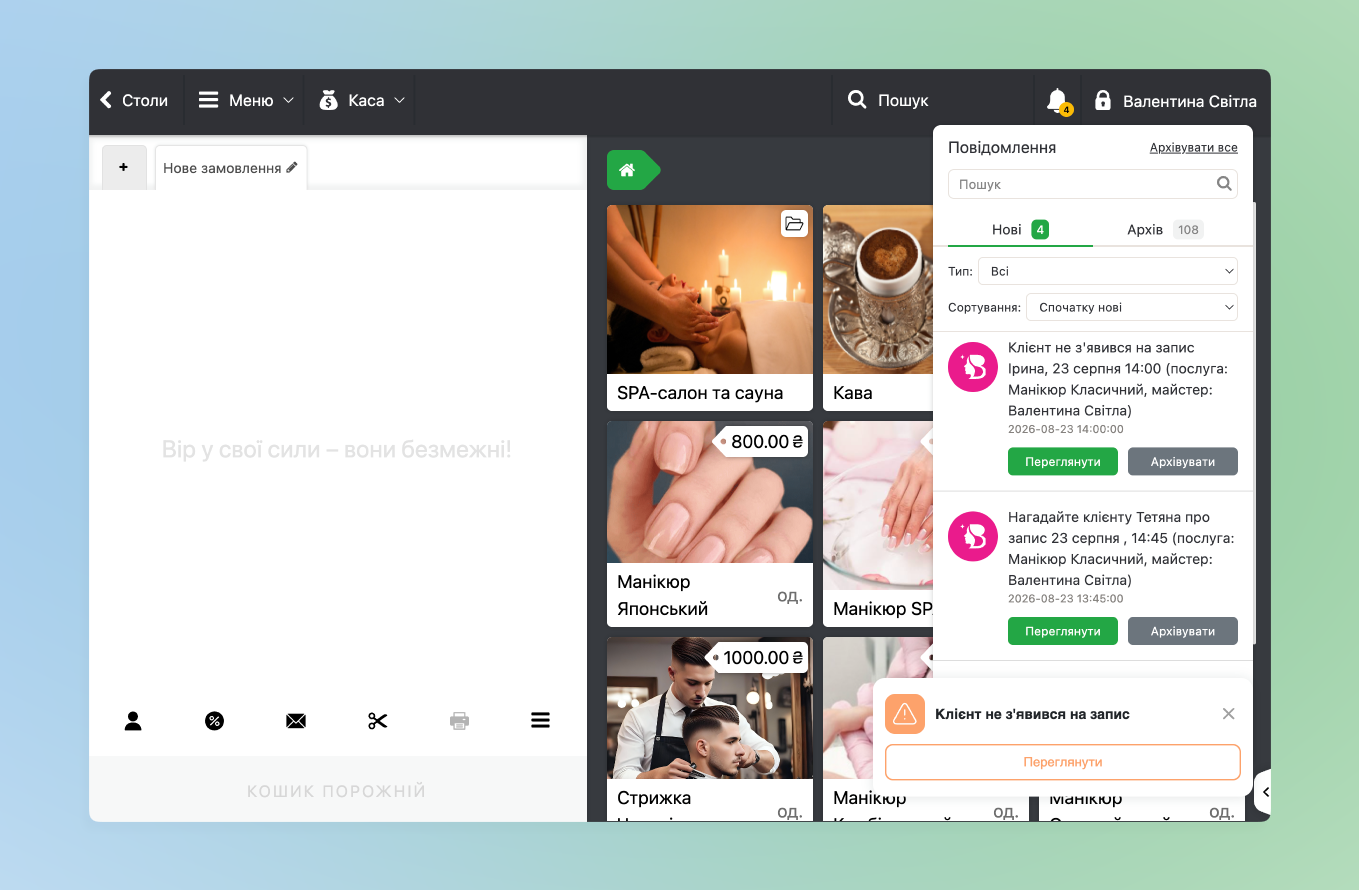
- By clicking View data about the entry will be displayed and the following Actions:
- No-show – the order is closed and in the app it will have the corresponding display
- Reschedule – if a different time is needed for the entry
- Cancel for cancelling the order
- Client arrived at their arrival
The BookBeauty app in the POS terminal
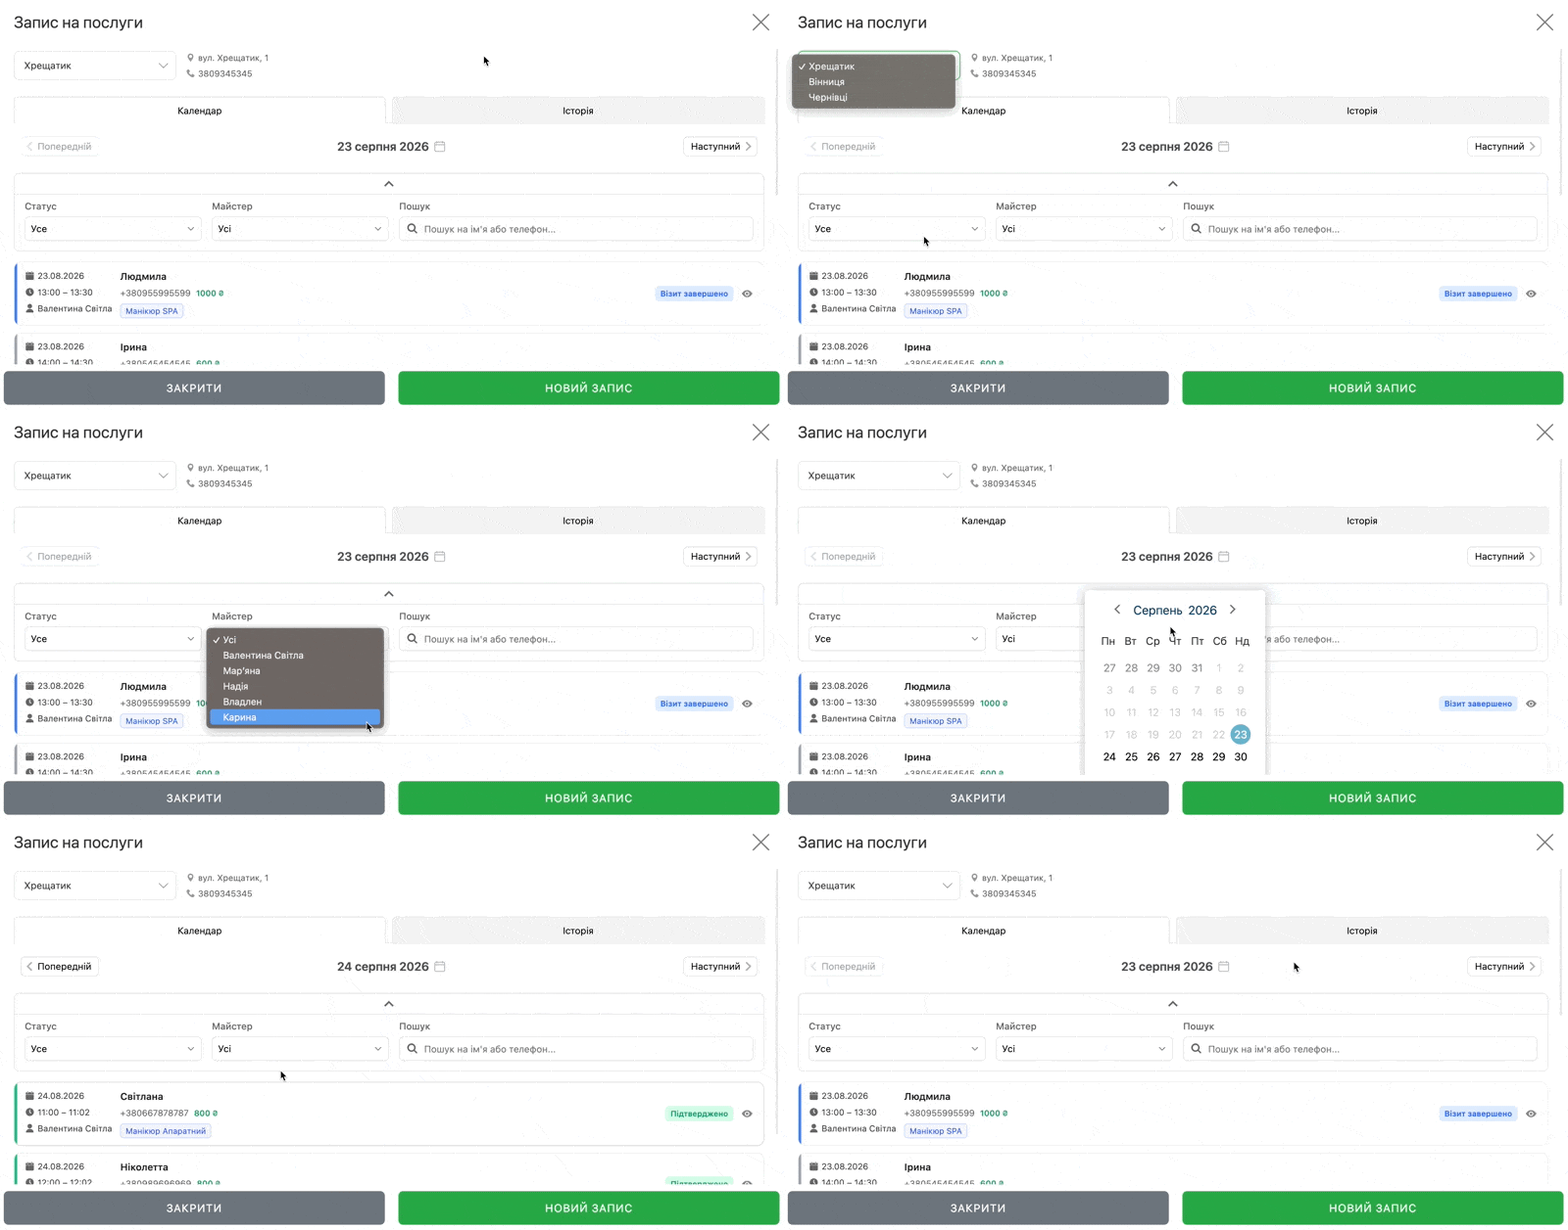
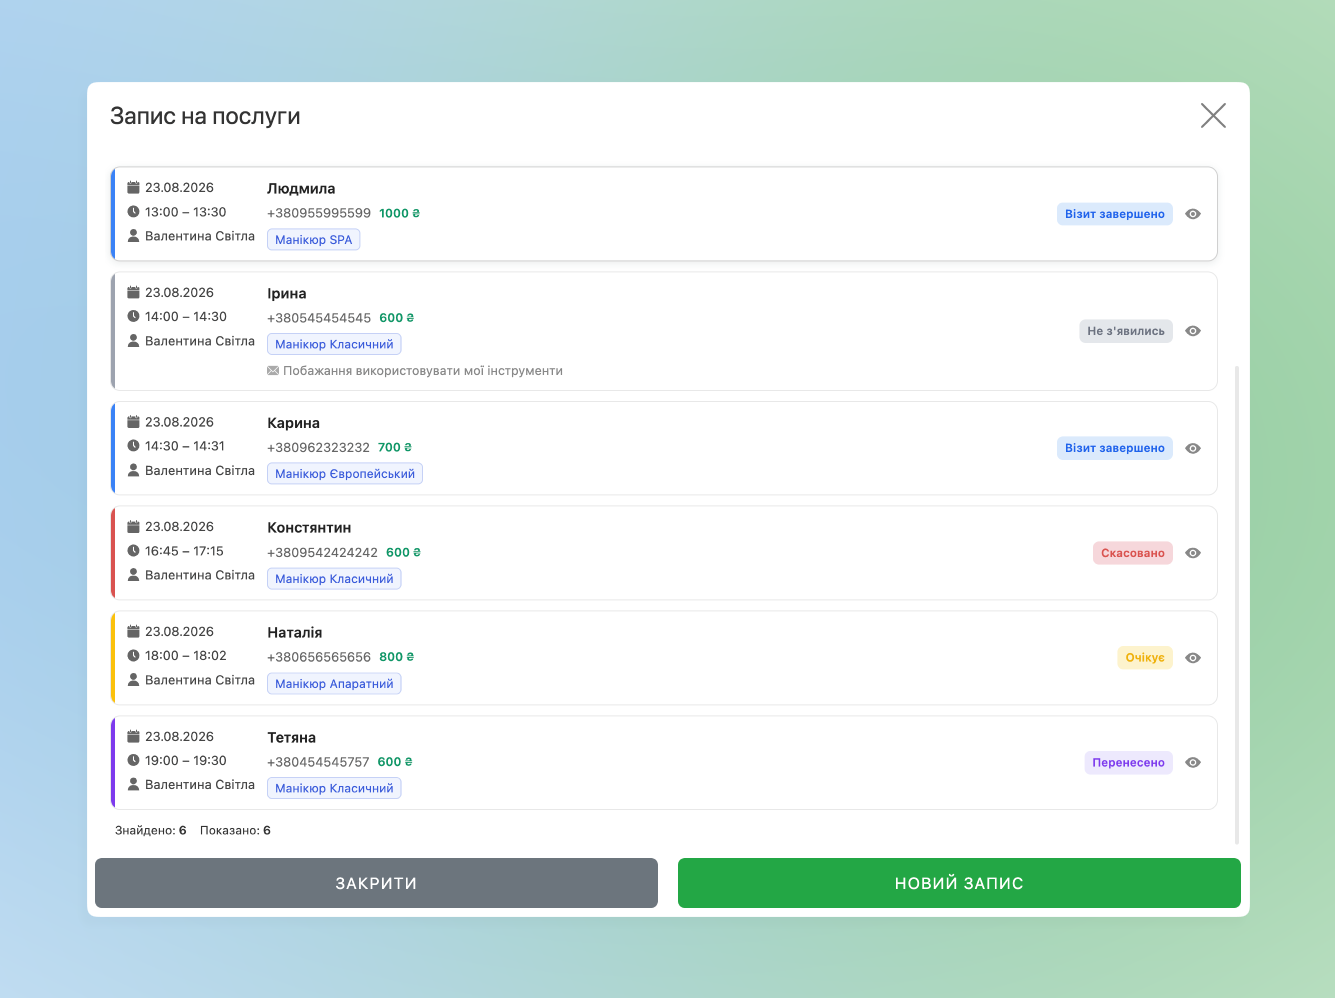
To go to the calendar of entries click at the top Menu → Additional features → BookBeauty and next two pages will be observed
- Calendar:
- It is possible to additionally set filtering by Sales point, set the required Date, Status and Master. Additionally you can find via Search booking entries of a specific client
- And below all entries for the selected day are displayed – to view entry details click on the required one
- History:
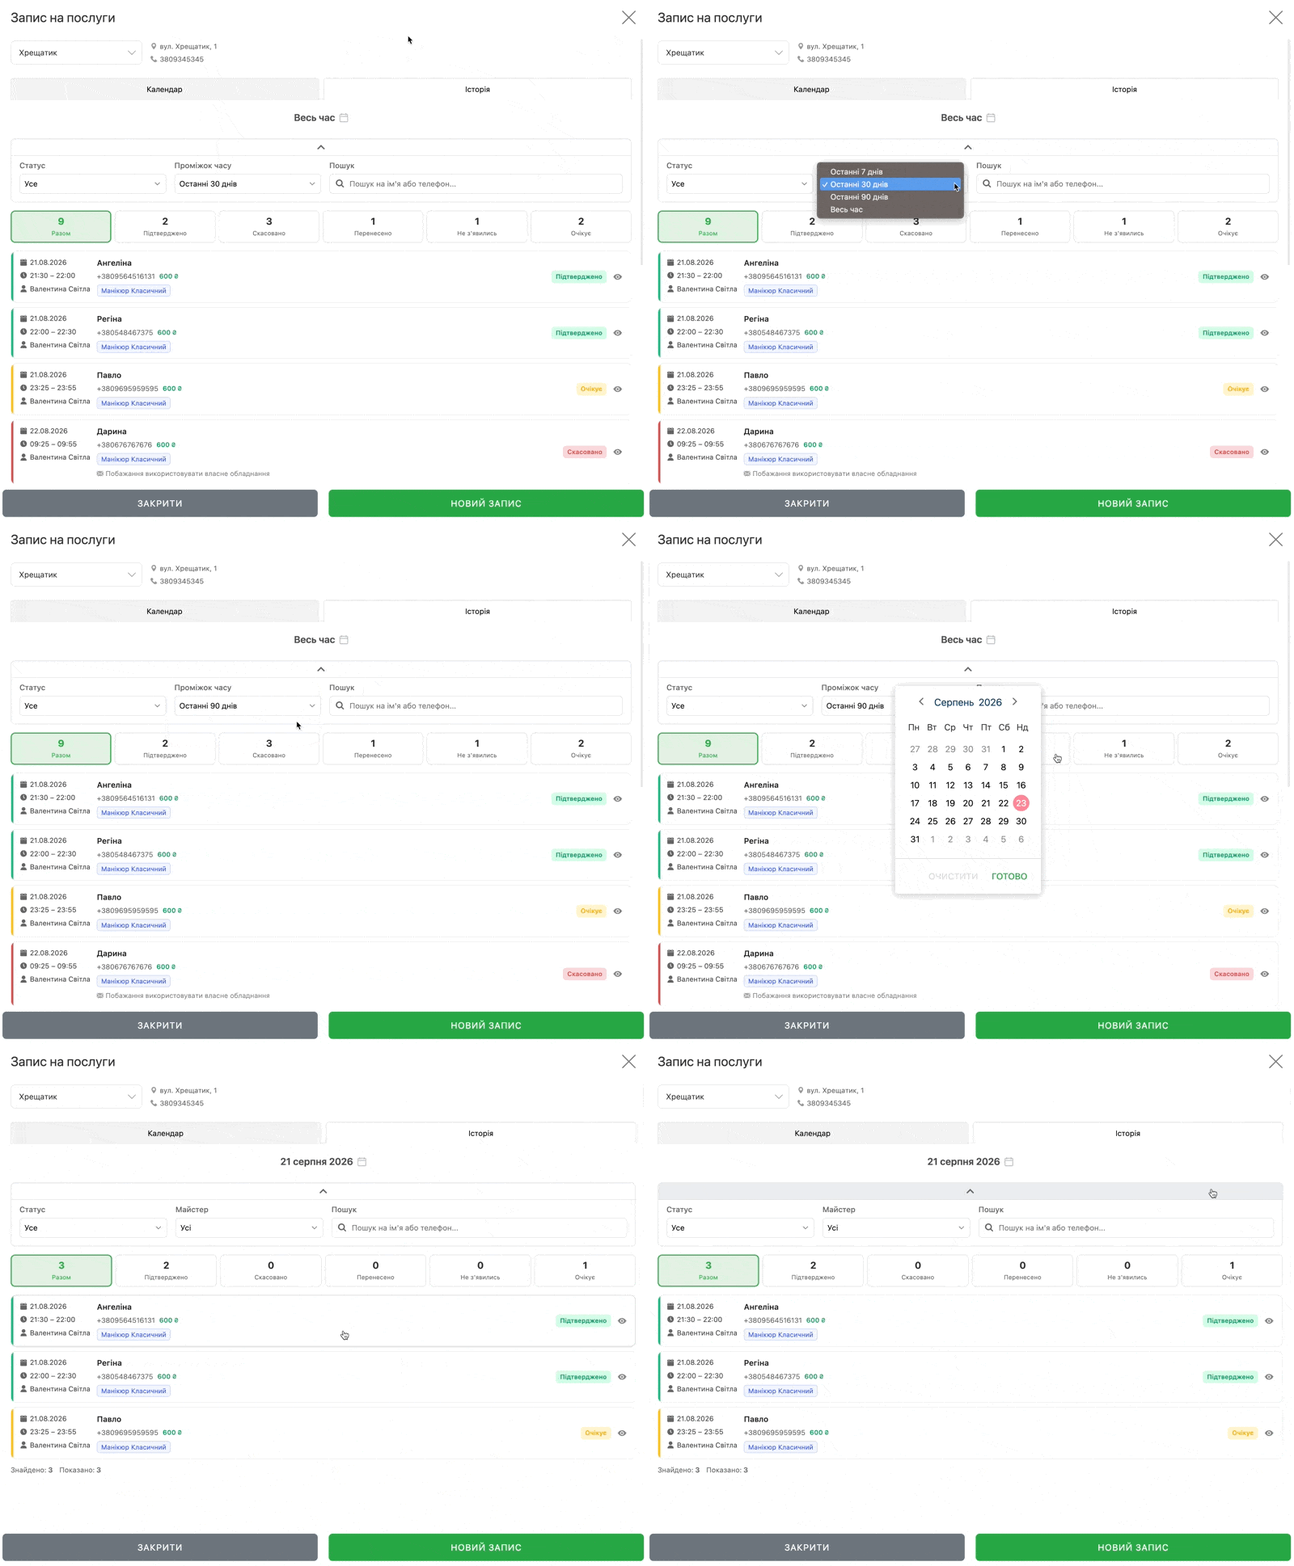
- It is possible to additionally set filtering by Sales point, set the required Period for which it is necessary to view entries that should have already occurred, Status and Time period. Additionally you can find via Search booking entries of a specific client
- If an entry was not previously confirmed or cancelled – after its end time it will in any case fall into History with the status Pending – it can be additionally cancelled
- If necessary to view a separate date click All time → set the required date → the filter Time period will be replaced with the filter Master
- It is possible to additionally set filtering by Sales point, set the required Period for which it is necessary to view entries that should have already occurred, Status and Time period. Additionally you can find via Search booking entries of a specific client